Passover Challenge: Flourless Chocolate Cake with Salted Caramel Sauce

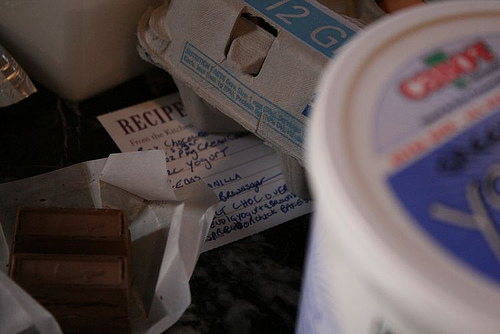
A while ago twitter was all abuzz about a passover potluck and it sounded amazing.  I wanted in and immediately started to plan my Seder challenge meal with the salt of the plate by creating a Flourless Chocolate Cake with Salted Caramel Drizzle.  I immediately emailed Cara saying I was in and what I was bringing; she has a great description of the meaning of the Seder plate over on her blog if you want to learn more (after all, Knowledge is Power!).  I ended up (sadly) missing Cara’s Seder potluck, but I still made the cake because, regardless, we all need a little more chocolate in our lives, right?  Then I searched for my flourless chocolate cake recipe – which is sort of like trying to find a needle in a haystack (my loose recipes are about 6″ of stacked paper and in no semblance of order… someday I’ll work on that).

The recipe I wanted was a symphony to dark chocolate – a pound of chocolate, espresso, eggs, butter, and sugar in a single bowl mixed.  So Simple and So Delicious.  I love rich, dark, chocolate decadence but I can only take it in small portions so I make this cake once or twice a year, if I’m even motivated for that.  I have friends who can’t “do” gluten so I try to accomodate them, and most of the time succeed, which is how I came to hunt for this particular gem in the first place.  I know two people that should avoid the binder that we all know and love and it is with them in mind that I try to go “gluten free” occassionally here on the blog.

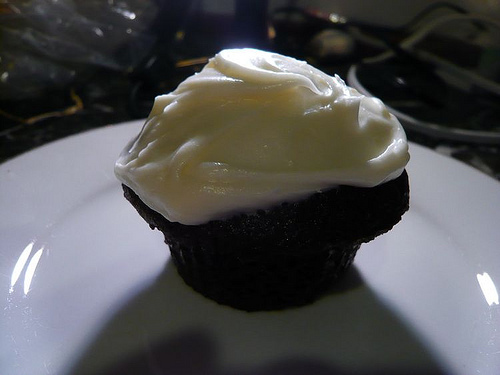
Now, this cake; the first time I made it was with a lovely raspberry coulis that was bright and tangy to cut the richness of the cake. This time I made a dark, intense caramel that married with the flavors of the cake in an entirely different way, making each bite more decadent than the last.  It’s quite a lot like eating a well-made candy bar, but without the hassle of having to bite on the chocolate; this cake just melts away, leaving you with an urge for a big glass of milk or some sharp and well-spiced tea.

Kathy’s Flourless Chocolate Cake with Salted Caramel Drizzle
Note: This cake is rich and dense; plan to eat small pieces of it at a time.  Having a sauce to drizzle over it makes it less intensely rich.  I also have a tendency to use the darkest chocolate I can find without it being unsweetened so if you used something less dark, it could be less rich.  Either way, it’s delicious in a celebratory way, and it’s surprisingly quick to mix but takes some time to cook.

Flourless Chocolate Cake
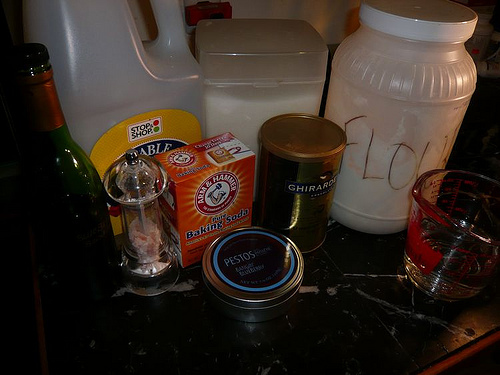
1 lb of semi-sweet chocolate, chopped into coarse hunks (I recommend at least 55% cocoa since this really needs the fat)
1/2 cup sugar
1 cup brown sugar
3/4 cup espresso
16 Tbs (2 sticks) butter, softened and cut into 1 Tbs pieces
2 Tbs cocoa powder
8 eggs
1 Tbs vanilla

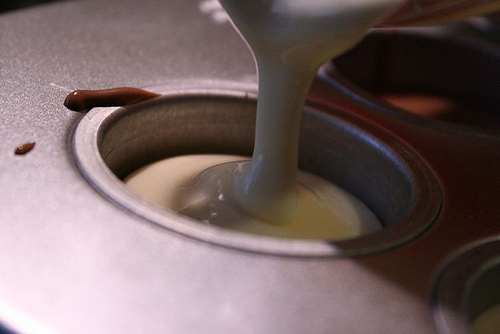
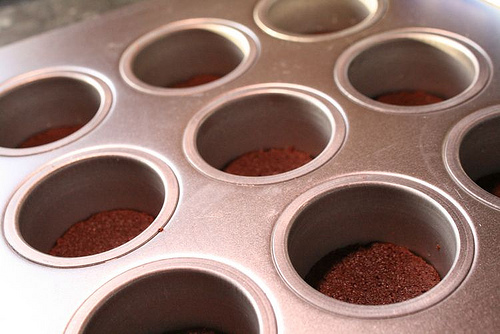
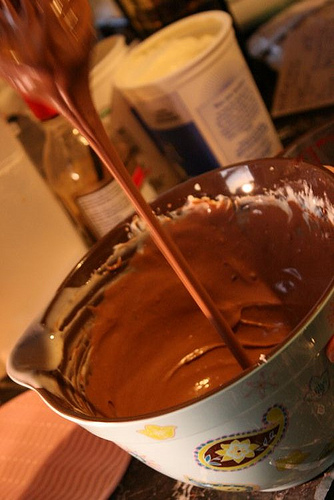
Preheat your oven to 350 and grease a 9″ springform pan with butter. Line the bottom of the pan with parchment paper.  In the large bowl of a food processor, pulse your chocolate until it is a coarse crumb texture – this take about a minute.  Add the sugars and pulse until everything is an even, sandy texture.  Turn the food processor on and gently stream in the HOT espresso; this will melt the butter and allow the whole thing to come together.  Allow this to run for a couple of minutes to make sure it’s smooth and the chocolate is fully melted.  Add the cocoa powder, then the butter pieces one at a time to the running food processor.  Process until smooth and fully incorporated – about 30 seconds.  Add the vanilla.  Add the eggs one at a time, pulsing the FP between each egg to incorporate them fully.  Pour the mixture into the lined and greased springform pan.  Place the springform on a cookie sheet (in case of leakage) and bake for 50-60 mins.  The top of the cake will be puffy and a little cracked when it’s done; the center of the cake will still jiggle a bit.  Pull the cake from the oven and set it on a rack to cool for at least an hour – if you don’t allow this resting period and try to pull the springform off early you will have crumbs; they’ll be tasty crumbs, but they’ll just be crumbs. After the cake has set up, remove the outer ring of the springform pan.  You can level the cake now if you would like to, or if you are like me, you can not worry about that and flip it onto a plate and watch the middle make a crater.  If you do level the cake, you should probably flip it over so the pretty side is facing up.  Chill it overnight or for at least 3 hours in the fridge.  Serve chilled and drizzled with copious amounts of salted caramel sauce.

Salted Caramel Sauce
Adapted from Smitten Kitchen
Note: Mine is darker than hers, I liked the “nuttier” flavor of the darker sugar and I added a little corn syrup to keep the caramel from crytallizing.  Since I wouldn’t eat all the caramel for a bit I wanted to be able to reheat and use it at my leisure – a little corn syrup made that easier.  If you are hesitant about corn syrup, David Liebovitz talks about it over on his site and you can see more there, but for all intents and purposes it can be left out here if you feel it should be.

1 cup sugar
1 Tbs light corn syrup
6 Tbs high quality salted butter. I used Kerrygold and it was divine!
1/2 cup plus 2 Tbs of heavy cream at room temp; fresher is better if you can get it.

Add the sugar and corn syrup to a medium sized sauce pan and whisk them while they gently come to a simmer over medium heat. This takes about 5 mins, sometimes less if it’s humid out.  Cook the sugar to a dark copper color (it’s better to have a light bottomed pan here so you can see the sugar change colors).  Whatever you do: DONT LEAVE YOUR SUGAR UNATTENDED, it’s a little twit and will burn if you walk away for even 0.2 seconds.  Remove the melted caramelized sugar from the heat and add the butter all at once, immediately.  This will simultaneously melt the butter and cool down the caramel enough to add the cream without it all siezing on you.  Whisk the sugar/butter mixture until everything is evenly distributed.  Add the cream all at once. The caramel will foam; it’s okay, that’s why you used a largish pan (you did use a largish pan right?). Continue to whisk the sauce until it all comes together.  Serve it immediately over your rich, dark, flourless chocolate cake or take it to the darkest corner of your apartment and eat it with a spoon while calling it “my precious” and… wait sorry, that’s not right.  You should probably try to share.  Everyone will love it after-all.  This stores for 2 weeks or so in the fridge. If you refrigerate it and find the caramel too firm, you can microwave it for about 30 seconds to soften it up again.

Mini Oreo Cheesecakes

Mmm cheesecake.  It’s creamy, it’s sweet without being cloying, and it’s delicious.  Always.  So when a friend came to work lamenting the “oreo cheesecake” she had gotten at Mike’s, saying that it was merely chocolate cake with some wierd creamcheese filling, I started plotting these little delights.  She lamented the Mike’s cheesecake in August or so and I made her these in November; enough time for her to totally forget about that disappointment 🙂

Ingredients

My first challenge for these was to determine just what exactly I was going to do for the cupcakes and as Twitter was alive with Joanne Chang’s Flour cookbook and it seemed to be THE cookbook everyone was using. I determined that I needed to make her oreos.  So I found the recipe on Boston.com thanks to Joanne Chang herself directing me to it (super thanks!).  And started plotting.  I had a vision of cheesecake with a full oreo base, until I realized that making all those oreos was just way more work than I was willing to put in ;P
So I just made the cookies, sans filling, and put them in my mini-cheesecake pan as crust.  They were delicious, and will definately be made this way again!

The cheesecake was a breeze, after a quick phone call to my mom (the bible of all cooking questions and head-full of random and mostly useful information), I had a cheesecake recipe that worked with what I had in my pantry/fridge.  I was giddy.  I started cooking on Sunday around 1pm.  I finished cooking around 8pm.  I was exhausted, but it was worth it.  Homemade Oreos, dark chocolate cheesecake, vanilla cheesecake, dark chocolate cheesecake.  Delicious.  And perfect.  My coworkers certainly thought so!

Oreo Cheesecake
Note: I’ve made a lot of cheesecake.  This one is very simple.  Try it.  If you want to make a full-sized cheesecake follow all of the directions below but replace the oreo cookie with a cookie crumb crust and  bake the cakes for an additional 10-15 minutes.  Also, I used the Flour recipe for my oreo cookies in the bottom of the cheesecake.  I baked the cookies according to the recipe, did not fill them, then cut them to size and dropped them into my mini spring-form pan.

1/2 cup semisweet chocolate chips, melted
1/2 cup sugar
1-8oz pkg cream cheese, full-fat, softened to room temp
1 1/2 cup Greek yogurt or sour cream, separated
2 eggs
1 tsp vanilla
2 tbs brown sugar

Preheat the oven to 325 Fahrenheit.  Melt the chocolate chips over low heat.  Beat the cream cheese and sugar together until creamy.  Add 1/2 cup of the Greek yogurt or sour cream and the eggs to the cream cheese-sugar mixture.  Beat this until smooth.  Pour 1/3 of the cheesecake batter into another bowl and add the vanilla to this bowl.  Mix well.  Add the melted chocolate to the larger quantity of cheesecake batter (roughly 2/3 of the whole batter).  Mix well.  In a mini-spring-form pan (or a cupcake tin lined with paper cups) drop the cheesecake batter over the homemade oreo cookies, alternating chocolate-vanilla-chocolate for an oreo look. Pouring your batter gently over the back of a spoon (to disperse it, like making a layered cocktail) will keep the layers from blending together.  Put the cheesecakes in the oven.  While the cheesecakes cook, combine the rest of the yogurt/sour cream (1 cup) and the 2 tbs of brown sugar to make a glaze. Remove the cheesecake from the oven (about 10 minutes into baking) and glaze them with the yogurt/brown sugar mixture.  Return the cheesecakes to the oven for another 15-20 minutes, until they are light golden brown.  Remove the cakes from the oven and allow them to cool completely; overnight or at least 6 hrs is ideal.  Serve them to someone who loves sweets, they’ll be over the moon about them.  I swear it.

Nesting Spice Cookies

I love gingersnaps.  I love the crackly sugar coating and the way it yields to a cookie that is sharp and spicy.  I love the depth of ginger, molasses, cinnamon, and clove when they get together for a party.  I love the crunchy snap of the cookie as it crumbles onto my tongue. I am obsessed.  So when I saw this King Arthur Flour blog post about nesting cookies, my thoughts went to spice cookies and all I needed was a reason to make them, which was conveniently delivered in the from of a Merchant Marine friend stuck in Florida and another friend nursing a cold in Minnesota.

These gingersnaps are my thought of a perfect cookie and I have never found their equivilent.  These are the same recipe we used in my high school culinary class.  We used to sell cookies around the school every other Friday and there was one teacher who requested a bag of a dozen every time; how could we say no to that?

The snickerdoodles are also divine; I don’t have the passion for them that I have for the gingersnaps but how can you not love a cookie that is rolled in cinnamon sugar?  More crackle!  More soft yielding sugar!  More cookie perfection!  I used Smitten Kitchen’s recipe for snickerdoodles, so you can just go over there and snag it if you want to make these; I totally recommend it. 

These nesting cookies will become your favorite cookie the way they became mine. The instant the pans were cooled, the sharp gingersnap married so well with the neutral snickerdoodle that the whole cookie experience became transcendental.  My sister couldn’t keep her hands off of them!  As I tried them for the first time, I said (to the general apartment), “Frack, I’ve found my favorite cookie and it takes twice as much work as any other cookie!”  I then proceeded to eat two more of them before remembering I was giving them away, hem-hem.

These cookies were visually stunning, with the warm gingersnap color and the bright snickerdoodle.  Now if I could just find a way to foist off more of them on people I know. Anyone need a care package?

Nesting Spice Cookies
Based on an idea I read about on the King Arthur Flour Blog
These Crinkly Molasses Cookies are from my Introduction to Baking book from high school (which still has safety sheets for the Hobart in it. Ah love).
The snickerdoodles are from Smitten Kitchen, I add an additional tsp of cinnamon to the dough when making it as well as dipping the cookies in cinnamon sugar.

The most important thing to note for these cookies is to make sure they are of a consistent size; use the same cookie scoop for both sets of dough (or at least matching scoops).  Also make sure the cookie cutter is metal and sharp (the cookies will be very hot, so plastic will not work so well).

Ellie’s Crinkly Molasses Cookies
Makes about 3 doz large cookies (about 3 inches across) and 6 doz small cookies (about 2 inches across).
1 1/2 cups softened unsalted butter
1 cup sugar
3 eggs
1/2 cup molasses
4 1/2 cups all purpose flour
2 tsp ground cinnamon
1 tsp ground ginger
1 tsp ground cloves
4 tsp baking soda
1/2 cup demrera (raw) sugar (recommended but regular sugar works too)

Preheat the oven to 350 degrees farenheit.  Cream the butter and sugar together with a flat paddle in a stand mixer over med speed or with a hand mixer at medium speed.  Add the eggs and mix to combine.  Add the molasses and mix evenly (my trick:  put a little canola oil in the measuring cup and let it cover the whole inner surface. Then add your molasses. The molasses will slide right out and it won’t be so hard to clean!).  Measure half of the flour, the spices, and baking soda into a sifter and sift them together into the bowl.  Sift the second half of the flour into the bowl.  Mix the dry ingredients in until evenly incorporated, the dough will be a lovely nutty brown.  Put the demrera sugar in a pie plate, allowing it to evenly coat the bottom.  Using a standard cookie scoop (I like 1 1/2 Tbs), scoop the dough out of the bowl into same size balls and drop them into the sugar, coating them completely.  Bake the cookies on a parchment lined baking sheet for 8 mins for smaller cookies, and 12 mins for larger ones.

If you want to make nesting cookies (like mine, sooooo pretty and fun):
Make a second batch of cookies that are a different color, I recommend these ones from Smitten Kitchen.
Cook 2 trays of equal amounts of cookies at the same time (I liked to do 8 on each sheet) and pull them out of the oven about a minute before they are done.  Using a metal cookie cutter, cut your desired shape out of the middle of each type of cookie, swapping centers to create a nested effect.  Return the cookies to the oven for another minute so the centers set.  Delicious.  Send/give them to a friend in need of a pick-me-up they will appreciate it.

Baking Cookies for Swapping

flikr2

A note for all of you with those good health conscious January resolutions.  I’m sorry.  I try to avoid those resolutions.  There’s something about butter and sugar that makes my life need more of them.  And these practically perfect cookies won’t really help you stick to those resolutions at all.  But they are delicious and so rich you can’t really eat more than one or two of either.  ðŸ™‚

flikr1

I hosted a cookie swap in mid-December and in a terribly haphazard way forgot to put these recipes up for the greater blog-reading world (all of you fantastic readers) to make for yourselves… until now.  These are both truly delicious cookies – decadent in all the right ways.  But I’m a fan of chocolate, so I’m probably a little biased.  Also BF goes over the moon every time I make these macaroons, to the point where he has started to learn the recipe so he can make them for himself when I’m not around.  Love it!

flikr3

Mountain Top Coconut Macaroons
I have no idea where this recipe came from but it’s awesome.  I dipped it in chocolate and it was better.

4 large egg whites
1 cup white sugar
dash of salt
3 cups shredded coconut (I try to use a mixture of half finely shredded and half coarse, but use what you’ve got on hand)
1/2 cup flour (I used cake flour because I had it but all-purpose is fine)
1 tsp vanilla
1/2-1 semi-sweet chocolate, melted
Finely shredded coconut, for sprinkling

In a stainless steel bowl over a pot of simmering water (or a double boiler if you’re fancy like that), whisk together the egg whites, sugar and salt until they are warm to the touch and frothy/creamy. The sugar will be fully melted and everything should be a uniform white color.  Remove from the heat.  Add the vanilla, flour, and coconut and stir to combine; it will be sticky.  Cover with plastic wrap and stick it in the fridge for an hour or two until the mixture is firm.

Once your cookie dough is firm, preheat the oven to 325 degrees Fahrenheit and line two baking sheets with parchment.  These cookies are a little sticky and parchment can do double duty here to hold the cookies after they have been dipped in chocolate, so I strongly suggest that you use it.

Using a small cookie scoop (about 1 Tbs) scoop the cookies onto the parchment. They don’t really expand, so they only need 1″-1 1/4″  between the cookies; enough so that if they do spread they aren’t stuck together.  Bake them for 10-15 mins, until the tops are golden brown.

Allow the baked cookies to cool for about 15 mins so that they are cool to the touch and then dip the tops in the melted semi-sweet chocolate.  Immediately sprinkle a few shreds of coconut on top of the chocolate and let them harden (20-30 mins).  ENJOY!

Jackson Pollock Lace Florentines
Adapted from The Fannie Merritt Farmer Boston Cooking School Cookbook, circa 1959 (best one!)
My favorite part of these cookies is getting all Jackson Pollock with the chocolate.  Spatter painting – it’s for more than just canvas.

2 1/4 cups oatmeal, I use old fashioned oats and give them a pulse in my food processor
2 1/4 cup dark brown sugar (Fannie calls for light but I prefer the deep caramel tones of the dark)
3 Tbs flour (I think you could safely add oat or another kind of flour here; its mostly so the sugar has something to hold it together)
1 tsp salt
1 cup melted butter
1 egg, slightly beaten
1 tsp vanilla
1/2 cup melted semi-sweet chocolate

Preheat the oven to 375 degrees Fahrenheit. In a large bowl, mix the brown sugar, oatmeal, salt, and flour together until evenly combined.  Add the butter and stir to coat everything.   Stir in the egg and vanilla.  Drop in teaspoonfuls onto a parchment lined baking sheet at least two inches apart, these spread (a lot) so don’t be stingy with space.  Bake until lightly browned, about 7 mins.  Allow the cookies to cool slightly on the baking sheet then move them to rack once they have set.  Be careful, these cookies will burn you directly from the oven, complements of molten sugar.

Once the cookies are cool to the touch, crowd them onto a wide flat surface and go all Jackson Pollock on them with the melted chocolate; leave swirls (if you like fancy) or spatter paint them!  It’s up to you!  Have fun!  I love this part.

Eat them delicately. They will crumble and be luscious.  They will melt in your mouth the way a good piece of caramel should, but they’ll make you feel a little bit okay about it.  After all, they are oatmeal cookies, right?

Bangin’ Blueberry Pesto Chocolate Cupcakes

flikr3

At the beginning of December Local in Season tweeted about Pestos with Panache holding a recipe contest and I was intrigued.  I quickly investigated and emailed /tweeted Lauren, the owner of the company, saying I would love to participate.  She replied quickly and offered to send me a pesto of my choice for my recipe.  I was delighted.  Many of my blogger friends have been using the Pestos with Panache in their cooking recently and I had been dying to try it.  Lauren shipped it out and I waited patiently for my Pesto to arrive.  I chose the blueberry pesto, something I have a bit of an obsession with given my upbringing in blueberry fields, and while Lauren checked in with me everyday to see if I’d gotten my pesto, I started to get excited.  What was I going to make with this pesto, something savory or sweet?  Something classic, like a pesto cream sauce, or something brash and outlandish?  I chose outlandish. 

flikr1

Maybe it was the blueberry balsamic vinegar sitting in my pantry calling out for usage, maybe it was me falling in love with these litte vegan (without the pesto) gems in October, maybe it was that first whiff of pesto as I unpacked it moments before I left to host the Boston Blogger Cookie Swap and I thought of chocolate and blueberry layered and married together, but I like to think it was all of these things at the same time.  Blueberry is one of those flavors that makes me five again, running through a hot field to my mom and being reprimanded for wrecking the berries.  I love the memories that I get from the blueberry flavor and the spiciness makes these worthy of mention.  So here it is – my spin on an accidentally found (and promptly inhaled with non-vegan frosting) vegan chocolate cupcake.

flikr2

Kathy’s Bangin’ Blueberry Pesto Chocolate Cupcakes with Cream Cheese Frosting
Note: These are adapted from a food.com recipe that I found. They are also the most wonderfully moist cupcakes I’ve ever eaten and so fast to make. It’s a dream.

Cupcake Ingredients
1 1/2 cup all-purpose flour
1 cup granulated sugar
1 tsp baking soda
1/3 cup cocoa powder
1/2 cup oil (something with a neutral flavor, I use vegetable but any without a strong flavor will work)
1 cup water
1 Tbs balsamic vinegar (I use the Blueberry Balsamic from La Roux kitchens, thanks Sarah!)
2 Tbs Bangin’ Blueberry Pesto, from Pestos with Panache

Preheat the oven to 350 degrees farenheit. Add all of the dry ingredients to a medium sized bowl and mix them until the cocoa is distributed evenly. In a two cup measure, combine the water, oil, vinegar and pesto. Stir until the pesto is broken up and even (it’ll look a little like a vinaigrette). Add the liquid to the dry ingredients and mix until everything is evenly mixed and smooth; 20 or so stirs by hand is good. You should be able to hear the vinegar and baking soda sizzle a little bit. Separate the cupcake batter evenly into a 12 cup cupcake pan; I used some super adorable silicone bug cupcake liners I got for Christmas (Thanks Mandi!), and bake for 15 to 20 minutes (about one short chapter in Harry Potter, if you read like me); they’ll bounce back to the touch or an inserted toothpick will come out clean when they’re fully cooked.

Cream Cheese Frosting Ingredients
1 8oz block of cream cheese, softened
6 Tbs unsalted butter, softened
1/2 tsp salt
2-3 cups powdered sugar

Mix the butter and cream cheese until fully combined and fluffy. Add the salt and stir to incorporate. Add 1 cup of powdered sugar and stir to fully combined. Gradually 1/4 – 1/2 cup at a time, continually adding powdered sugar until the frosting is the consistency and taste that you desire (I don’t like my frosting terribly sweet so I usually err on the less sugar side of things). Smear large dallops of frosting on your chosen receptacle, spoon, cupcake, spoon, spork, pancake, spoon, fork… (Umm, yeah – Hi my name is Kathy and I have a cream cheese frosting addiction). Eat it messily. Maybe like BF[Editor’s Note: The young unshaven gentleman in question was so enamored by the delicious cupcake, that he attempted to eat it in a single, high-velocity bite.]