Celebration Cakes

IMG_7358

My birthday lands right at the beginning of April – it’s a time when the temperatures can jump from 75 to 45 in a single afternoon and there’s more likely than not going to be a blizzard. Every year I keep my fingers crossed for a nice warm birthday – where I can wear a sleeveless dress and flip flops. I wish for a birthday that will see me sipping a cocktail on some patio in the warm rays of an afternoon. This is all entirely unrealistic. So, instead I settle for giving myself a day of baking – the kitchen is always warm with the oven on and it is quite sunny.

IMG_7338

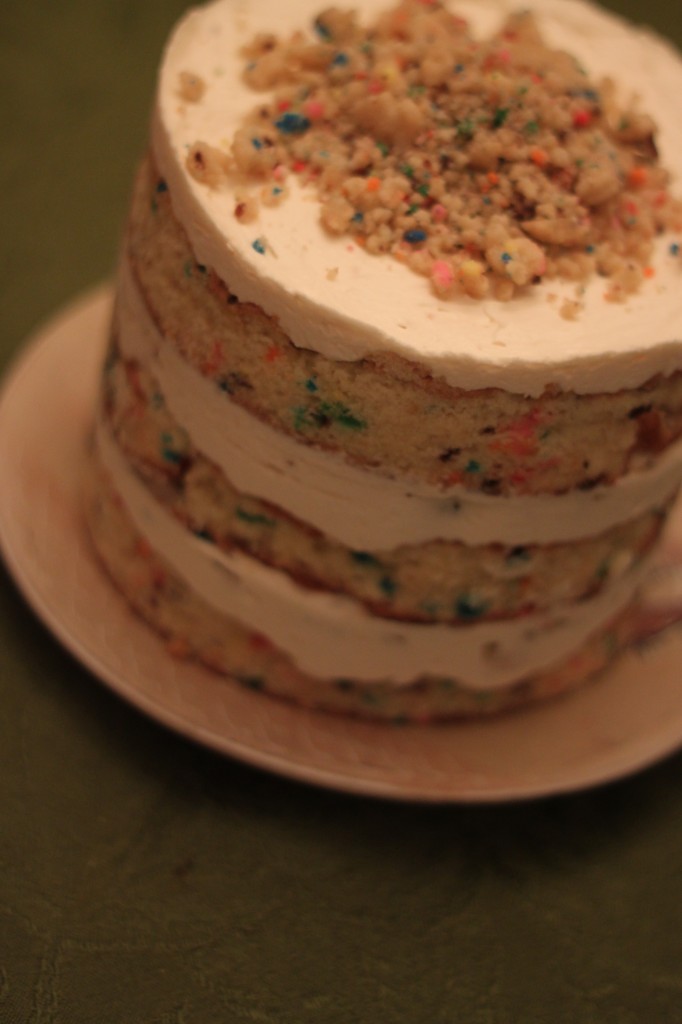
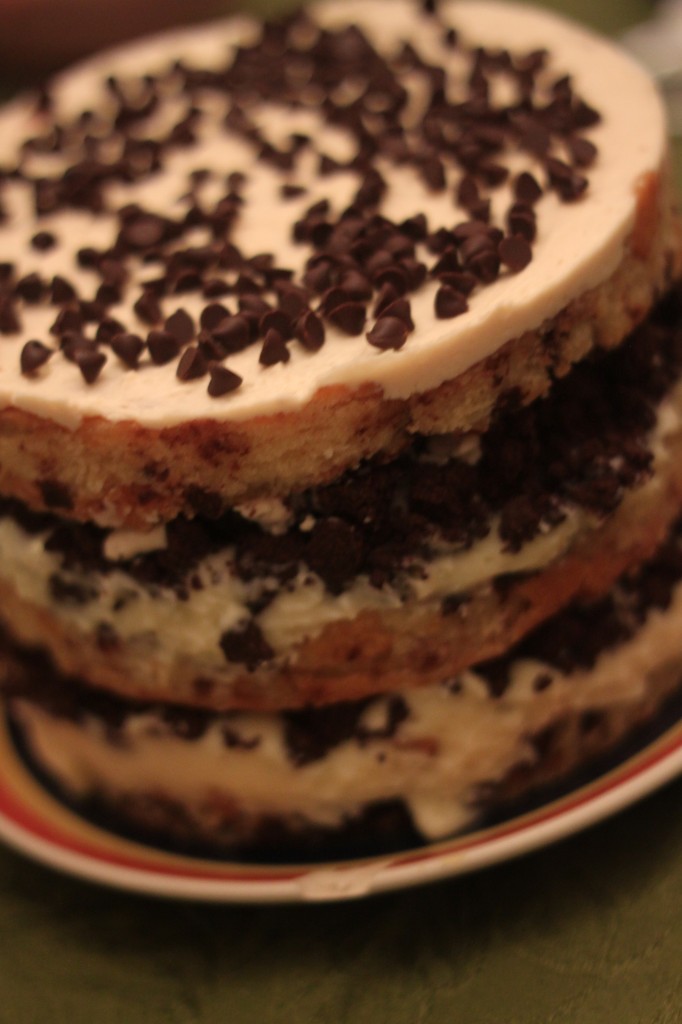
Each year I see my birthday as a baking challenge – a chance to try something I haven’t tried before that I’m daunted by. My birthday is an opportunity to try those recipes that could be potential flops – that way if I mess up someone’s birthday cake it’s MY birthday cake. No harm no foul, right? This year was no different. EXCEPT instead of going out for dinner with BF and my sister I chose to conquer Momofuku Milk Bar.

IMG_7401

I threw a dinner party. I made a ton of pasta and asiago cheese riddled focaccia. I invited BF’s and my favorite people over, we drank wine and ate good food. Dan and Mandi made a great sauce that went perfect with the I-drank-too-much-wine-last-night day that followed. Megan made a lovely spinach salad and there was liberal pouring of wine and beer. It was, truly, the best birthday I could ask for. But, in my brilliance, I decided that making two cakes that both required at least three separate pre-made ingredients and a whole bunch of love was the best way to top off this grand evening of debauchery.

IMG_7368

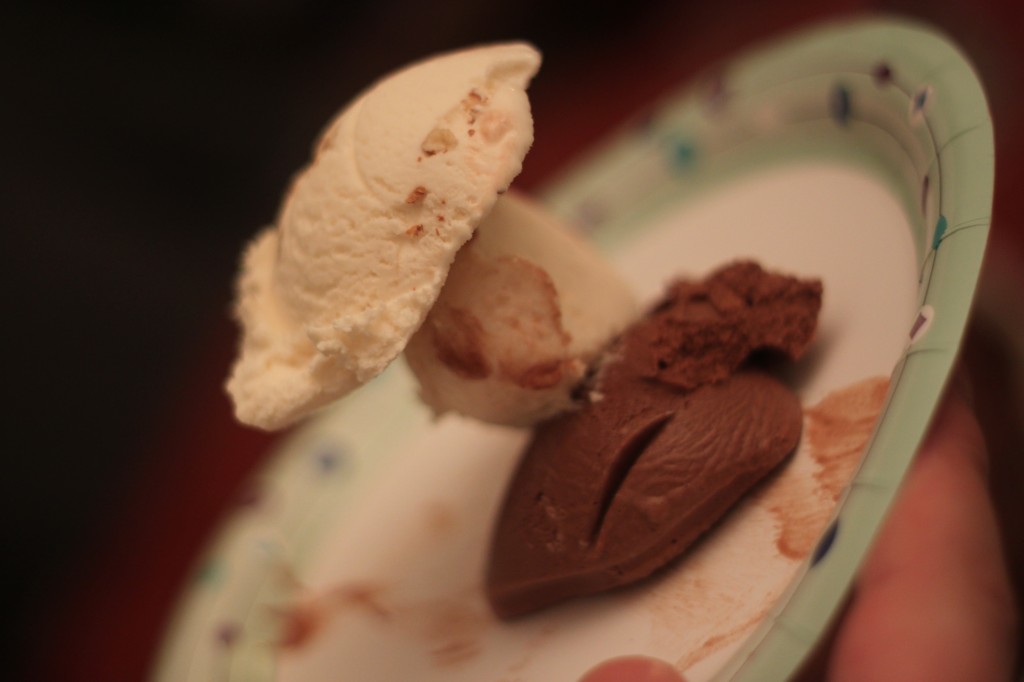
I made both of these cakes pretty much exactly according to the recipes – my variation was that I used liquid cheesecake in the chocolate chip cake instead of passion fruit curd. The cheesecake was WAY more accessible. I’m not sharing these recipes today – they are too complex and my pictures are MIA as my hands were typically too much of a mess to photo-document this process. SO all we have left of this cake is a remnant and these pictures. There were twelve of us at the party. We ate most of both of these cakes. I loved them.

And I will assuredly be baking from Momofuku Milk Bar again soon.

Six Layer Salted Caramel and Chocolate Truffle Cream Cake

Thanks for the picture Rachel!

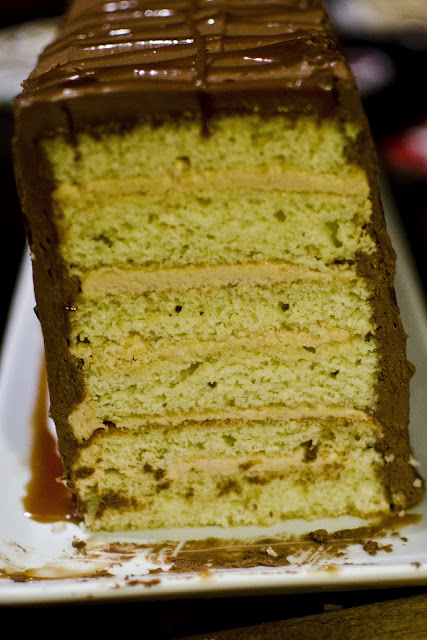
I wasn’t going to post this recipe initially.  The cake recipe is an old one (a favorite that I use all the time) and the salted caramel frosting is directly from another blog – but BF told me I needed to share it because a six layer confection of frosting and cake should be shared.  Because I hadn’t initially meant to blog this there are only pictures of the cake as it was built, but don’t worry about that.  Marvel at the cake – six layers of yellow cake, salted caramel frosting sandwiched between each layer, coated with decadent chocolate truffle cream frosting, and topped with drizzles of caramel sauce.

I had been playing with the idea for this cake for quite a while – it’s a take on Smith Island cake, which just had chocolate frosting and filling.  But BF isn’t the biggest fan of that much chocolate and I’ve been wanting to make salted caramel frosting, so it seemed a natural fit.  I made this cake to bring over to Rachel and Joel’s as a pairing with a fantastic meal of braised lamb shanks and potatoes au gratin.  Which meant I baked all day and left an obscene amount of dishes in the sink.  But it was worth it.

I am one of those people that will bake to soothe whatever stress I’m under, whether it be in relation to job-hunting or doing my taxes, baking calms me down.  So on Saturday, while BF struggled with his taxes and I paced impatiently from the kitchen to the office and back again, I baked a cake, I made two different kinds of frosting, and I fell in love with salted caramel sauce all over again.  As I watched sugar melt and boil to a beautiful amber color and hoped against hope that it would come out right this time I fell into a state of ease – I shook off the tension of the week and indulged in a cake scrap drizzled with caramel sauce.  So perfect, so confidence inducing, so satisfying to see a pot of caramel and say, “yeah, I did that, TWICE.”

Let us not forget the chocolate truffle frosting, either.  This frosting is sort of a mantra for my mom who tells me that it is THE chocolate frosting I must make if I’m looking for it.  My mom found this frosting about nine-and-a-half years ago, while she was pregnant with ‘Tonio and swore she wouldn’t ever make another one.  I tend to agree with her – it’s fantastic, decadent without being too sweet, and rich without being overpowering.  It paired perfectly with the salted caramel frosting.  Now if only we all had enough room to eat a whole 3″x14″ six layer cake, instead we all had thin slices and cursed the epic amount of cake I made.  Oops.

Six Layer Cake with Salted Caramel frosting and Chocolate Truffle Cream Frosting
The cake is all my design!  The cake recipe I used is one I put up here a long time ago.  The salted caramel frosting is from this post, over on My Baking Addiction, I made just the caramel sauce to put on top too.

Chocolate Truffle Cream Frosting
Adapted from the Joy of Cooking
This recipe makes enough to frost and fill a two layer cake.

4 egg yolks
1/4 cup sugar
1 tsp espresso (1 tsp espresso powder + 1 tsp boiling water works)
1/3 cup boiling water
6 oz finely chopped chocolate (about a cup)
8 Tbs unsalted butter

In a wide heat-proof bowl (I use a shallow metal bowl) whisk together the yolks, sugar and espresso until fully combined and frothy, about 30 seconds.  Add the boiling water 1-2 Tbs at a time, whisking between additions, until fully incorporated.  Place a bowl in a frying pan with at least an inch of water in it (the idea here is basically a wide flat double boiler).  Bring the egg, sugar, espresso, water mixture to a temperature of 160 degrees, stirring occasionally, and remove it from the heat.  Add the chocolate and butter, mix until smooth.  If you find that the chocolate/butter aren’t melting you can put them back in the pan with water in it (turned off, the water should still be warm enough to melt chocolate).  Allow the frosting to cool, in the fridge, fro about twenty minutes if you want to use it as a spreadable frosting.  Or just pour it over your cake if you just want a glaze.  Enjoy.

Assembly


This cake was a bit tricky for me, in that I created the whole thing specifically for a platter I had in mind, hence it’s Kit-Kat like appearance.  This meant cooking the cake in cookie sheets/jelly roll pans and then cutting each sheet of cake down to a specific size, in this case 3″x14″.  I found that cutting the cake down to be uniform sizes was the hardest part, mostly because I just can’t cut in a straight line.  Regardless, when all of your cake pieces are uniform (or you think they are) stack them to make sure.  Then you can start the real assembly.  It’s best to have both frostings all ready when assembling, then you don’t have to stop.  Start with a cake on the bottom then add a hefty amount of caramel frosting – I found that one recipe made just enough for me to fill between the layers. Smooth out the frosting then add another layer of cake, continue to alternate until it looks like the “image” below:

Cake
Caramel Frosting
Cake
Caramel Frosting
Cake
Caramel Frosting
Cake
Caramel frosting
Cake
Caramel frosting
Cake
There should be cake on the top and bottom of the whole thing.  After you have filled the cake go around the edges with an offset spatula (if you have one, I used a butter knife).  Then coat the whole cake in chocolate frosting. If you made the above frosting (which I can’t recommend highly enough) then you should have enough for about 1/8inch think frosting over the whole cake.  You should check out Test Kitchen for tips on cake frosting, they’re awesome.  Last of all, top the whole cake with a drizzle of caramel sauce in whatever pattern you want.  Adding this caramel helps tone down the richness of everything else and is an important step, don’t skip it.  Then take this massive cake and share it, with at least ten other friends.  You will want to eat it all by yourself, this is a bad idea.  Also, taking it on a long, packed train/bus ride is not a good idea.  Trust me, I tried it, the cake got, well, smooshed.

Hazelnut-Chocolate Biscotti

I love to make homemade food gifts.  I find it rewarding to give someone something I made from scratch specifically for them.  One of my best friends and I were preparing to swap Christmas gifts and had both decided that homemade was the way to go.  So I started hunting for recipes.  I had initially wanted to make biscotti for my step dad as a Christmas present, but he was on a diet – the idea for homemade biscotti lingered though.  I went through all of my cookbooks searching and narrowing recipes for the delectable coffee pairing until I found the one that would be perfect for B.  A cinnamon-chip biscotti was calling my name.  I swapped in some chocolate chips for the cinnamon and I was good to go.

 I have a confession to make – I don’t really care for biscotti, I find it too dry and hard most of the time, leaving me with a sore roof of the mouth and an unpleasant after taste.  But homemade biscotti is entirely a horse of a different color, it’s tender while still firm and left me craving more with every bite.  B loved it – or said she did to save my feelings 😛 But in all seriousness there are some things I will change about my next batch – I’ll coarsely chop the hazelnuts because whole was just too much and I’ll leave out the chocolate chips – they were delicious but they also made it just not pretty.  I’ll just dip them in ganache next time instead, besides that will give a better cookie to chocolate ratio.

Regardless – you should probably take an afternoon and make these, soon.  They’re that good.  Like overgrown chocolate-chip cookies and they’re just perfect with a good cup of coffee.  Perfect.

Hazelnut-Chocolate Chip Biscotti
Adapted from Baked: New Frontiers in Baking by Matt Lewis and Renato Poliafito which I borrowed from Megan and love!
Note: The original recipe calls for cinnamon but I really wanted a Nutella feel to these so I omitted the cinnamon.  I also cooked mine for slightly less time than they called for because I prefer a more tender biscotti.  Also, the original recipe calls makes 24 huge biscotti – I would make them a bit smaller next time and have changed the recipe below to indicate that.  I also nixed brushing egg whites on top of the fully cooked biscotti log before drying them.  It felt unneccessary to me and mine were toally fine without it.

1 1/3 cup sugar
1 1/4 tsp baking powder
1 1/4 tsp salt
4 large eggs
2 tsp vanilla
3 1/4 cups flour
1 1/2 cup blanched hazelnuts,  toasted and coarsely chopped
1 3/4 cups semisweet chocolate chips (optional)

Preheat the oven to 350 degrees and line a large baking sheet with parchment.  In a small bowl whisk/sift the sugar, baking powder and salt until fluffy.  In the bowl of an electric mixer cream the eggs and sugar mixture together until it’s ribbony – about 45-60 seconds. Add the vanilla and beat until incorporated – 5-10 seconds. Add one half of the flour and beat to combine.  Add the second half of the flour – mix until everything is just combined – about 30 seconds.  Add the nuts and chips (if using) on low speed, mix until evenly distributed.  Turn the dough out onto the parchment lined baking sheet and separate it.  Shape one log into a 12 inch log 2 inches across and 3/4 inch think.  Do the same thing with the other log on another baking sheet.  Bake the logs for 20-25 mins, until firm to the touch but not hard (I cooked mine about 18), then let them cool on the pan for 10 mins or so, until handle-able.  Lower the oven temperature to 325 degrees.  Cut the logs into 1/2-3/4 inch slices, however wide you like your biscotti, I’m more on the half inch side myself.  Lay the sliced biscotti back on the baking sheets cut sides up/down  and bake them for 20-25 mins, until they are firm (again if you want more tender biscotti don’t cook them as long on this step, 18 mins is what I did).  After the biscotti are cooked remove them from the oven and let them cool fro at least five minutes on the pan before transferring them to a wire rack.  Let the cookies cool completely before eating/storing them.  These will keep for about two weeks in  an airtight container.  They are fantastic dipped in a jar of Nutella for dessert.

A Visit with Vianne Chocolates

I love chocolate of all sorts. I will eat chocolate anytime, its familiar and comforting in a nostalgic way.  I love that first bite into a handmade chocolate that makes my mouth want to do a jig, or the soothing way chocolate melts at body temperature.  I am convinced that chocolate would solve most problems and that nothing else calms most ills.  I have been lucky enough to test this theory time and again in all situations and at all times. I love it.

I periodically get the opportunity to eat chocolate like this, decadent dark chocolate with additions that make me swoon and one weekend day I had an opportunity like that.  On the afternoon of July 30th I was given the fantastic opportunity to sit down with the totally charming Valerie, owner and chief candy-maker-extrordinaire of Vianne Chocolates.  Vianne Chocolates is one of the specialty vendors at last year’s Boston Local Food Festival and then I only briefly met her as I showed her to her booth.  As I sat down to interview Valerie she gave me a marvelous linen bag full of goodies!

I immediately fell in love with the sketch on the bag and all of the packaging.  Made by a South End artist these little sketches are a fun and creative way for Valerie to show her local love, and does she have local love.  This girl hails from the wilds of New York and tries as hard as possible to incorporate local produce, jams, herbs, whatever into her chocolates.  From using Kate’s of Maine butter (yay, totally rocking the Maine pride) to using mint she grew herself (!) and sourcing her more obscure spices from Christina’s Spices in Inman Square, Valerie is all about keeping as much as possible local and sustainable!

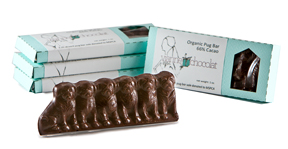
I also love when companies and businesses choose pet charities that they are passionate about, this is especially true with Vianne and the Pug Bars.  These pug bars, aside from being insanely cute, are for a GREAT cause.  Of every bar that is sold Valerie donates 25 cents to the Massachusetts Society for the Prevention of Cruelty to Animals, how great is that?  So not only does Vianne source as much as possible locally, they support a local charity too!  And if saving animals doesn’t lessen the guilt of eating this fantastic chocolate than nothing will.  😉

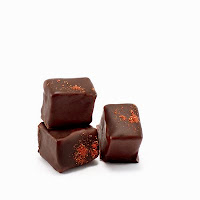
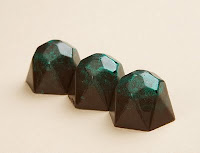
Now, then onto the best part.  Let’s talk about the chocolate.  As I sit here eating the beautiful pieces of candy that were to lovingly stashed in my snazzy bag I am abuzz with excitement.  My first chocolate is the Strawberry Balsamic (one of Valerie’s favorites), with it’s creamy white chocolate center, rich dark chocolate coating and generous sprinkle of strawberry dust I am in heaven, glowing with the thrill of perfect chocolate that only enhances the flavor of strawberries with each savored bite.  Chocolate number two is the Green Fairy, an entirely different chocolate than the strawberry balsamic but still totally swoon worthy and, by far, my favorite.   The green fairy is, as the history of it’s name would suggest, an Absinthe spiked truffle that is one of those tongue-dancing-a-jig sort of chocolates.  The crisp chocolate shell followed by the spicy and herbal ganache is a totally mesmerizing experience.  I could sit here and give you a play by play of all the chocolates that were bestowed on me but instead I will encourage you to come to the Boston Local Food Festival on October 1st and try them yourself.  And if you see me around grab me a green fairy 🙂

  
I wrote this post for the Boston Local Food Festival blog back in the fall, however if you are struggling for a some good Christmas gifts Vianne Chocolates will definitely fit the bill of that person with a sweet tooth.

*All photos in this post are courtesy of www.viannechocolat.com.

Small Plates at Fleming’s Prime Steakhouse & Wine Bar

This post has been brought to you by kathycancook’s very own “BF”, who also sometimes writes in his own blog.

A few weeks back, Kathy was invited to a blogging event at Fleming’s to experience their new small plate menu items. These type of events more-often-than-not fall into the category of “fun, but gastronomically unremarkable” (even more so when the restaurant is a national chain), so I considered passing on this one, but decided to tag along as a plus-one, aiding with pictures and review-related-thinking-activity-things. What I can report back is pleasant surprise. We were treated to a series of dishes, each one vying for my affections by exploiting my different culinary vices. Like children, I could not choose a favorite and had to eat each one multiple times. As such, I’m going to review each dish briefly so as to avoid gross keyboard-unfriendly drooling.
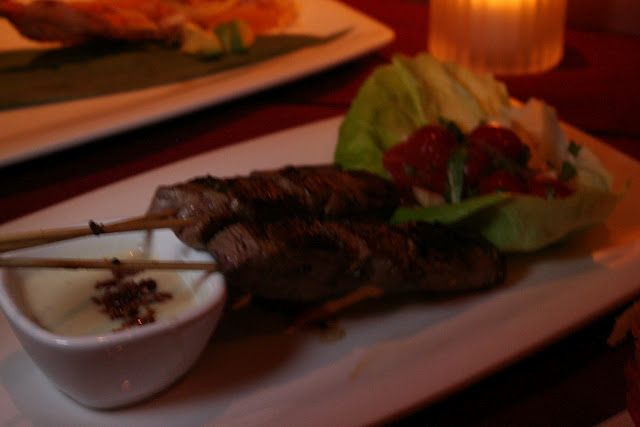
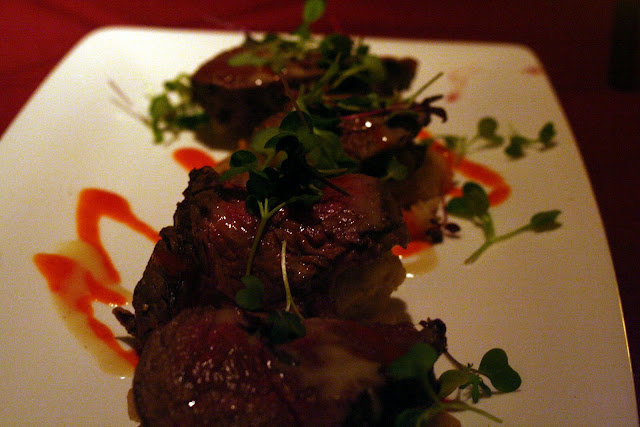
First up on this new lineup is the Filet Mignon Skewers. The skewers were cooked perfectly (rare-medium-rare for-the-win) and was accompanied by “the Sauce”. The Sauce is comprised of two-parts Gorgonzola, one-part bacon, and thirteen-parts jackalope magic. After being the first to taste it, I promptly (and secretly) snuck around the room looking for anything I could dip into it so as to maximize the relocation of whatever Sauce that was present from cold, unfeeling porcelain dishes into my stomach. Assume from this point forward, that all the other dishes I tried were first consumed as they were intended, and then again with gratuitous amounts of the Sauce drizzled all over.
Next came the Sliced Filet Mignon. Let me just re-iterate again here how perfectly this and all the other meat was cooked. My experience has been that most places (including steakhouses) have difficulty hitting that rare-medium-rare sweet-spot – Fleming’s nailed it each and every time (and let’s face it, if you’re eating over-cooked meat, you might as well not bother).
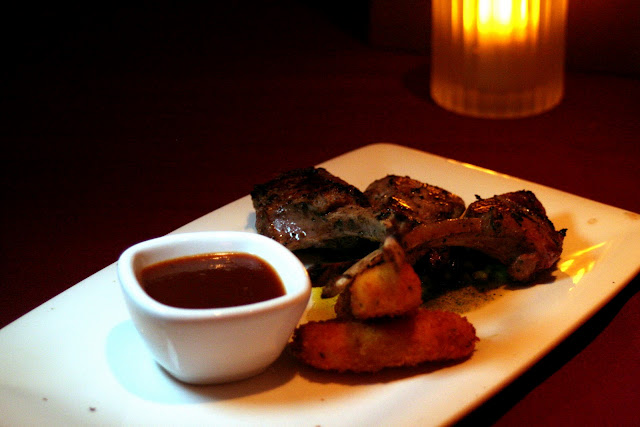
I’m not a huge fan of chops as a finger food, but these lamb chops were delicious and accessible.


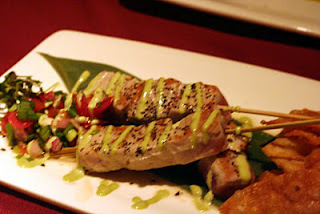
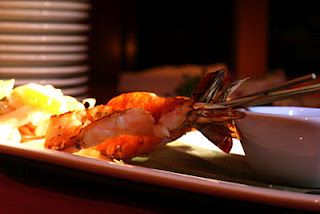
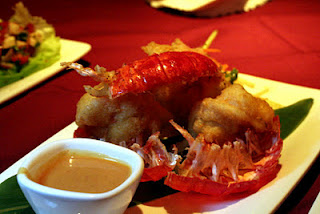
Let’s also not forget the seafood offerings. We tried their tempura-breaded lobster, shrimp skewers, Ahi tuna skewers, and scallops. Full disclosure: I am not a seafood fan, save for very few, very specific exceptions. I tried each of these dishes, and was surprised to enjoy each one – they were actually on par with my all-time favorite, steak (which is nearly blasphemy in my book).
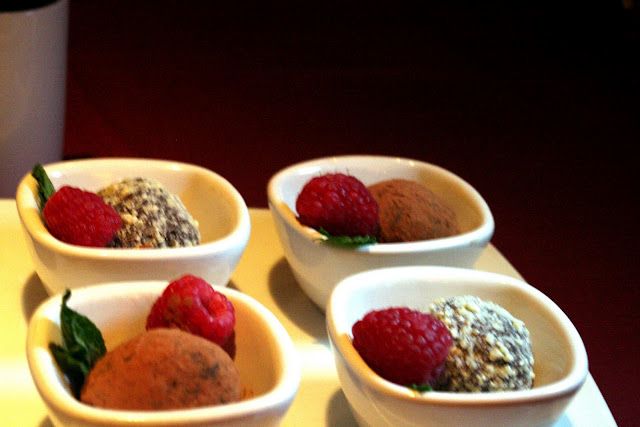
We wrapped up with espresso and white chocolate-covered chocolate truffles, which were their own kind of heaven.
I won’t lie, I was surprised by the quality of Fleming’s dishes. While I don’t consider myself a particularly discerning foodie, I recognize the difference between “pretty good” and “fantastic”. If the quality of these dishes are what can be expected at every visit, I’ll be adding Fleming’s to my list of regular places to eat.
Please Note:
We were also treated to red and white variations of wine, though I don’t feel terribly qualified to judge them. I enjoyed them plenty, but wine is one of my regular blind spots. The event was complementary, but as is the norm here at kathycancook, our opinions are our own.

Fleming's on Urbanspoon