Six Layer Salted Caramel and Chocolate Truffle Cream Cake

Thanks for the picture Rachel!

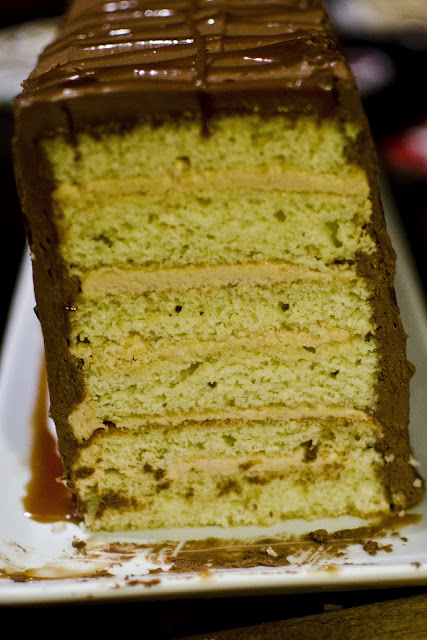
I wasn’t going to post this recipe initially.  The cake recipe is an old one (a favorite that I use all the time) and the salted caramel frosting is directly from another blog – but BF told me I needed to share it because a six layer confection of frosting and cake should be shared.  Because I hadn’t initially meant to blog this there are only pictures of the cake as it was built, but don’t worry about that.  Marvel at the cake – six layers of yellow cake, salted caramel frosting sandwiched between each layer, coated with decadent chocolate truffle cream frosting, and topped with drizzles of caramel sauce.

I had been playing with the idea for this cake for quite a while – it’s a take on Smith Island cake, which just had chocolate frosting and filling.  But BF isn’t the biggest fan of that much chocolate and I’ve been wanting to make salted caramel frosting, so it seemed a natural fit.  I made this cake to bring over to Rachel and Joel’s as a pairing with a fantastic meal of braised lamb shanks and potatoes au gratin.  Which meant I baked all day and left an obscene amount of dishes in the sink.  But it was worth it.

I am one of those people that will bake to soothe whatever stress I’m under, whether it be in relation to job-hunting or doing my taxes, baking calms me down.  So on Saturday, while BF struggled with his taxes and I paced impatiently from the kitchen to the office and back again, I baked a cake, I made two different kinds of frosting, and I fell in love with salted caramel sauce all over again.  As I watched sugar melt and boil to a beautiful amber color and hoped against hope that it would come out right this time I fell into a state of ease – I shook off the tension of the week and indulged in a cake scrap drizzled with caramel sauce.  So perfect, so confidence inducing, so satisfying to see a pot of caramel and say, “yeah, I did that, TWICE.”

Let us not forget the chocolate truffle frosting, either.  This frosting is sort of a mantra for my mom who tells me that it is THE chocolate frosting I must make if I’m looking for it.  My mom found this frosting about nine-and-a-half years ago, while she was pregnant with ‘Tonio and swore she wouldn’t ever make another one.  I tend to agree with her – it’s fantastic, decadent without being too sweet, and rich without being overpowering.  It paired perfectly with the salted caramel frosting.  Now if only we all had enough room to eat a whole 3″x14″ six layer cake, instead we all had thin slices and cursed the epic amount of cake I made.  Oops.

Six Layer Cake with Salted Caramel frosting and Chocolate Truffle Cream Frosting
The cake is all my design!  The cake recipe I used is one I put up here a long time ago.  The salted caramel frosting is from this post, over on My Baking Addiction, I made just the caramel sauce to put on top too.

Chocolate Truffle Cream Frosting
Adapted from the Joy of Cooking
This recipe makes enough to frost and fill a two layer cake.

4 egg yolks
1/4 cup sugar
1 tsp espresso (1 tsp espresso powder + 1 tsp boiling water works)
1/3 cup boiling water
6 oz finely chopped chocolate (about a cup)
8 Tbs unsalted butter

In a wide heat-proof bowl (I use a shallow metal bowl) whisk together the yolks, sugar and espresso until fully combined and frothy, about 30 seconds.  Add the boiling water 1-2 Tbs at a time, whisking between additions, until fully incorporated.  Place a bowl in a frying pan with at least an inch of water in it (the idea here is basically a wide flat double boiler).  Bring the egg, sugar, espresso, water mixture to a temperature of 160 degrees, stirring occasionally, and remove it from the heat.  Add the chocolate and butter, mix until smooth.  If you find that the chocolate/butter aren’t melting you can put them back in the pan with water in it (turned off, the water should still be warm enough to melt chocolate).  Allow the frosting to cool, in the fridge, fro about twenty minutes if you want to use it as a spreadable frosting.  Or just pour it over your cake if you just want a glaze.  Enjoy.

Assembly


This cake was a bit tricky for me, in that I created the whole thing specifically for a platter I had in mind, hence it’s Kit-Kat like appearance.  This meant cooking the cake in cookie sheets/jelly roll pans and then cutting each sheet of cake down to a specific size, in this case 3″x14″.  I found that cutting the cake down to be uniform sizes was the hardest part, mostly because I just can’t cut in a straight line.  Regardless, when all of your cake pieces are uniform (or you think they are) stack them to make sure.  Then you can start the real assembly.  It’s best to have both frostings all ready when assembling, then you don’t have to stop.  Start with a cake on the bottom then add a hefty amount of caramel frosting – I found that one recipe made just enough for me to fill between the layers. Smooth out the frosting then add another layer of cake, continue to alternate until it looks like the “image” below:

Cake
Caramel Frosting
Cake
Caramel Frosting
Cake
Caramel Frosting
Cake
Caramel frosting
Cake
Caramel frosting
Cake
There should be cake on the top and bottom of the whole thing.  After you have filled the cake go around the edges with an offset spatula (if you have one, I used a butter knife).  Then coat the whole cake in chocolate frosting. If you made the above frosting (which I can’t recommend highly enough) then you should have enough for about 1/8inch think frosting over the whole cake.  You should check out Test Kitchen for tips on cake frosting, they’re awesome.  Last of all, top the whole cake with a drizzle of caramel sauce in whatever pattern you want.  Adding this caramel helps tone down the richness of everything else and is an important step, don’t skip it.  Then take this massive cake and share it, with at least ten other friends.  You will want to eat it all by yourself, this is a bad idea.  Also, taking it on a long, packed train/bus ride is not a good idea.  Trust me, I tried it, the cake got, well, smooshed.

Antonio Bakes Pear-Gingerbread Cake

Recently I had the opportunity to attend a fantastic brunch hosted by Harvard Common Press in their publishing offices – where there were many shelves of impressive cookbooks to encourage my kitchen obsessions.  One of the first books that caught my eye was Gadgetology, a cookbook for kids about cooking with specific tools that are in most kitchens (mixing bowls, whisks, spatulas – stuff like that).  As a child I had the Klutz Kid’s Cooking cookbook and, in theory, it was great but the best recipe in the whole book was for homemade play dough which isn’t even edible so when I saw Gadgetology I got excited.

I have a nine year-old brother, Antonio, who can usually be found in the kitchen with my mom – mixing things and in general getting in the way.  More than anything I have wanted to get him a good kids cookbook for a long time – I wanted him to have a book full of reliable recipes and consistent easy to understand directions that he could refer to and cherish for a long time.  So while at HCP I perused Gadgetology and, to my great delight, found it to be exactly what I was looking for.  When Adam kindly offered me a copy I did a little happy dance and started plotting.

When I got home that afternoon I showed the book to BF and explained my plan, we would get ‘Tonio a bunch of cookware to go with Gadgetology and then cook with it while my fam was visiting for the holidays.  As plans go it was pretty brilliant and I was able to come up with what I thought were some fundamental kitchenware pieces – nesting bowls, measuring cups and spoons, a paring knife and blade sheath, a small bar board, and some bamboo utensils.  So Christmas came and ‘Tonio was basically bouncing to open his big box under the tree, which I had packed to the gills with his individually wrapped Christmas presents.  He was ecstatic.

Fast-forward a couple days later and ‘Tonio and I are the first people up so we scurry to the kitchen and start perusing Gadgetology.  There were quite a few recipes that we thought looked good – Chicken Satay with Peanut Sauce and this Gingerbread Cake being at the top of the list.  We went with the cake – it looked breakfast-y and a great use of the excess pears we had around.  It was perfect – spicy and filling, and with the pears it seemed healthy as a breakfast option 🙂  I loved this cake, but the actual cook (‘Tonio did all the work, I was merely a guide and did some of the more challenging stirring) thought it was a little too spicy and asked that next time we decrease the ginger.  He also asked for more powdered sugar topping, so I think his priorities might have been a bit skewed.

Antonio’s Pear-Gingerbread Cake
Adapted from Gadgetology by Pam Abrams


1 1/4 cup All Purpose Flour
1 1/2 tsp Ground Ginger (‘Tonio recommends only 1 tsp if you don’t like it too spicy)
1 tsp Baking Soda
1/2 tsp Salt
1/4 cup Granulated Sugar
1/4 cup (1/2 stick) Unsalted Butter, softened to room temp
1/3 cup Molasses
1/3 cup Boiling Water
1 Large Egg
1 Bosc Pear, peeled and chopped into 1/2 inch pieces
Confectioner’s Sugar (for topping)
Whipped Cream (optional)

Preheat the oven to 350 degrees and grease and flour an eight inch square pan. Sift flour, ginger, baking soda, and salt into a medium bowl, set aside.  In a large bowl cream the butter and sugar together, we just used upper arms and a whisk but a hand mixer would also work here.  Add the molasses and boiling water the the sugar-butter mixture, mixing well.  Stir the egg into the wet mixture making sure it doesn’t scramble.   Mix the dry ingredients into the wet until everything is just blended, 25-30 strokes by hand.  Fold the pear pieces into the batter until evenly mixed in.  Pour the mix into the pan and bake for 30 mins until a toothpick inserted into the center comes out clean.  Allow the fully cooked cake to cool for five minutes in the pan and then flip it out onto a cooling rack to cool another ten minutes.  Dust the cooled cake with confectioners sugar, we made a crosshatch pattern with paper towels and it was pretty neat.  Share the cake with all of your family and make sure to let them know just how awesome a cook you are.  Especially if you’re nine 🙂

BF’s Nintendo Cake

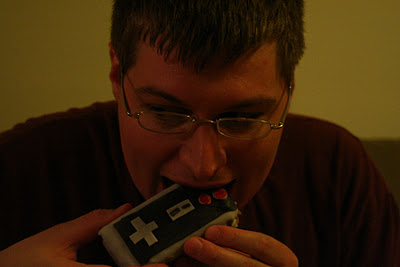
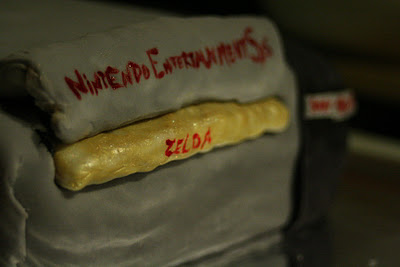
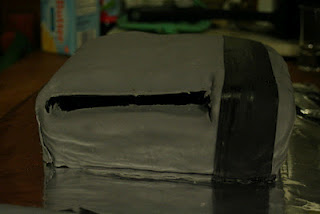
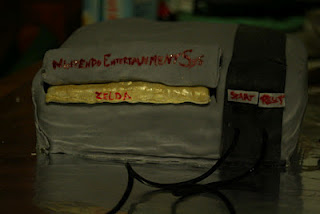
So, Nov 20th was BF’s 27th birthday.  Not a significant birthday really – it’s not a milestone or anything, but this year is a special one for him.  He’s accomplished a lot and this past year has taught him how to be stronger and patient with all aspects of his life so I wanted to celebrate it.  As a gift he got (or rather is getting because it’s still not here) the 25th anniversary edition of Zelda: Skyward Sword, so I decided his birthday cake should be Nintendo-themed.  I started to plan this cake in March;  It’s a classic Nintendo Entertainment System, for those not in the know, and it has his favorite Zelda game in the cartridge slot, The Legend of Zelda, which is also the first Zelda game.

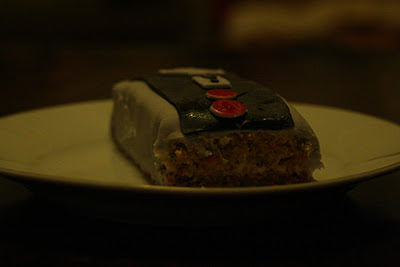
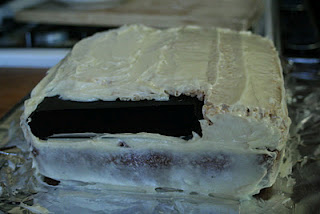
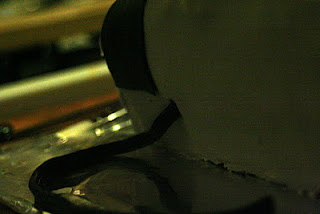
I made the cake of Brown-Butter Rice Krispie Treats and a family carrot cake recipe that I always make him.  I purchased the fondant; its just the Wilton brand because I wasn’t sure how to make it and didn’t want to mess up BF’s birthday cake for my first test.  But now that I have worked with fondant, (a first!) I will probably do it again, and may even try making it myself, maybe with marshmallows next time.  We’ll see.  Below is my photo step-by-step of the whole process from start to finish.

From start to finish creating this cake was a lot of fun, but next time I think I’ll try to make it on a day other than BF’s actual birthday.  It was a lot of work and took a fair amount of time because I just wasn’t prepared for how hard it was going to be to work with the fondant and keep the cake a surprise.  Also, banning BF from the kitchen for his entire birthday was kind of mean; he wasn’t able to come in and get snacks or anything.  Thankfully two of his best friends were visiting, so they played Settlers of Catan while I finalized cake sculpture.

[Editor’s Note: The game “cartridge” was removable as well; instead of blowing out candles, I blew into the edible game cart in hopes that would get the system to start. And for the record, I do not recommend eating game controllers, no matter how vintage they may be. All in all, truly outrageous.]