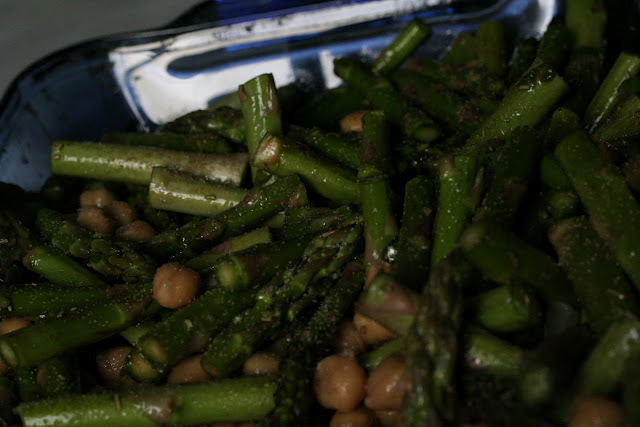
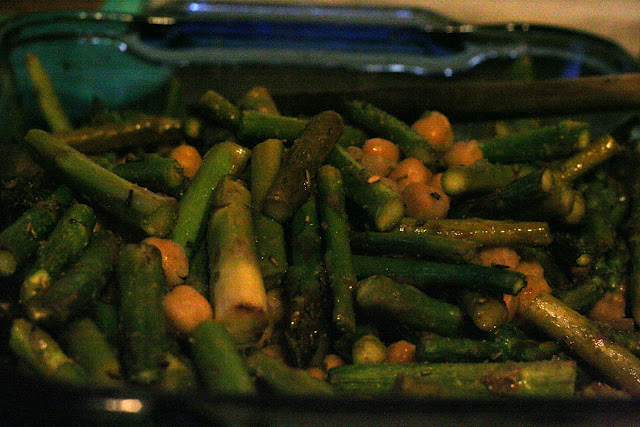
Baked Asparagus and Chickpeas

Spring has finally moved in and is rapidly approaching summer here in Boston and I am simultaneously thankful and irritated.  The thankfulness comes of knowledge of fresh and local produce that will soon be gracing my table and kitchen and the irriation comes of horrible spring hayfever.  I know we all have it on heavy pollen days – the runny nose and itchy eyes come with the territory, but just once I would like to smell the lilacs and not sneeze for the rest of my walk home.  But the produce – that I can get behind.  With the city’s seasonal farmer’s markets starting up I’m getting impatient for food that tastes fresh again.

On a recent trip to the Dewey Square Farmer’s Market I was thrilled to see Kimball Farm with bunches of asparagus for $5 each.  They were good and I was excited to be seeing produce that is creeping closer to home as the ground warms and green things start to explore the world.  With the fresh asparagus comes the hope of greater things coming soon – tomatoes that taste like tomatoes (gasp), peppers that I want to eat, and fresh herbs that I’ll add to some greens (which you can get at your market now thanks to cold frames and awesome farmers), add a squirt of lemon juice and call it dinner.  But we’re not quite there yet.  For now I have some root vegetables left over from the winter and this farm fresh asparagus – the first sign of summer actually coming to stay.

I love asparagus, especially the tender green shoots that are no bigger than a pencil and burst with a sweet and green flavor; it’s filling and delicious.  I basically turn BF and I into vegetarians while asparagus is in season, buying it in quantities that make most people look at me strangely, and gently roasting it with chickpeas at least twice a week.  I’m obsessed.  And it’s soooo worth it.  We aren’t vegtarian eaters usually – add a sausage or some chicken to our meals and we’re happy campers but this roasted asparagus dish is fantastic and when I made it the other night as a quick meal, BF asked me to make it again.  I was so surprised you could have knocked me down with a feather, a quick and easy meal that’s cheap and delicious – oh yeah I’ll make it again (and again and again).
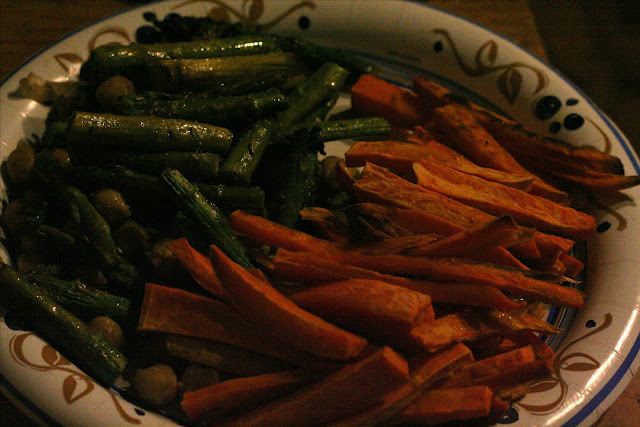
The best part of this “meal” if you want to call it that, is that it’s virtually effortless – remove the bottoms of the asparagus, cut it into finger lengths, and toss it with some oil and spices.  It’s a meal!  Veggies!  Protein!  I suppose you could do it as a side, but it’s delicious on it’s own.  I like it with sweet potato fries – which is a great way to use up the tail-end of those wintered-over potatoes that are hiding out anyway.

Baked Asparagus and Chickpeas
1 bunch asparagus, woody ends broken off and cut into 2 -3 inch pieces
1 can chickpeas, drained and rinsed
1 Tbs olive oil
1 Tbs balsamic vinegar
1/2 tsp coarse kosher salt (any coarse salt is fine here, it doesn’t need to be kosher)
1/2 tsp garlic powder, to taste (rosemary is nice here too, or whatever other spices you’re in the mood for)

Preheat the oven to 350 degrees farneheit.  Add the asparagus and chickpeas to a 2 inch deep baking dish (I use a 13×9 glass pan) and drizzle the olive oil and balsamic over them.  Gently toss the asparagus/chickpeas with the oil and balsamic (this can be done in a bowl if you are not confident of your abilities to keep them in the pan).  Add the salt and spices and give everything a final toss to evenly distribute the spices.  Stick the pan in the oven for 20-25 minutes until the asparagus is tender and a little wilty.  The asparagus will be fantasic and the chickpeas crisp up so much that you will  chase them around your plate until they’re gone.  I promise.  This makes a great entree meal for two (with sweet potato fries, of course) or as a side for more.  Deee-licious.

Thai-Peanut and Black Bean Chili

I went to college in a minuscule town in Western Maine.  While school was in session it felt like there was a town of about 15k when school was not in session there were about 3000 people in the town.  My school was wonderful with small classes and professors who knew your first name it was the place you wanted to go after going to high school in an even smaller town, a stepping stone toward more.  But it was the town I was most enchanted with.  There was a cafe where I worked for a brief period, there were the brick structures of campus covered in English Ivy, there was the river I rode a giant blowup dinosaur named Lottie down one summer day – meandering slowly on it’s way somewhere I never went (Mexico, ME maybe?), and there was Soup For You.

In my senior year of college I took most of my classes on Tuesdays and Thursdays, in class until 4:15 or so on Thursday and then later that evening from 6-9.  So in that little interim period from 4-6 I always walked downtown to Soup For You, ordered one of the daily soups (there are always 6 – 3 vegetarian options and 3 omnivorous options) and a coffee and sat in a booth and read, or chatted with friends there.  It was one of my favorite semesters, and I always hoped for this soup to be on the menu, especially on warm spring days.

Maybe I loved Soup For You because it was charming – with hand painted tiles and quirky-ness everywhere, or because they knew that I loathed soup-spoons so always gave me one of the miniature ones they held behind the counter for little kids, but I think the biggest reason I loved it is that it was introduced to me by a community.  That community was full of some of the strongest women I’ve ever met, and I am still close with several of them now.  They were my coworkers in the Women’s and Gender Studies Center, a work study job that is by far the best job I’ve ever had.  We held potlucks together, went to lunch, stayed well past or scheduled times just to hang out, published a literary journal called Ripple that focused on women in writing, we wrote poetry and we read.  I associate this soup with those girls. 

My first day in the Women’s and Gender Studies Center saw me, terrified (as usual) meeting everyone and trooping around the grand (read 2 or 3 streets) downtown of our little college town when one of the girls piped up that there was Thai Peanut and Black Bean Chili and Soup for You and they probably still had Corn Muffins.  So we stopped.  We all ordered the same thing 8oz of the chili and a corn muffin, then we sat down.  The warm spring sunshine on our backs and excited about our upcoming events and the new issue of Ripple.  So this soup is camaraderie for me, it’s comfort somewhere new, and it’s friends and mentors.  It’s my history.  It’s also a Soup for You specialty and totally made the internet fail me.  So this is as close an approximation as I can get.  Eat it with friends and a corn muffin.

Soup For You inspired Thai-Peanut and Black Bean Chili
Note: I love this soup and would eat it every day if I could.  It’s also quite close to Soup For You’s version, which is so exciting to me, since I can’t find anything half as good in Boston.

Olive oil
1 Medium white onion, finely diced
1-2 cloves garlic, minced
1 Tbs Ginger Juice, or 2Tbs fresh grated ginger (I LOVE GINGER, you may not so go lighter on this if it’s not your flavor)
1/2 red pepper, finely diced
2-3 medium carrots, sliced thinly into coins
1 can full fat coconut milk
zest of 1 lime
zest of 1 lemon
2 cans of black beans, 1 drained and 1 with liquid
1/4-1/2 tsp red pepper flakes (use more, less, or none depending on the heat you like)
1/4 cup creamy peanut butter
1/2 cup dry roasted unsalted peanuts
handful of cilantro (optional)

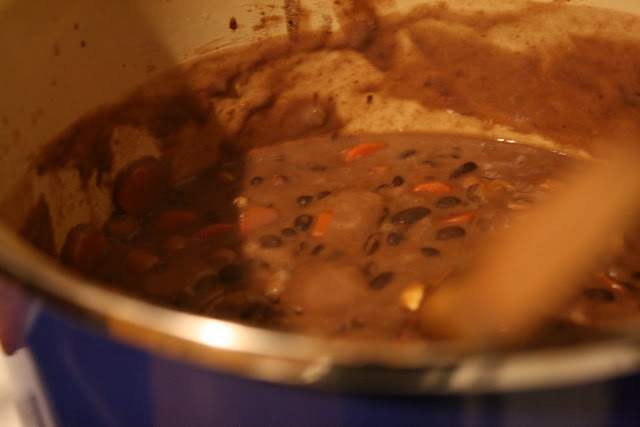
In a large pot heat the olive oil over medium heat.  Add the onion, garlic, red pepper, carrot, and if you are using fresh ginger add that too and allow them to soften, stirring occasionally – this should take about 5 minutes.  Add the coconut milk and the zests and stir to combine.  Make sure you get everything in the pot evenly distributed throughout the coconut milk and allow the whole pot to come to a gentle simmer.  Add the black beans and red pepper flakes then allow the pot to come back up to a simmer, allow it to simmer like this for 10-15 mins.  Add the peanut butter and allow the chili to come to another simmer.  If you think your chili is a little thin you can add more peanut butter, but that is up to you, regardless stir the peanut butter in well – it s the star flavor here.  Add the dry roasted peanuts and let them cook for 10 minutes or so – you want them to be warm but still have crunch.  Serve the chili with a corn muffin on the side and a sprinkling of cilantro on top.  Don’t ever look back.  Its vegan and delicious.  Win.

Whipped Feta Dip and Pita Chips

So, about a month ago I got together with Megan and Amanda for an awesome and truly delicious Bake Date.  We ate croissants and pop tarts, drank hot cocoa, and played a ton of banana grams (if you haven’t played that game you really should, it’s super fun and lots of indignation will happen).  I also made some dips and  homemade pita chips to make our bake date not kill us with sugar.  At least that was the plan.  I made two dips actually but I’m only going to write about one of them – ever probably, number two was not good.

A while ago (after blogger brunch at Dorado Tacos actually) I ended up hitching a ride to Russos with Renee and we talked about whipped feta dips.  Batting ideas back and forth over the ways feta could be used to make a dip and which feta would be best for it.  She ended up making one with beets (which is a fabulous shade of pink and I totally need to make).  And I made one with roasted red peppers (unbeknownst to her, admittedly, but it was this conversation that inspired me to actually try it).  I chose roasted red peppers because in the handful of times I have gone to Sofra I have gotten this mezza as an appetizer and it makes me giddy, fresh pita chips and some of this dip and I’m set.  Give me a book and I’ll read, and munch, for a good long while (well until the dip is gone anyway).

The pita chips were merely an experiment to see if I could do it.  There was no recipe to go by, just an idea that if I was spending $2.50 per bag on pita chips wouldn’t it be better to make them myself?  I was right.  It was worth it.  They were delicious, and I was lucky I was able to save any pita chips and feta dip once BF tried them.  Both the chips and dip were so remarkably simple I’m surprised I hadn’t tried them sooner. Now I strongly recommend you try them too.

Kathy’s Pita Chips
Note: This recipe just deals with one “bag” of pitas but you can easily make more. It’s also a very fast process so don’t go wandering too far while the chips are baking.

2-3 pocket pitas, cut into triangles and separated (I get mine at Arax where they get fresh breads delivered daily but wherever you can find the pita go for it, Thomas’ is a decent nat’l brand)
olive oil
garlic, salt, rosemary, whatever you like… cinnamon and sugar would be very good

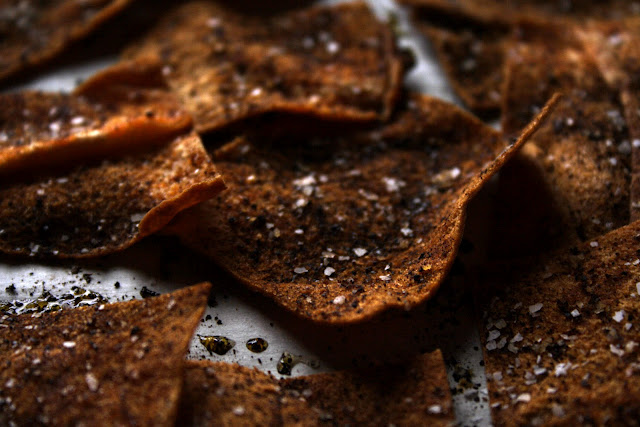
Preheat the oven to 425 degrees farenheit, make sure you let the oven come up to temperture – it is critical with these chips or else they’re wilty (trust me, I got impatient so I threw the pitas in the warming oven and was hugely disappointed in the results).  While the oven heats cut your pitas into good chip sizes, I recommend basically making a pizza with 8 slices so you have triangles… or an approximation of them.  layer the pita “chips” in a single layer on a parchment lined baking sheet and spray/brush/drizzle olive oil on the pitas.  I use a regular spray bottle I picked up at the grocery store for this and it gets the job done, it’s not nearly as good as having a Misto (hey family *nudgenudgewinkwink*) but it works in a pinch.  Sprinkle whatever spices you like on your chips, I like mine with salt, rosemary, and garlic powder but I think cinnamon and sugar would be awesome, though they wouldn’t go with the feta dip (maybe a slightly sweeter spiced cream cheese dip, like frosting, eh?).   Put the chips in the oven for 3-7minutes, checking them every minute or two for doneness.  DON’T WALK AWAY.  These go from done to burnt in literally 10 seconds, but are worth it.  When the chips are a nice light-medium brown pull them from the oven and let them cool on the pan, this should only take a couple minutes.  Then eat them with the following dip.  Unless you made the cinnamon-sugar ones, then you’re on your own 😛

Roasted Red-Pepper Feta Dip
Note:  I made this after eating it at Sofra.  It’s delicious.  If you don’t have a food processor get it, if only to make this dip, though I suppose it could be made in a blender.  If you were watching it.  Also, a note about feta – get it fresh, it tastes worlds better and is very easy to get in the Boston area – ANY middle eastern market will have it, I know of 4 places in Watertown that do.  Another feta note, I recommend using Bulgarian Sheep’s milk feta for this (it’s not as salty as the cow’s milk, maybe the brine is different?  Anyone know?) but if you can’t find that – rinse your cow’s milk feta to lose some of the saltiness, the second time I made this dip I used mostly cow’s milk and didn’t rinse which left me with overly salty dip which needed to be modified, a lot.

1/3-1/2 pound Bulgarian feta – this is more creamy than cows milk/domestic feta if you can get it.  It is the superior choice.
1-2 whole roasted red peppers, without skin and cored, in oil if you purchase them
1-2 Tbs Oil, from the peppers, or Olive oil
1-2 pieces of Roasted tomato, if you have them if not don’t worry but they lend great flavor
1/2 tsp garlic powder or 1 small clove fresh garlic, more if you want the garlic strong

Break the feta up into large-ish chunks (the size of a clove of garlic is good) and add them to the bowl of a food processor, incidentally I cannot recommend enough that you get a food processor – they are so wonderful from grated potatoes for latkes to this decadent dip they get the job down extraordinarily well.  Chop the roasted red pepper into 4-6 pieces enough so that the processor doesn’t hate you.  Add the pepper, roasted tomato, and garlic to the feta.  Turn the food processor on for 10-15 seconds, then check the consistency of the dip – is it stilla little chunky – whip it some more, is it still a little thick – add a bit of oil.  Add the oil in a slow drizzle while the food processor is on, much like making pesto, until the dip has reached the consistency you want – I like my dip a little stiff but soft enough to pick up with a pita chip, this is about 1 tbs – more if the feta is dry.  After mixing in the olive oil taste the dip – does it need salt, most likely no but if your feta is tangy it may, is it salty?  If you find your dip salty I was able to neutralize that fairly easily with some plain yogurt about 1/4 cup.  The important thing for this dip is that you keep trying it until the flavor is what you like, since you will be eating it and having to throw this sort of thing away is sad.  It will be orange, that’s ok it’s still delicious.  Eat it while, of course, playing Bananagrams with friends.

Squash and Apple Soup

I know that the winter squash obsession has passed for most people, but I’m still obsessed.  The sugars in those hardy winter squash are really coming into their own right now, making the squash really shine and work so well with whatever you want to add to it!  I like my squash soup with a fall fruit (in this case, apples) because I feel like it really fills out the flavors and lightens the heavier squash components.  I don’t roast my squash for soup; I feel like it takes too much time and I can just cook it down in water (or stock if you’ve got some laying around), keeping all of those delicious juices right in the soup pot.  I also feel like it leads to a smoother soup.  It also has the added bonus of NOT burning my hands, which is “handy” (yes, I went there – don’t judge me).

My dining companions (also known as BF and Big Sis) and I enjoyed this soup with sandwiches of baguette, salami, and brie, which were out of this world and were a fantastic accompaniment.

Squash soup isn’t one of those soups I remember eating as a child; it wasn’t even on my radar until I became obsessed with sunshine squash and soup a couple of years ago.  Such bright, cheerful little squash need to be soup.  They are vibrant and they have a fantastic flavor.  But I could be biased.  Also, I bought the one I used for this soup at an adorable honor system farm stand with a drop box for the money!  I love honor system stands in general, but one where I can stand in a little mud and pick out my favorite squash from the pile – those are the best.

Squash-Apple Soup
1 Medium Winter Squash (I like sunshine squash but butternut or hubbard will work too) (1 1/2-2 lb) peeled, cored, and cut into 1” cubes
1 Asian Pear (Pear-Apple) peeled, cored, and cut into 1” cubes
1 Macintosh Apple (Cortland will also work but a tart apple is key) peeled, cored, and cut into 1” cubes
1-2 tsp Garam Masala seasoning (to taste)
1/2 tsp salt
1/2 tsp fresh ground pepper
4-6 Cups Water or stock
Sour Cream/Creme Fraiche/Mascarpone Cheese/Greek Yogurt (for garnish, optional)

Put squash and apples into a large pot and add just enough water/stock until it comes to the top of the squash/apples but doesn’t cover them.  Heat the pan over med-low heat and let it simmer, stirring occassionally until the squash is soft (15-20 mins).  When the squash has begun to fall apart, add the spices and stir well to fully incorporate them.  Taste the soup – add additional spices as you like.  Allow the soup to simmer for another 10-15 minutes for the flavors to come together.  You can serve the soup chunky if you like texture, or you can use an immersion blender/food processor/blender to make it velvety smooth.  Serve in large bowls with a dollop of your cream of choice (my favorite is Greek yogurt, preferably Cabot).

Simple Lentil Chili

I’ve been posting a lot of heavy recipes recently: breads (like this one and this one), cream soups (like this one), and cookies.  And I know that it doesn’t make those New Year’s Resolutions that everyone is still trying to hold onto any easier, especially now that their shininess has worn off (my New Year’s resolution is to blog more, so far I have maintained my average of one post per week. Resolution fail).  But this recipe should help to get you back on the “healthy eating” bandwagon with its lack of added fat, and if you make it with vegetarian stock, it’s vegan!

I like cold weather because it leaves me with an urge for soups, stews, and chili (so. much. chili.)  which is great, BF loves all of these things – for the most part they fill us up quite well and are inexpensive, not to mention perfect snuggle-up eats.  Winter in New England always makes me wonder what it would be like to be a hermit permanantly; cozying up to my stove for the better part of the day and whiling away my evenings watching tv/playing video games with BF.  Wouldn’t that be the life?  Instead, I work a day job and have to fight icy sidewalks when I walk to and from work every day hoping that today isn’t going to be the day I have to walk to work in a blizzard (which has happened twice so far this winter).  This chili is an ode to staying warm after walking in a snowstorm to get in the door and collapse relieved on the floor in a puddle of snow boots and wet coats.  This is the reason I am excited to go home and eat.

There aren’t any pictures for this post (not from lack of trying mind you).  I’ve made this chili twice in the past two weeks and each time have been so excited about eating it I forgot to take pictures.  So there you go.  It’s kind of unpretty colors anyway, so no loss!  But it’s delicious, hearty and warming without any of that eating-lots-of-butter guilt; also it’s lentils so it’s filling and fast!

Simple Lentil Chili
Adapted (pretty heavily) from the Whole Foods website
Note: The WF version of this soup is vegetarian and wonderfully healthy, but I thought it was pretty bland so I added a bunch of extra spices (see below).  Also, if your stock is not homemade it may be pretty salty already so taste your chili before adding salt.

1 bag brown lentils (the dried ones that are in abundance at the supermarket)
1 onion, chopped medium-fine
1 sweet red pepper, chopped medium fine
3-4 cloves of garlic, minced (more if you like things garlic-y)
2 cans of diced tomatoes (I really like the fire-roasted ones!)
8 cups of broth or stock (I used chicken because I had it on hand, but whatever you have will work well)
2-3 Tbs Chili powder, to taste
1-2 tsp cumin
1-2 tsp worcestershire sauce (optional)
1/2 tsp salt, or more to taste or soy sauce (trust me)

Bring 1 cup of stock or broth to a boil over medium-high heat and add the onions and garlic.  Cook them in the broth until the onions are translucent; about 3 minutes.  Add the red pepper and cook it until tender, another minute or so.  Add the cans of tomatoes, the rest of the broth, and the spices (chili powder, cumin, and worcestershire sauce) and bring the whole pot to a low boil (another 5-7 minutes), stirring occasionally so the vegetables don’t stick.  Once your broth has reached a steady boil, add the lentils, stir to incorporate, and cover the pot.  Turn the heat down to medium low or low and simmer the whole thing, stirring about three times until the lentils are tender and plumped up (20-25 mins).  Try the chili now; if it needs some salt add a couple dashes of soy sauce or 1/4 tsp of salt.  If you need salt allow the soup to simmer for another 5-10 mins for the flavors to merge.  If you didn’t add salt take the chili off the heat.  Serve this chili topped with great gobs of sour cream, a sprinkling of chopped cilantro (if you like it), and some grated cheddar cheese.  It is happy in a bowl.  Real life.  Also, this dish is marvelously low-fat; well, that is, if you use low fat sour cream and cheese (though I never get low fat anything!).