Grapefruit Olive Oil Cake: A Sweet Bitter Cake for a Sweet Bitter Feeling.

grapefruitcake-1
Some days are just bad. You wake up feeling blue and it continues until you finally stop moping and DO SOMETHING about it. I feel that way a lot recently – looking for work is a challenging and depressing venture with a lot of grasping straws and missed opportunities, or worse just not being good enough. That’s how I feel most of the time, not good enough. I keep hoping that something will change with every job application I submit but with every rejection (and there are a lot) I just feel overwhelmed. I feel like finding full time work that I find meaningful isn’t going to happen. So I retire to my kitchen and I bake. I listen to music and empty my mind a bit. The repetition of measuring, mixing, kneading, frosting – whatever is soothing and comforting. Like cuddling up to a good book, I know that kitchen time can make me feel better. So I try to force myself into the kitchen to bake, or cook, or just… be.

grapefruitcake-2

This cake is one of those I need to bake cakes. It got me into the kitchen and out of my head – singing along to some good music and methodically measuring out ingredients. I was soothed by the repetition – also the leftover grapefruit syrup, which made a delicious cocktail. I was calmed by the familiarity. Recently I’ve been toying with the idea of grad school, but, honestly, I was not such a great student in college – my grades will hinder my grad school chances. How do I resolve that? I’ve been thinking going back to school for another BA, this was met by vehement and loud nos from all my grad school graduate friends. But I’m at a loss. I just feel not good enough for anything. Maybe I’ve lost perspective. Or maybe I should just eat more cake.

grapefruitcake-3

I should eat more of this cake. It’s not too sweet so you can eat a lot of it without falling into a sugar coma and with the grapefruit comes a subtle tang of bitterness that makes it a standout in really decadent ways. But – there’s no butter, it’s an olive oil cake and the citrus in it is only enhanced by the fruity oil. It fits exactly what I’m looking for in a cake right now – it’s unassuming and it delivers a lovely punch. It is a cake for tea time or dessert or breakfast or elevensies (the dictionary for WordPress tells me this is not a word. WordPress you are WRONG). Make it. Eat it. Indulge in it. But make extra of the grapefruit syrup and make a gin cocktail with it. I’ll come help you drink it.

grapefruitcake-4

I actually didn’t change a thing from Joanne’s recipe over on her blog, Eats Well With Others (she waited for her cake to cool completely before glazing, I didn’t – my time was tight). So just follow that. Then send me some of the cake. I could use a touch of sweet in my life.

BiBimBap with Ssamjang Braised Lamb

Lambbibimbap1This past winter I had a love affair with short grain brown rice (preferably mixed with soy sauce and sriracha, topped with an over easy egg and drizzled with sesame oil) – in my look for work, home for breakfast state, I was always looking for something quick and easy to make for breakfast.  Inevitably I ended up with over easy eggs on toast or whip it up quick oatmeal, but one day I decided to make myself some rice – it was less work to put rice in the rice cooker than it was to make oatmeal, and I would love the results.

lambbibimbap2

This is where my love of Bibimbap sort of originated, this constant rice mixed with soy sauce and sriracha for breakfast topped with a gently fried egg. To make this into bibimbap I would have to change some ingredients and bulk it up, but essentially it was the same thing. GENIUS. So when the American Lamb Board and Boston Chefs emailed me and asked me to make a lamb dish for the Boston Lamb Pro-Am my mind immediately went to Bibimbap, and some delicious slow braised lamb I made this past fall.

lambbibimbap3 lambbibimbap4 
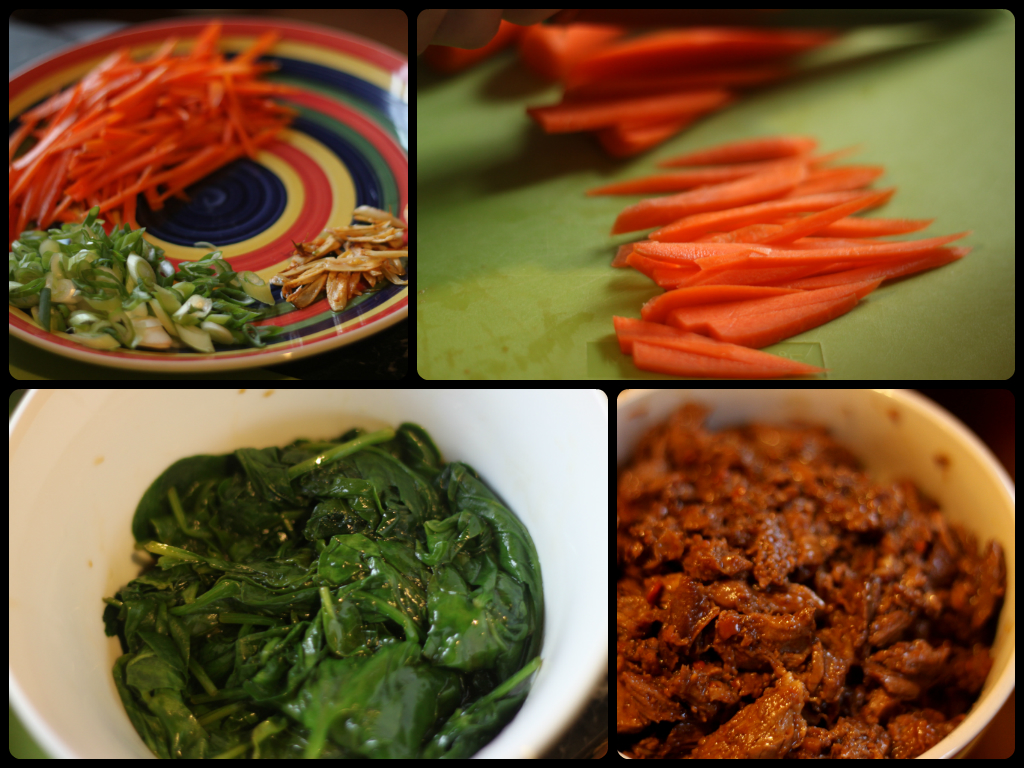
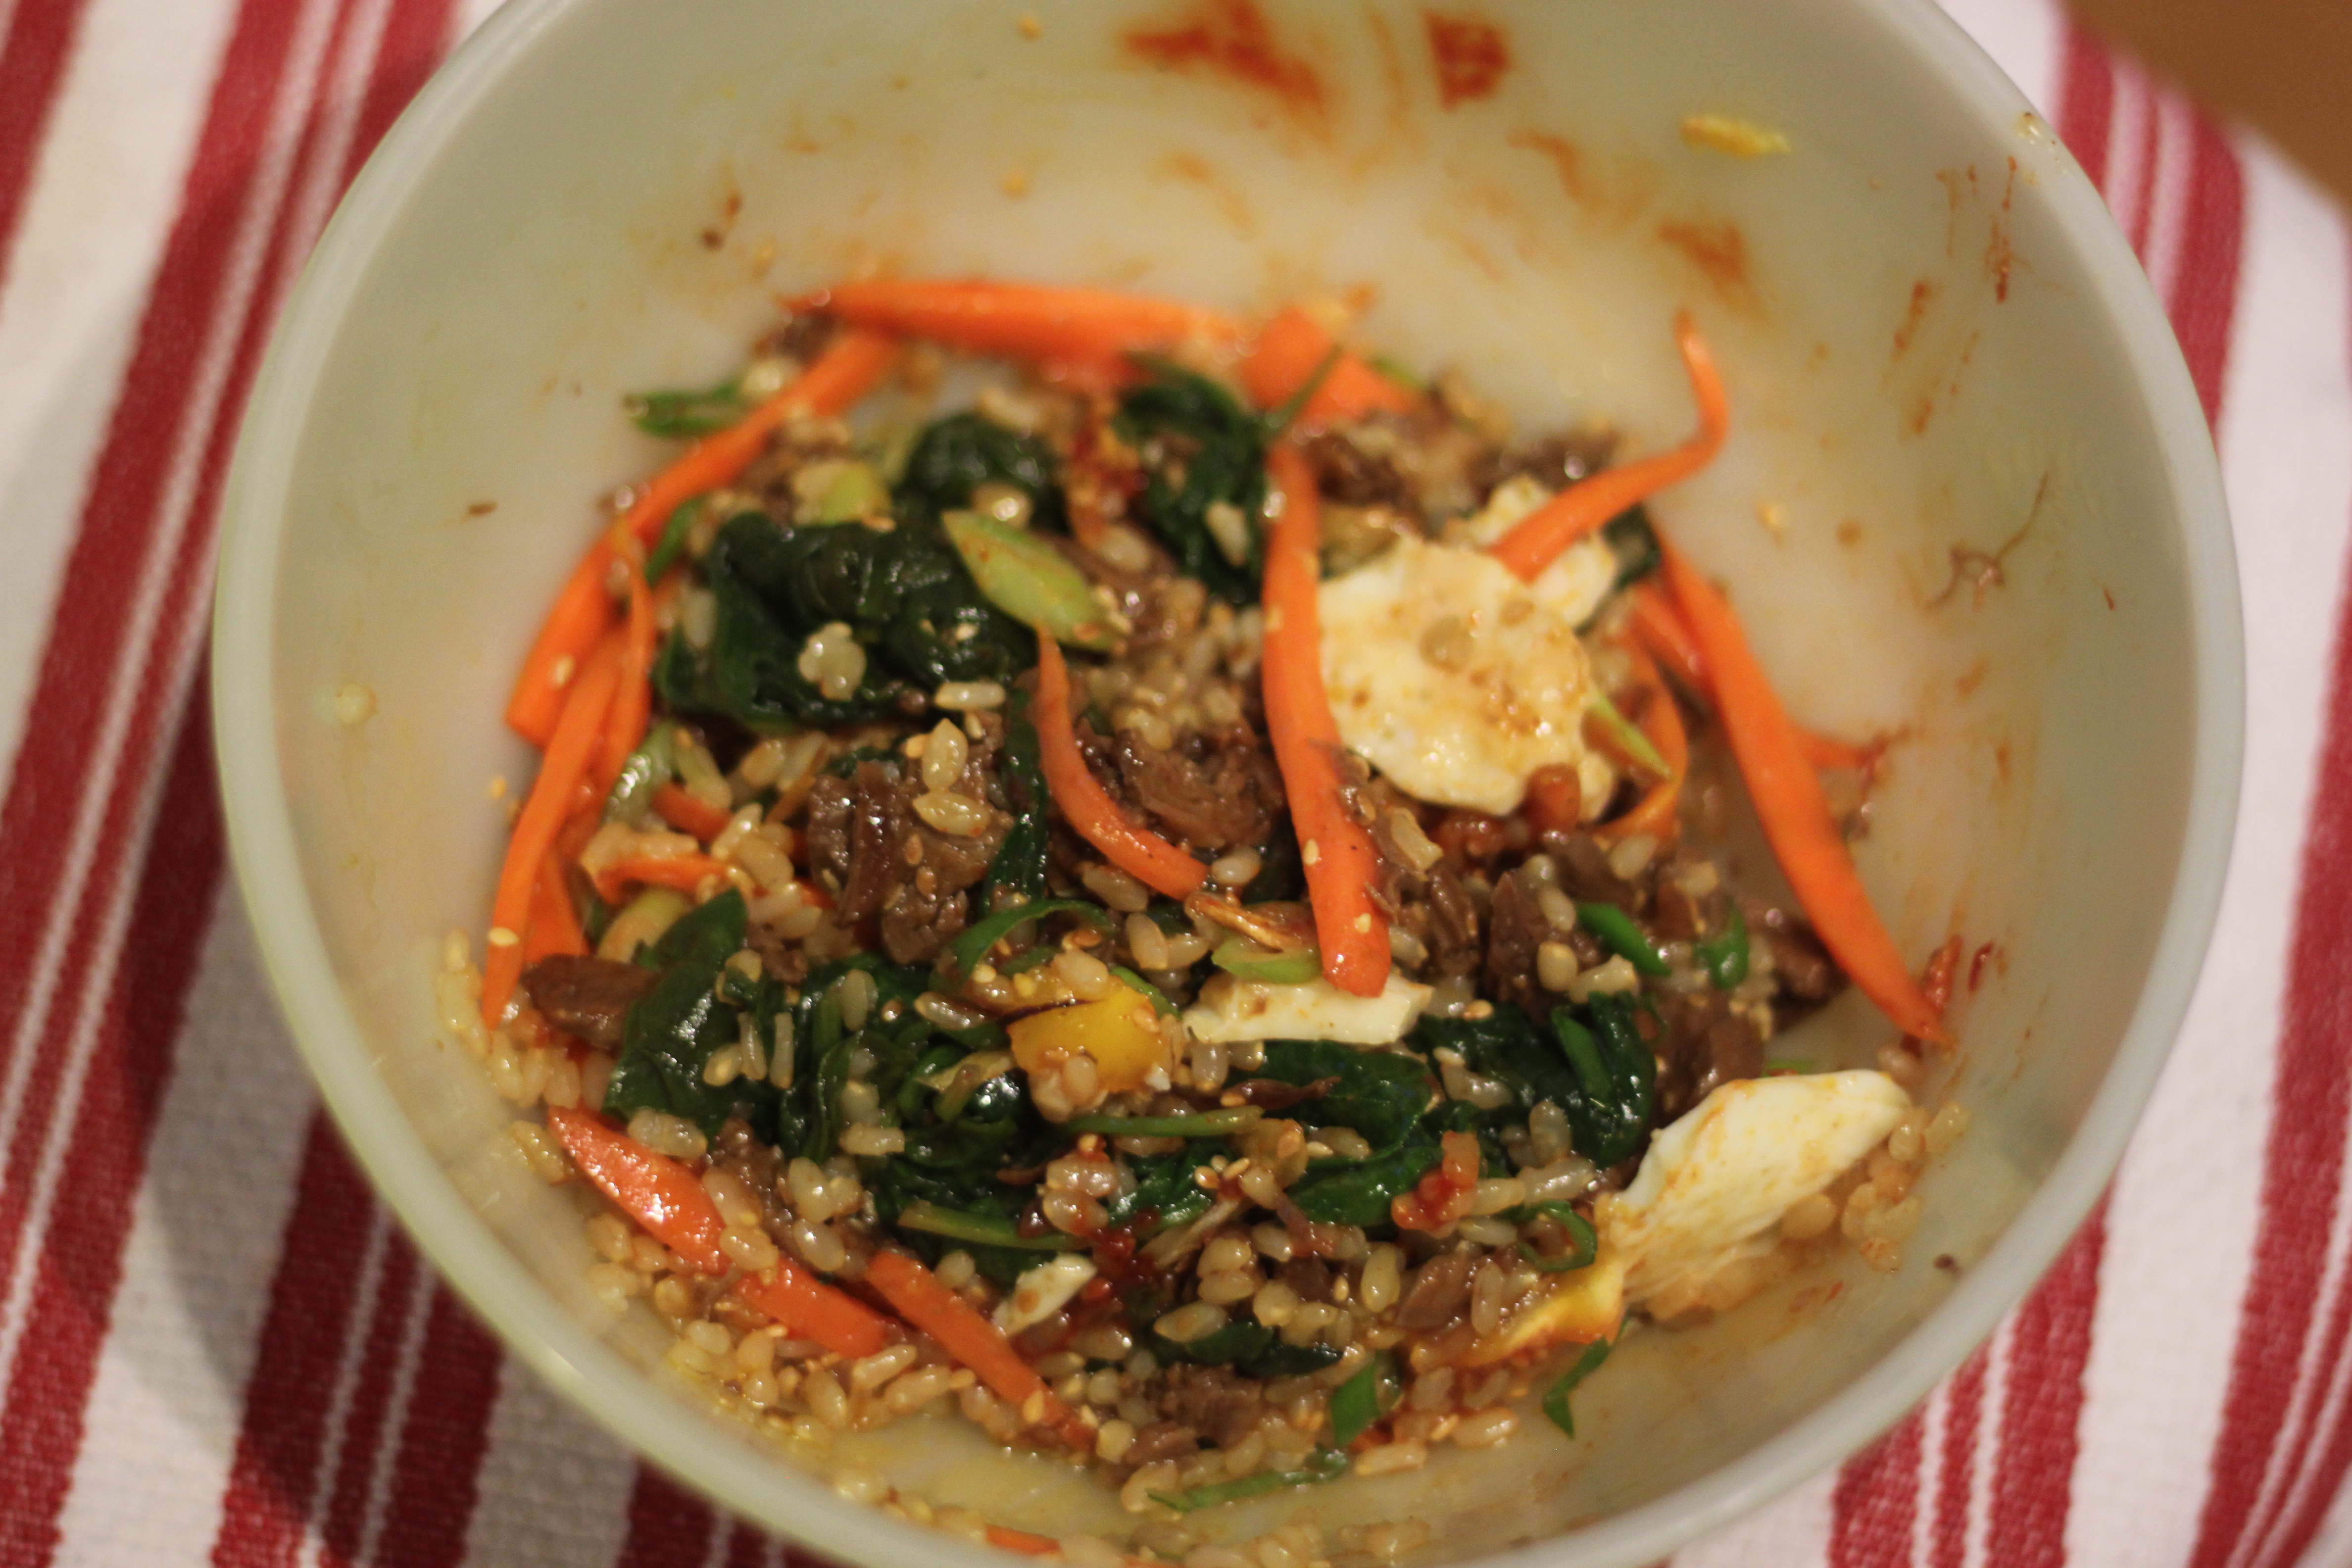
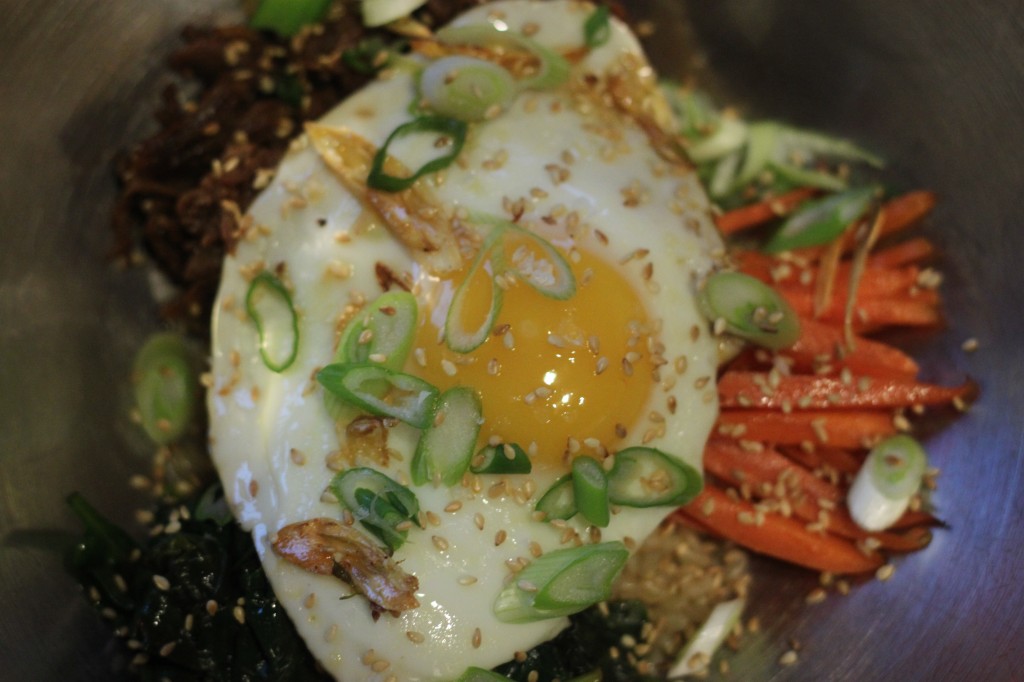
Bibimbap literally means mixed rice.  It’s a Korean dish that is rice, meat, spinach, sprouts (I didn’t have those here), carrots, gochujang, and a gently fried egg. I love it. This is one of those dishes that’s going to enter our weekly rotation of meals – it cooks up fast and can easily be tailored to fit one person’s tastes.
lambbibimbap5 If you want to guarantee you can come to see the bloggers (and me, with any luck) and chefs at Lamb Pro-Am grab your tickets today here!
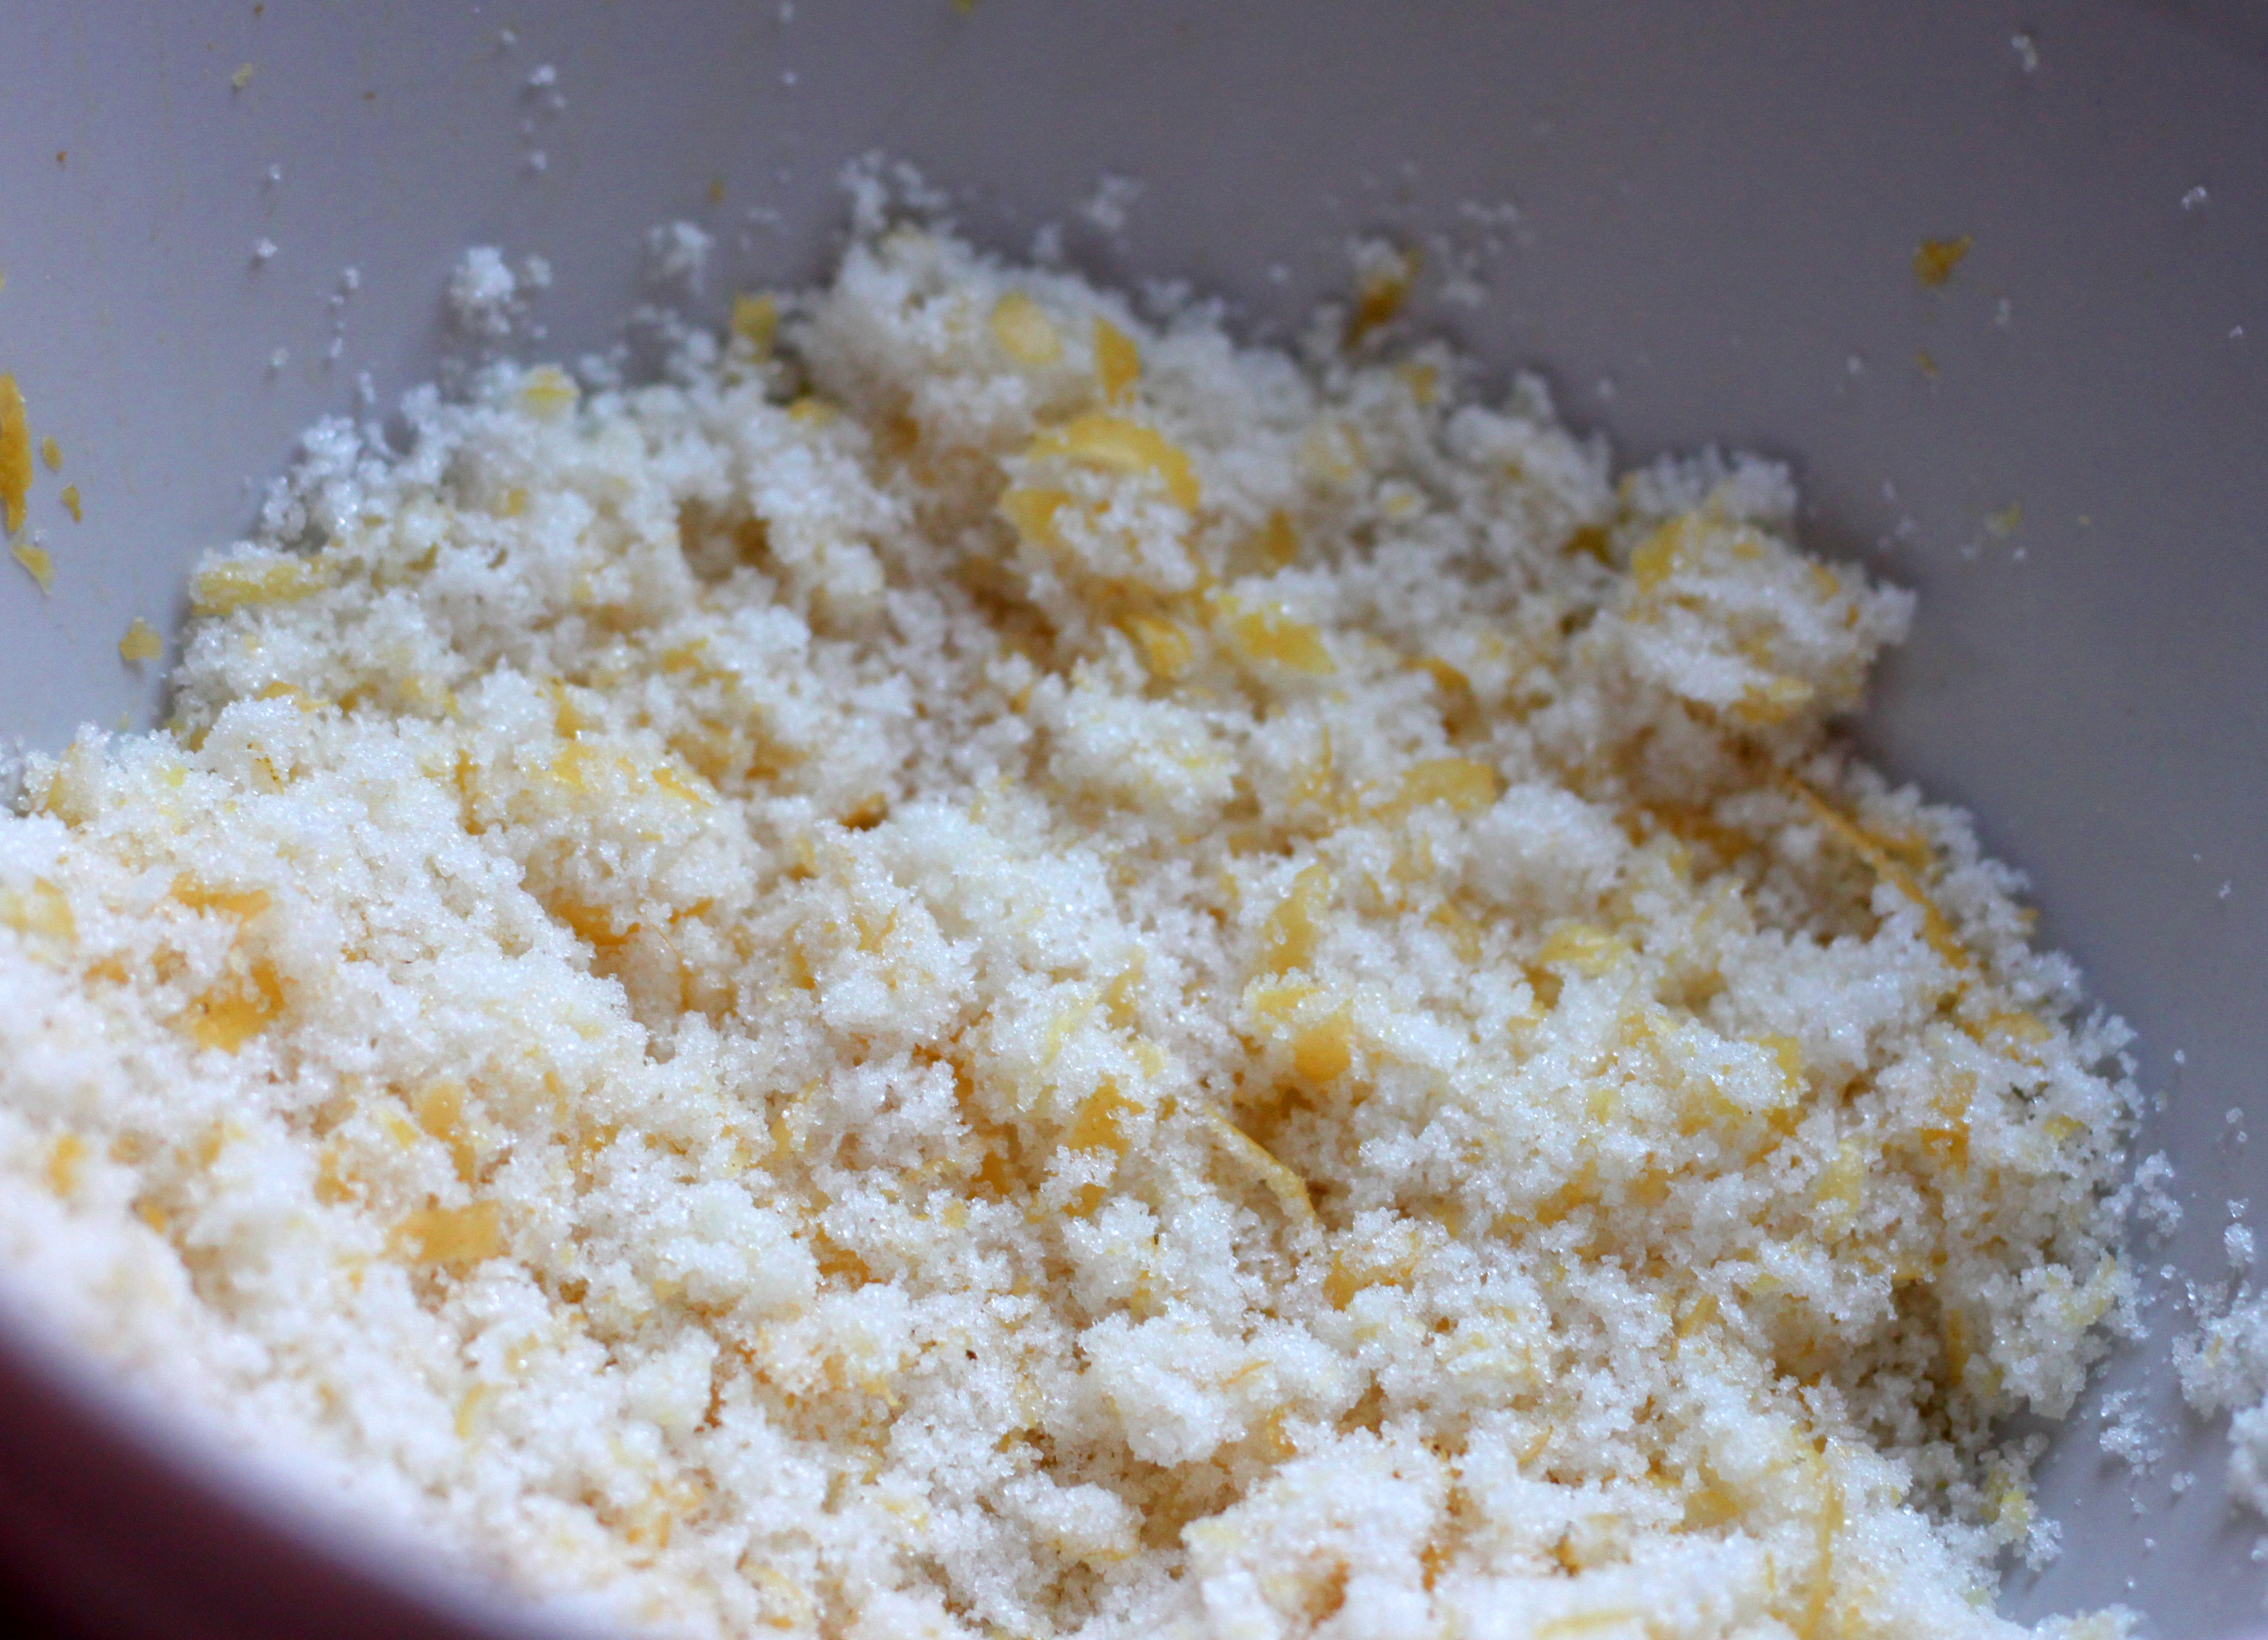
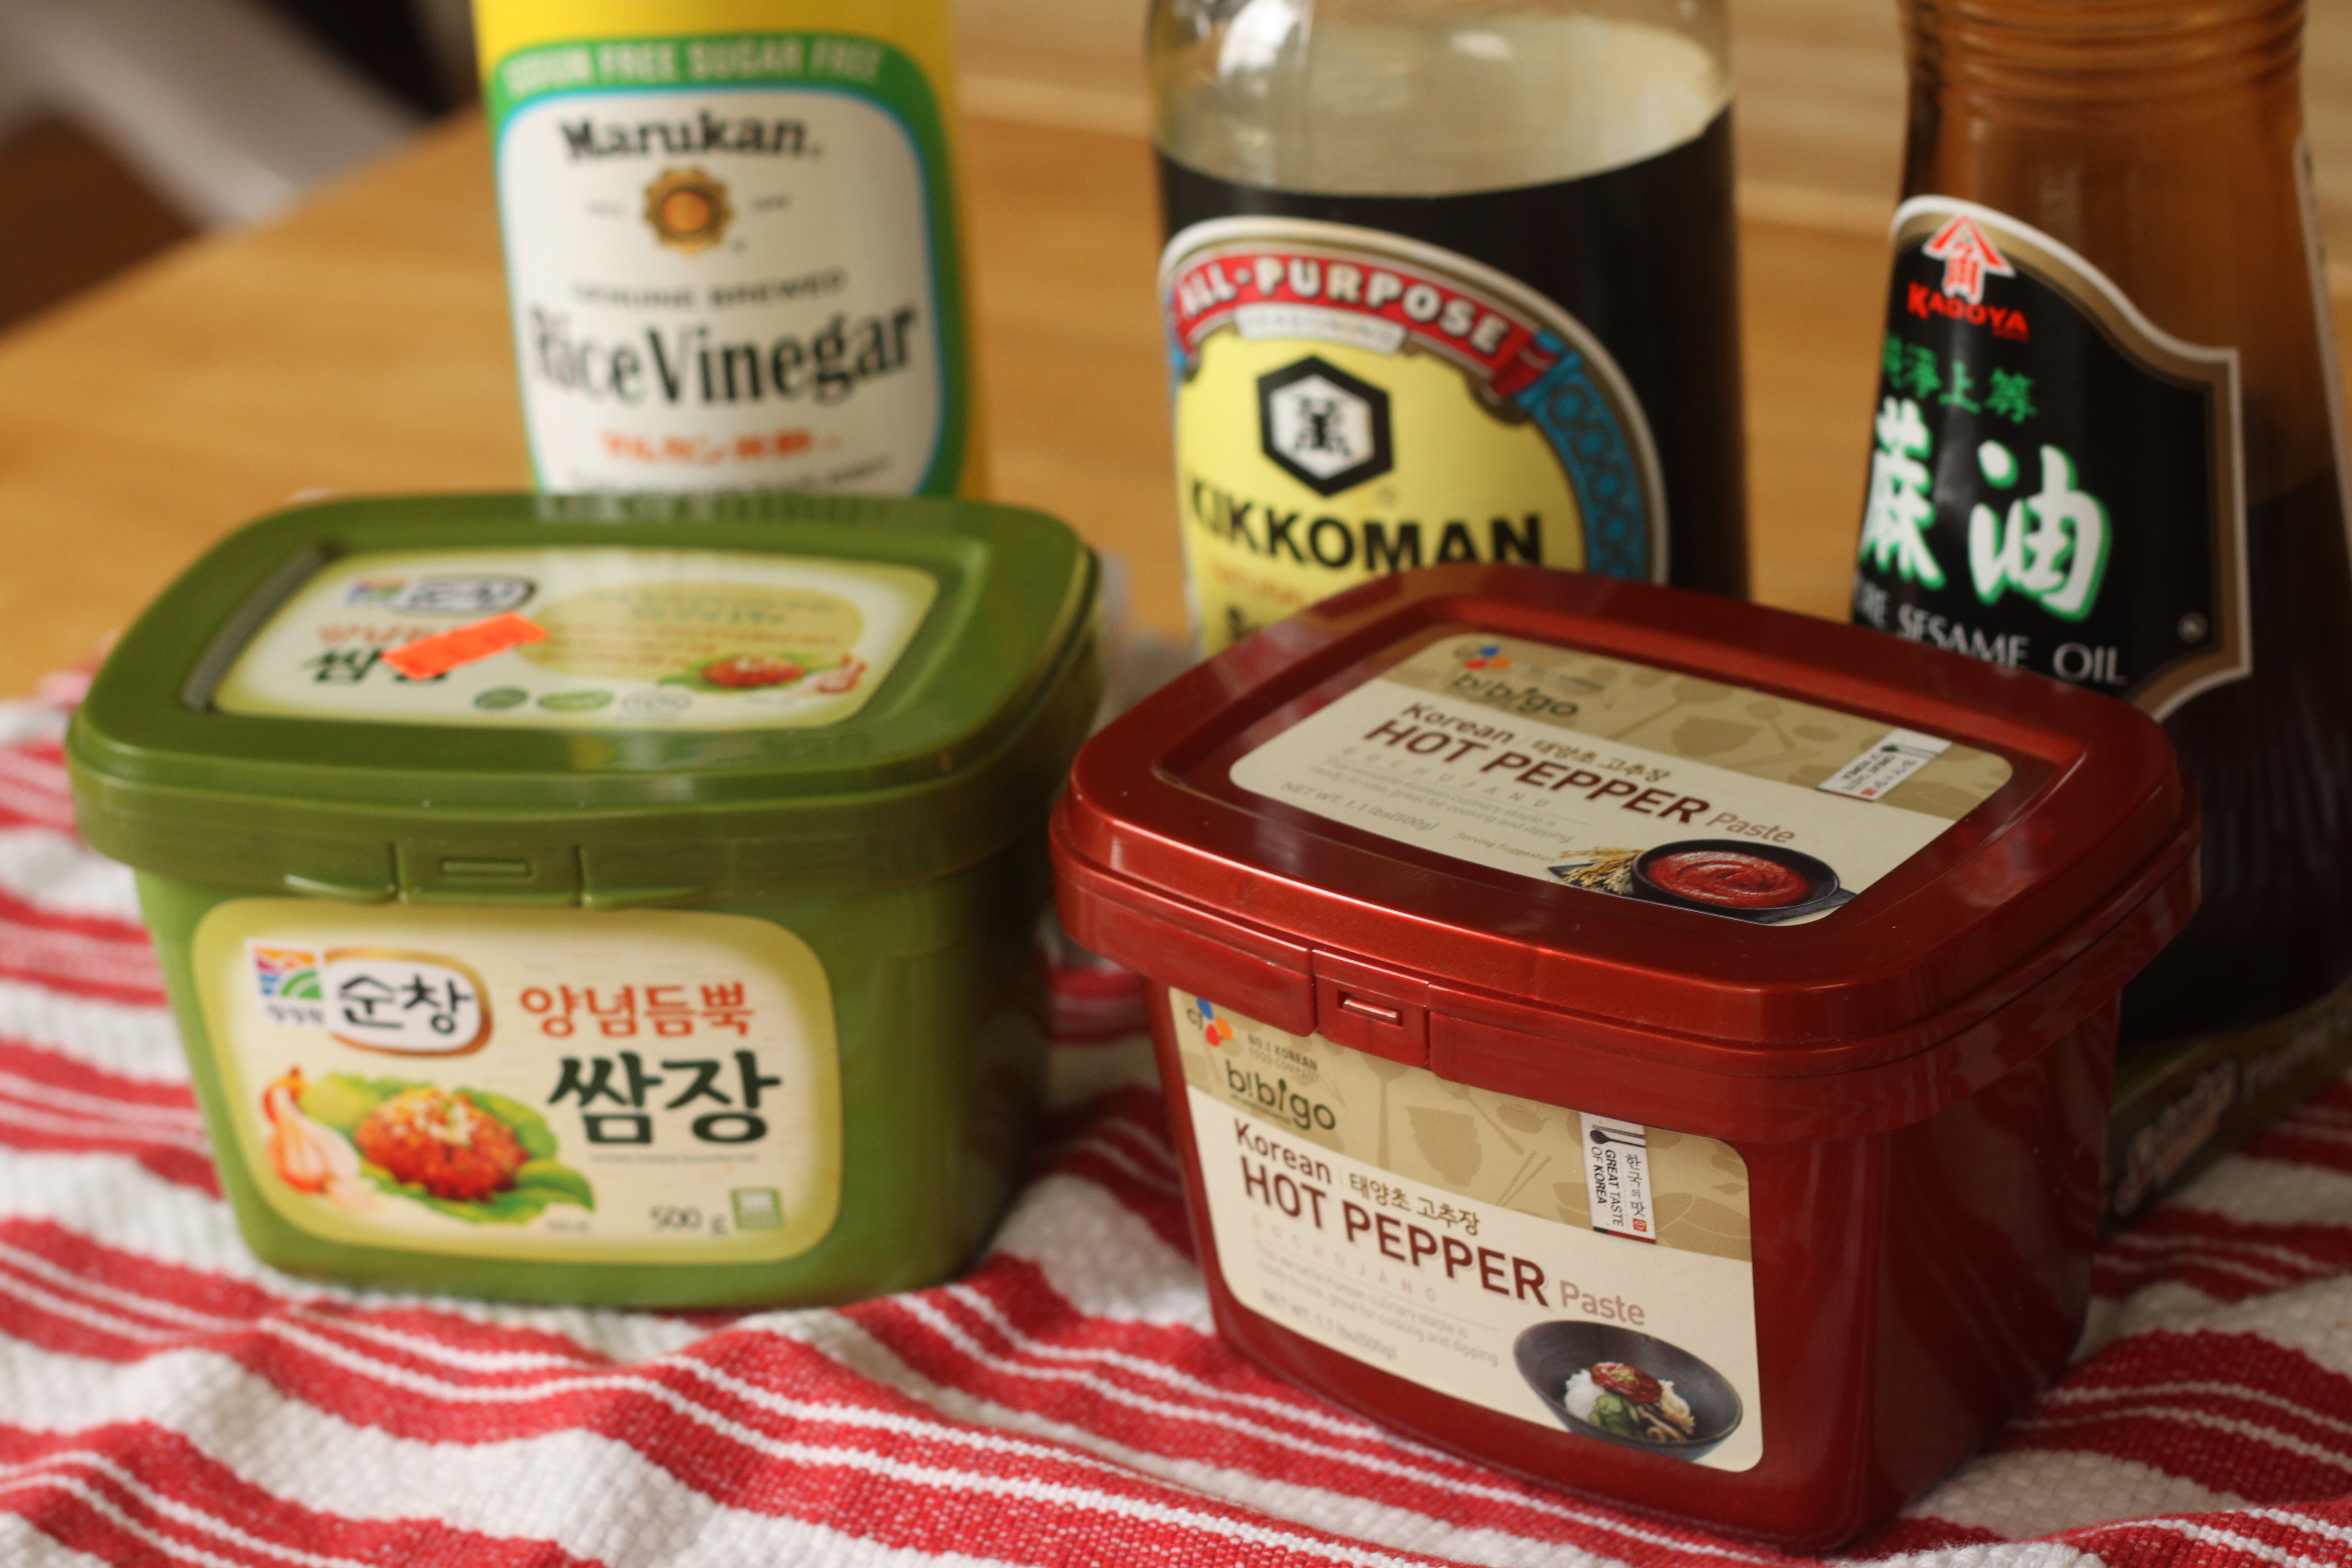
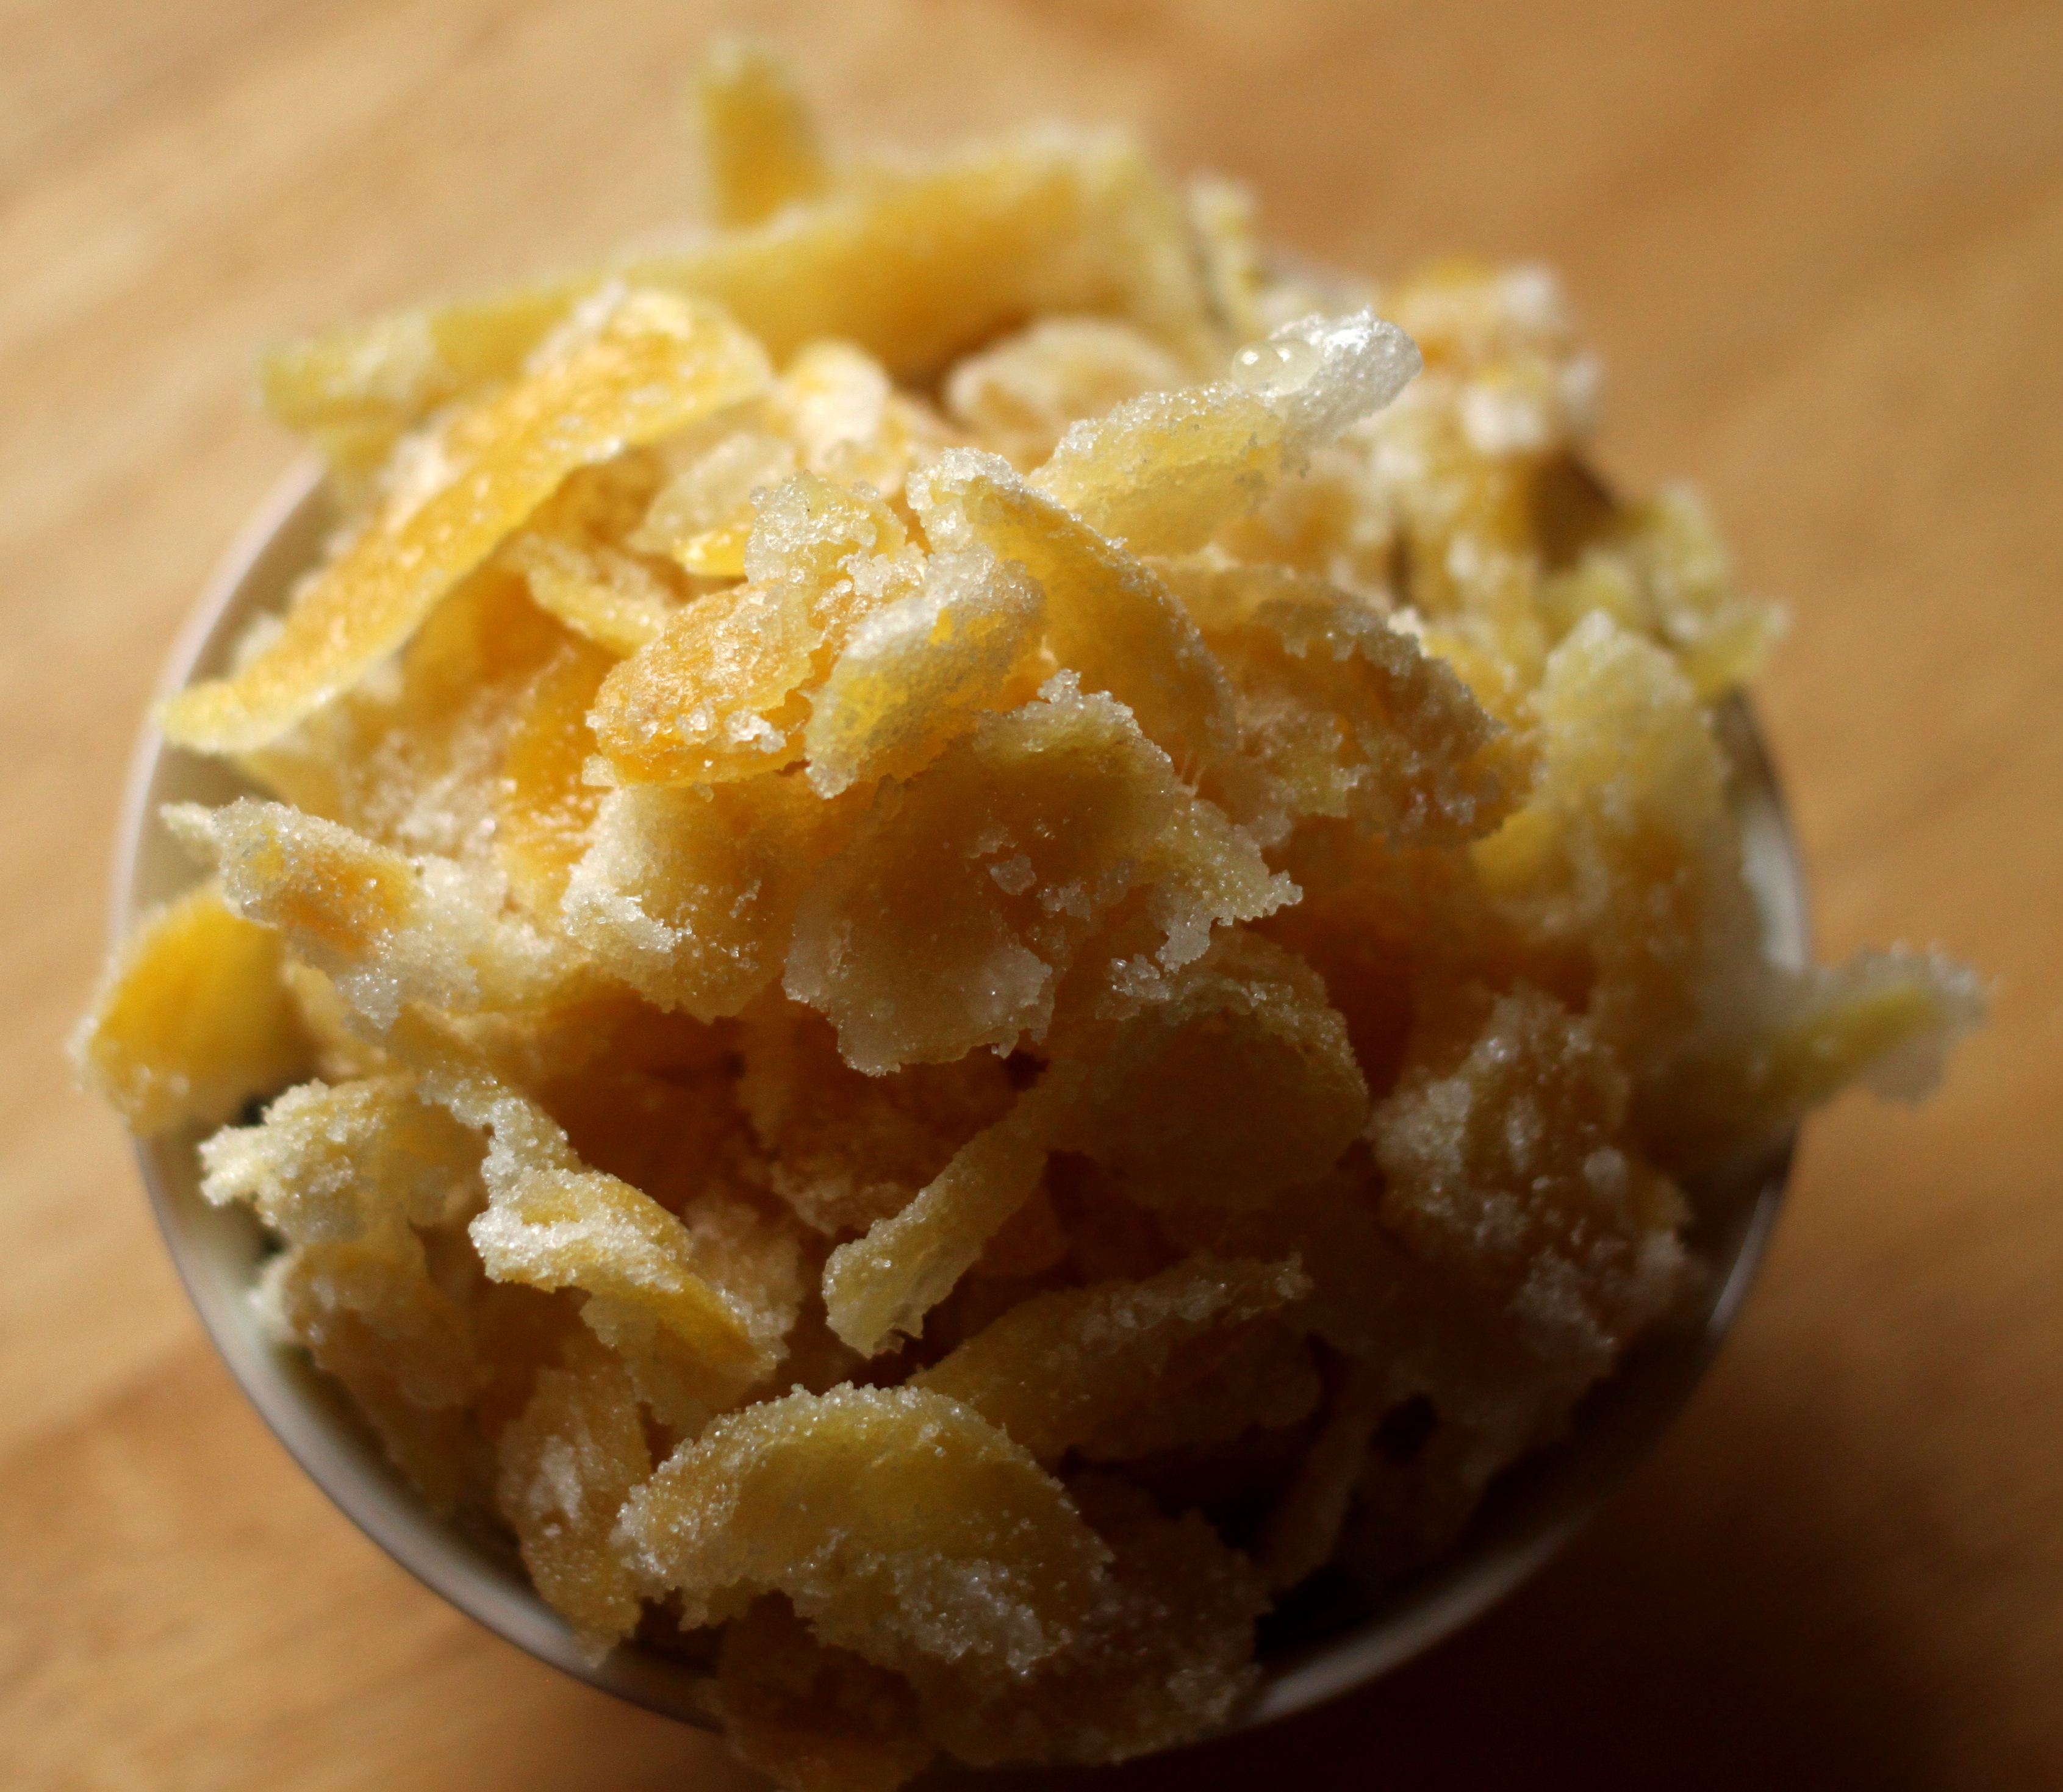
The Condiments

The Condiments

BiBimBap with Ssamjang Braised Lamb
Note: This is all my recipe in the sense that I didn’t need to follow a recipe for this dish, but Bibimbap is a family meal for most, so trying to follow a recipe for it is like trying to follow a recipe for pasta sauce – you make it to your taste. I used this recipe, sort of, to understand better what I needed to put in it. Also, my big sister was a huge help.

Serves 4, each bowl of Bibimbap is a single serving

For the lamb:

  • 2 lbs Lamb, cut into 4 fist sized pieces
  • 3-4 Tbs Fermented Soybean Paste, Ssamjang*
  • 2-3 Tbs toasted sesame oil*
  • Preheat your oven to 300.
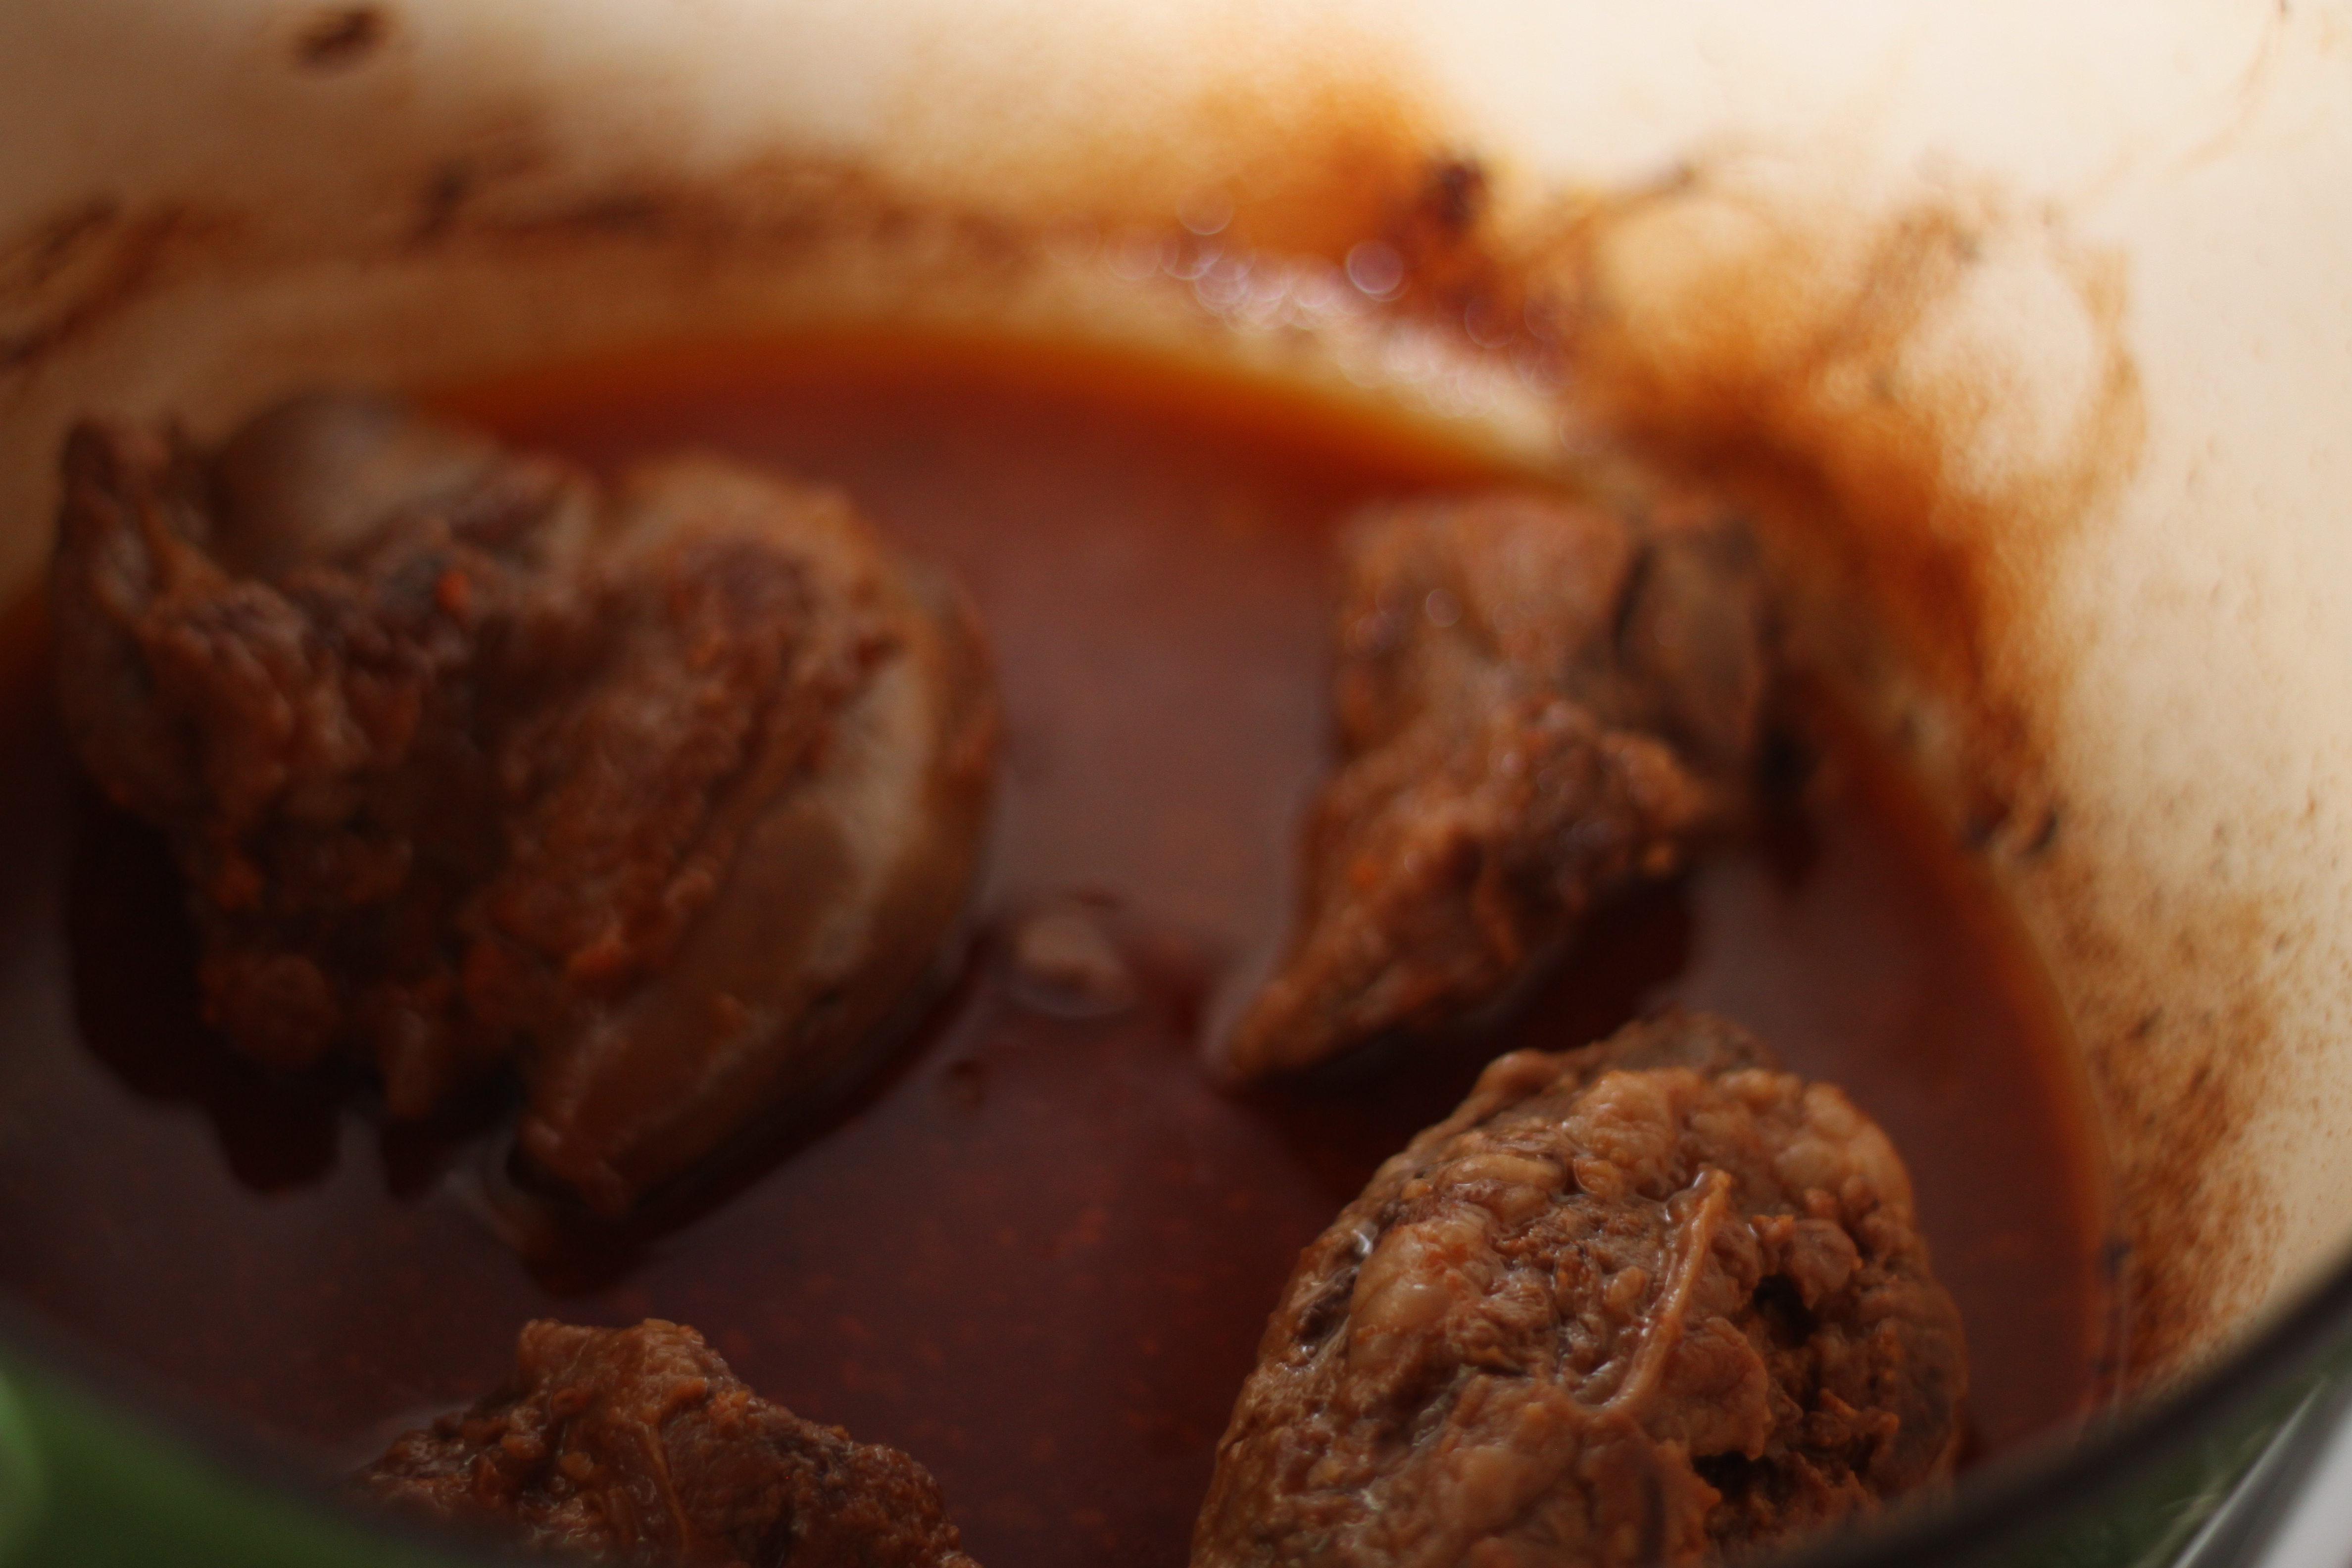
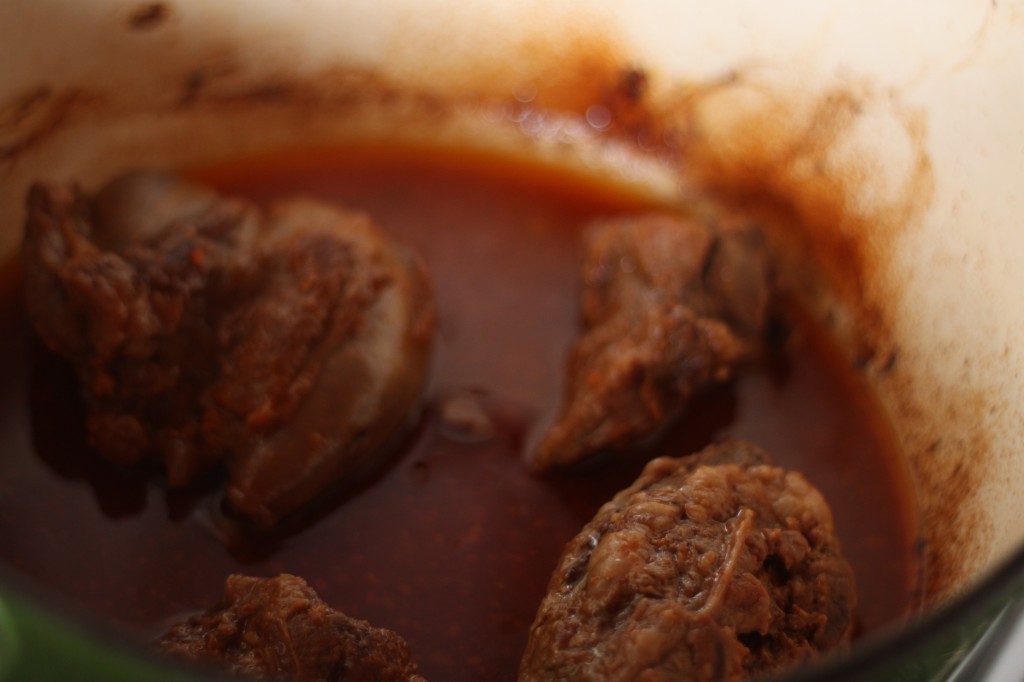
  • Rub the ssamjang evenly over the lamb pieces, make sure to get all the nooks and crannies in the meat. It should look almost orange from the ssamjang. Place it in a dutch oven. drizzle the lamb with the sesame oil.
  • Cook the lamb for about 2 hours, turning occasionally so that it can sit in the juices as it cooks. Feel free to reapply ssamjang as needed. Your kitchen should smell awesome at this point.
  • Remove the lamb from the oven when it’s done, it should be light brown throughout and fork tender. Allow the meat to cool for ten minutes. WHen you remove the lamb form the dutch oven reserve the liquid in the dutch oven.
  • Shred the lamb into bite size pieces – I accomplished this by cutting against the grain to make this slices then chopped them coarsely, and I used a fork. These two methods together gave a me a wonderfully tender pulled lamb.
  • Skim some of the fat off the top of the juice in the pan – we’ll use this for sauteing later.
  • Bring the juices in the pan up to a simmer over medium high heat, whisking constantly. After the pan juice simmers add the lamb and gently stir to coat. Set it aside.

FOr the Bibimbap:

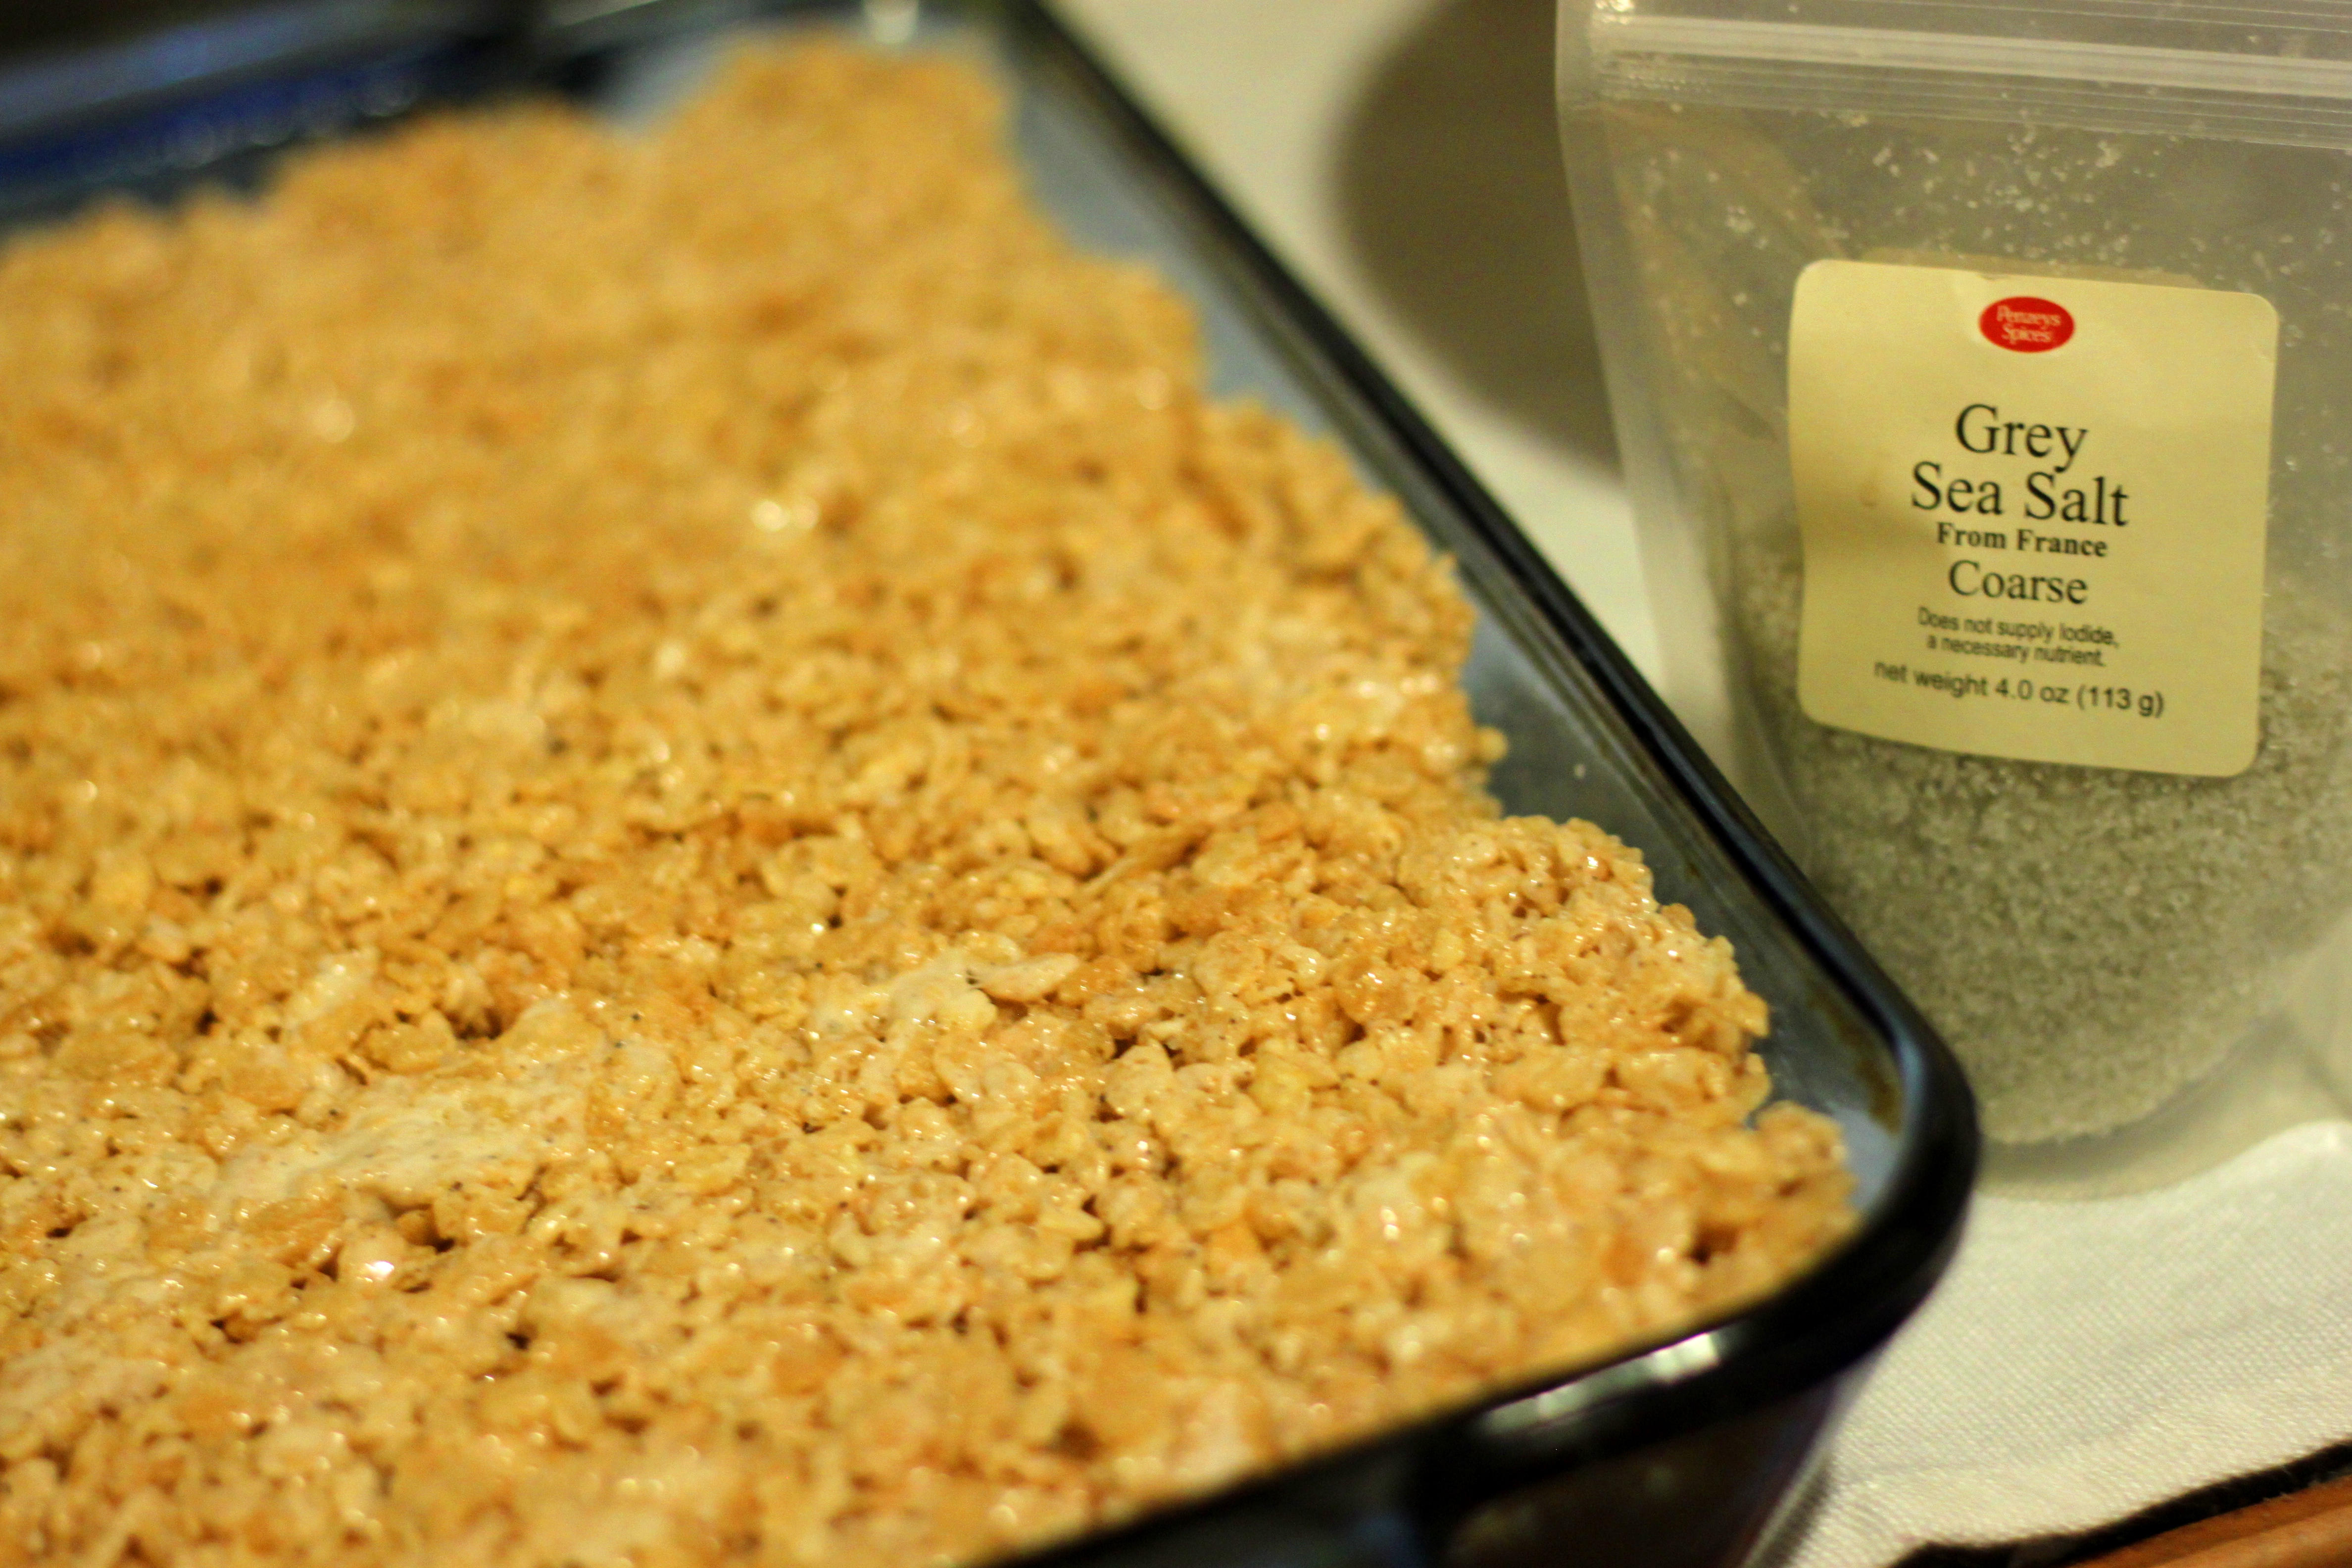
  • 1 1/2 cups cooked short grain brown rice, or whatever you have – I like the brown
  • 4-6 oz spinach, just barely steamed
  • 1 tbs soy sauce*
  • 1 tbs toasted sesame oil
  • 1 tsp rice vinegar
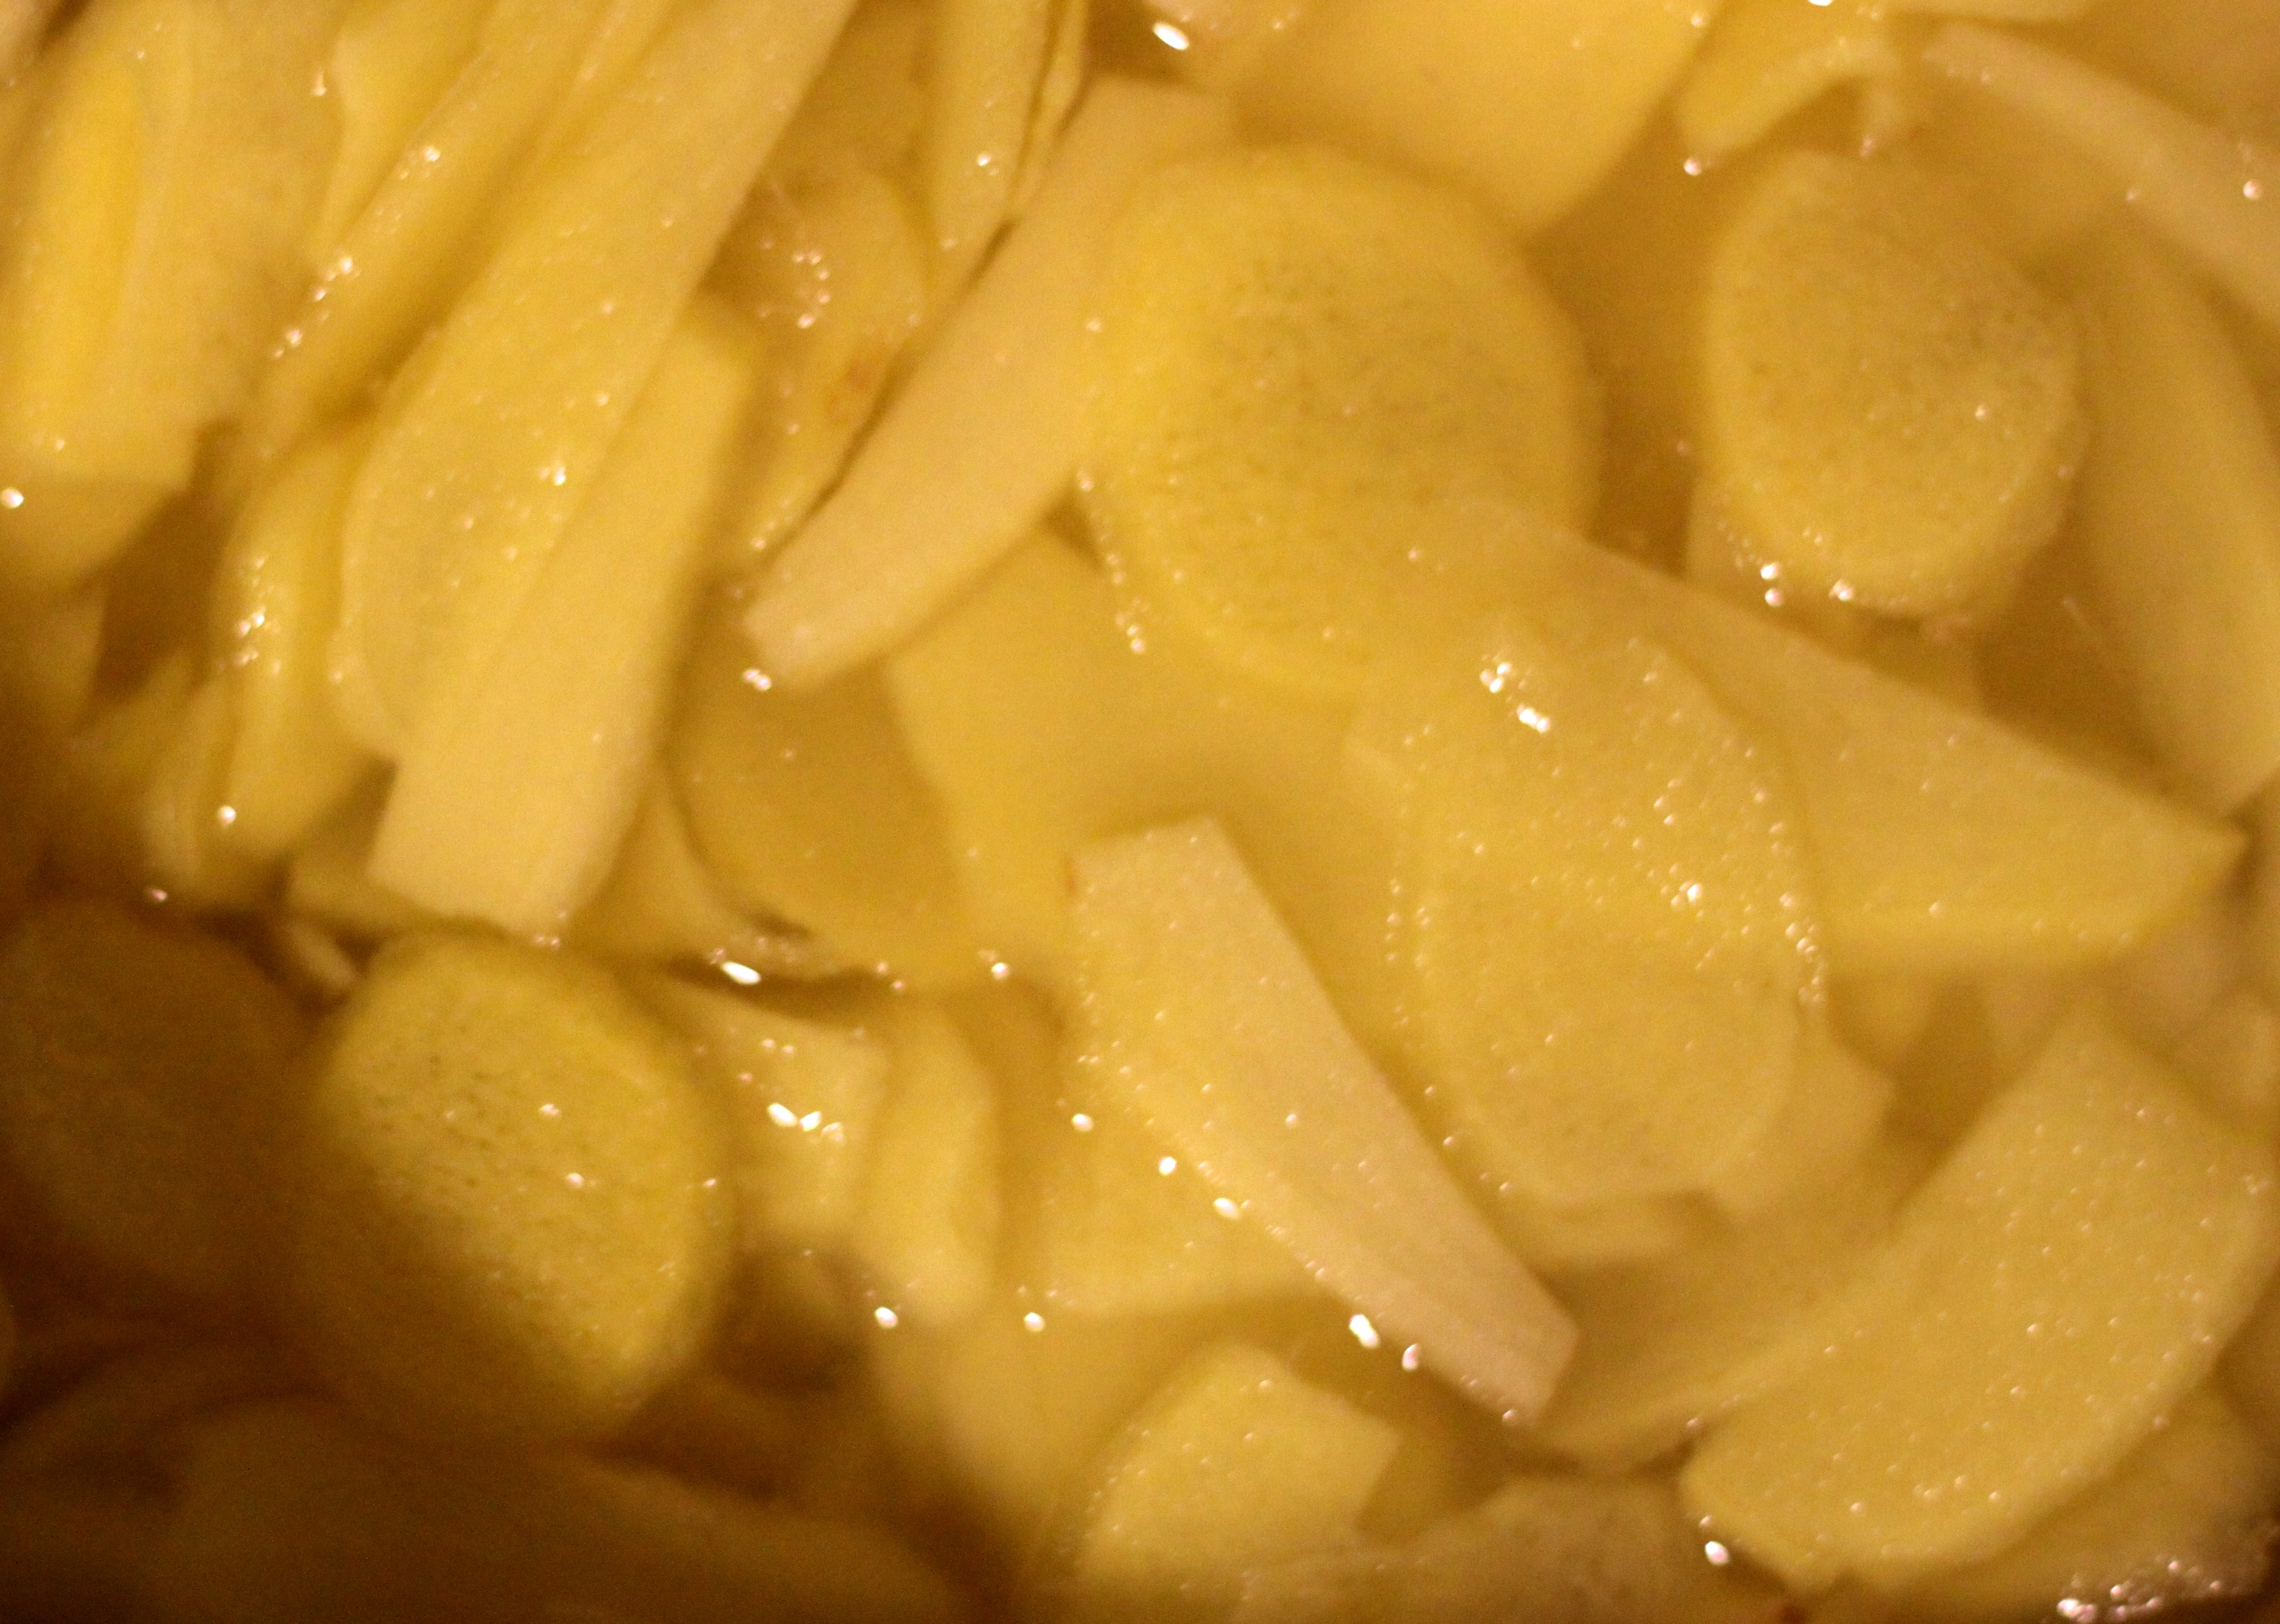
  • 2-3 carrots, cut into matchsticks
  • 2-4 cloves of garlic, sliced thinly (optional)
  • 4 eggs (worried about eating over easy eggs? Grab some pasteurized ones, I like SafeEggs)
  • toasted sesame seeds
  • scallions, thinly sliced
  • toasted sesame oil
  • Gochujang*, Red Pepper Paste
  • In a medium bowl combine the spinach, soy sauce, sesame oil, and rice vinegar. Toss so that the spinach is evenly coated.
  • Saute the carrot sticks over medium high heat in some of the fat you reserved from the lamb, if you don’t have that sesame oil works just fine here. You want the carrots to be soft but still a little crunchy – no more than a minute of sauteing.
  • Crisp the garlic in some oil – you want it to be crunchy and a bit fried. It’s delicious this way and really does make the bibimbap better.
  • Fry your eggs. To fry eggs for bibimbap the eggs need to be over easy and not brown on the bottoms, it’s much easier to break the egg up when the bottoms aren’t browned. To get this gently cooked egg cook the egg on a pan that is no higher than medium. Once the egg has set put a cover over it – this will help finish the egg without having to overcook it.
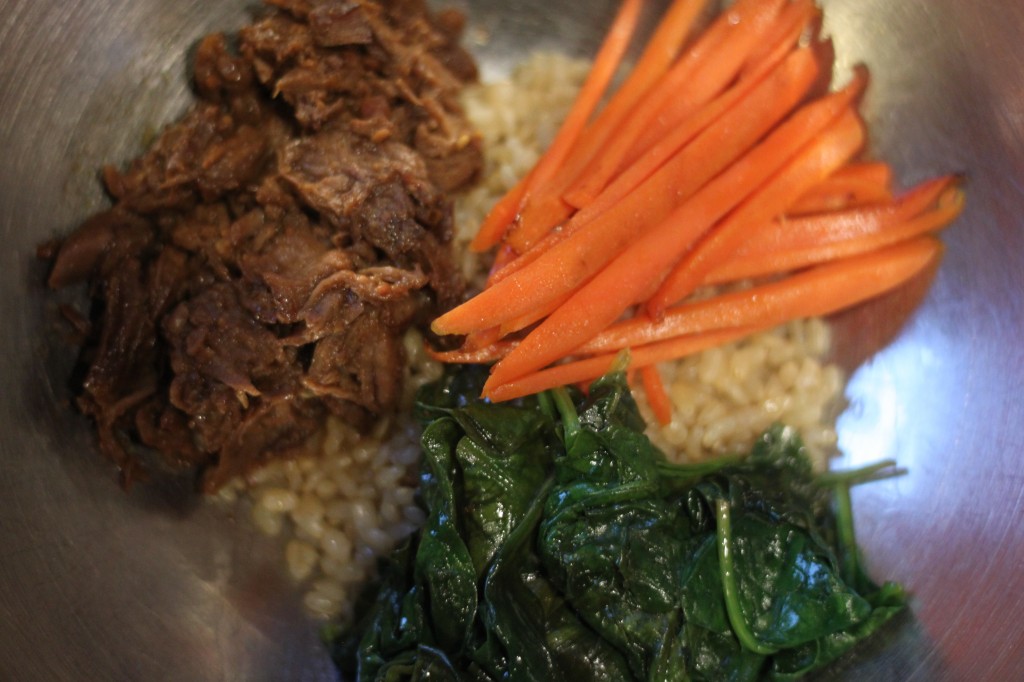
  • Assemble your bibimbap in a large bowl.
  • Start by making a mound of rice in the bowl – it doesn’t have to be huge, 1/2 cup is PLENTY of rice here.
  • Beginning at 12 o’clock add the marinated spinach, shredded lamb, and carrots to the bowl – it should look similar to the photo above.
  • Place your gently fried egg on top of the who shebang.
  • Sprinkle the fried garlic slices, sesame seeds, and scallions over the whole thing. Add one tsp of gochujang in a dallop (more if you like things spicy). Gently drizzle sesame oil over the whole thing.
  • Mix it all together, making sure to break up the egg well.
  • Deee-licious.

*You can find gochujang and ssamjang in the Asian foods section of most supermarkets, they are becoming increasingly common.
*Most supermarkets have soy sauce, go for a good brand here though, you don’t want your bibimbap to suffer because you went for the lame soy sauce, I really like Kikkoman.
*Sesame oil is probably the most hard to find item here; I tend to only go with brands I trust, this one is Kadoya. You should probably hunt it down at an Asian market if possible. Don’t get the supermarket stuff – it’s awful and you will never want to try Korean food again, and that will be so sad for your tastebuds.

I was given the lamb in this post by the American Lamb Board and Boston Chefs News to create a recipe with.  All opinions posted here are truly my own, I was honored to be asked and delighted to create this dish. It’s so good.

On My Shelf: The Momofuku Milk Bar Cookbook

cookbookshelf

Sometimes you need something to aspire to. Sometimes you need to step out of your comfort zone and just have a book that you can look at and know, with certainty, that it’s a hair out of your range.  That is why I own the Momofuku Milk Bar Cookbook.  I find this book incredibly daunting – like a giant sundae when I’ve already had too much to eat. But I can’t stop myself from picking it up every few months and thinking I should give it a try.

milk3

For the record – I’m usually a show no fear kind of cook.  I’ll try anything at least once – I’ve made my own bacon and babysat my own sourdough starter so I always think I can handle this cookbook. Which means I pull it out and look up a cake – now a cake in this book has at least four separate ingredients that must be cooked/mixed/pureed/blended before I even consider the possibility of putting it together. I did mention I found the book daunting, ya?

milk2

Most people look at this book for the pictures I think – okay the crack pie is fantastic and the compost cookies are extraordinary but the rest of the book is meticulous. Everything is weighed and soothed into the rest of the ingredients. But maybe that’s why I love it, it’s a book of challenges and dares me to break my boundaries a little bit.

milk1

I do plan on actually tackling a few of these recipes in the next couple weeks – I’ll share my results. Don’t you worry. Though I’m still a tad intimidated, at least I’m building my own birthday cake so I won’t wreck someone else’s birthday, right?

Candied Ginger

candiedginger_1There have been a few very fortuitous things happening for me recently – not in actual life, but here on Kathy Can Cook. First, my sister offered to write me a guest post on ginger, which I jumped at of course! Second, Jess asked me to help her make a cocktail with candied ginger in it. Third, I was invited to A Spoonful of Ginger at the MFA to help benefit the Joslin Center for Diabetes Research. So, obviously, there was a need for a BLOG SERIES.

candiedginger_2 So, candied ginger. Candied ginger is a perfect snack or palate cleanser, it’s a moment of sharp heat and sweetness when you need it most. It’s great in cookies, cocktails, and on it’s own. It’s basically magic (the ginger syrup that you get as a byproduct is pretty awesome as well). My sister had a couple of good comments on candied ginger on her post about ginger too – go read up on it!

candiedginger_3 I ended up making this because I just needed to. I read the recipe that Jess had chosen (she posted the full cocktail on her blog) to highlight, essentially a dark and stormy – but infinitely better. So I read the recipe and noted that there was A LOT of fresh ginger being used – two large hands is nothing to sneeze at. But I did it, peeled and chopped two hands of ginger, and got roughly a quart of peeled ginger that was BEAUTIFUL, bright yellow, and lovely.

candiedginger_4 I don’t know that I will buy premade candied ginger again – because here’s the thing, this was perfect. It tasted fresh and gingery, it had that sharp ginger flavor without a weird old ginger aftertaste and I totally could have made a small amount. I also loved that I didn’t have to coat it in sugar, and make it candy sweet, if I didn’t want to.

Candied Ginger
Note: This recipe is adapted from a recipe that Jess got for a Goslings Rum and Ginger Cocktail, created by Ming Tsai. I am sharing only the recipe for candied ginger, because it was AWESOME, you can see the cocktail over on Jess’s blog.

  • 2 cups ginger, roughly two medium hands or one large one
  • 4 cups sugar, plus 1 1/2-2 cups for sugaring
  • 2 cups water
  • Peel and cut your ginger. I find ginger is easiest to peel with a spoon, you can run the tip of a spoon right over the skin and it’ll fall off, this also works for those little nubbins and nooks where a peeler or knife wouldn’t fit.
  • To cut the ginger cut it unto 1/8 inch thick rounds or strips, either will work one way you’ll see the fibrous ends of the ginger and it’ll be a little bit rougher and with the grain you’ll get smoother pieces but they’ll be tougher.
  • Combine the chopped ginger, 4 cups of sugar, and water in a large saucepan over medium heat. Bring this to a simmer.
  • Reduce the heat to low and allow the ginger syrup to simmer for 10-15 mins, until it is about 1/3 reduced
  • Preheat the oven to 200 and line a large baking sheet with parchment paper
  • Using a fine mesh sieve, strain the syrup into a heatproof bowl. Reserve this syrup, it’s great in club soda as homemade ginger ale.
  • Combine the strained ginger and the rest of your sugar in a large bowl – gently toss the ginger with the sugar until it’s sparkly with sugar and mostly separate pieces. I found that a pair of gloves would be ideal here.
  • Spread the ginger in a single layer on your prepared baking sheet and put it on a middle rack in the oven.
  • Bake the ginger for 3 1/2-4 hours, rotating it occasionally. The ginger will be mostly dried out after this.
  • Allow the ginger to cool completely before touching it. MOLTEN SUGAR IS HOT. I left mine in the cooling oven overnight, and it was perfect the next day.
  • Break the ginger apart gently, this is easily done using a gentle pressure and pinching the piece of ginger between your fingertips – they should fall right apart.
  • Enjoy! I love to add a touch of the syrup and a couple slices of the candied ginger to lemon tea, or club soda (with a splash of rum).

Browned Butter Rice Krispy Treats

RiceKrispytreat1
I have a confession: I love rice krispy treats. I love them in an unabashed I will gorge myself silly on them if they are in the house kind of way.  I love them in a “these are made with breakfast cereal so they totally count for breakfast” kind of way.
RiceKrispytreat2
I’ve been making these little snacks for at least three years, every six months or so I get a hankering and cook up a batch.  It takes ten minutes at the most and you get to have a super classy and delicious dessert/snack/breakfast at the end.  I made these ones with my sister and she took all the pictures for me, I also made her some salted caramel sauce that same night so we got creative with the drizzling.
RiceKrispytreat3
Now go grab the ingredients and make these.  They’ll cost you less than $3 and they disappear within twenty four hours. I promise.

Browned Butter Rice Krispy Treats
This recipe is adapted from Flour:Spectacular Recipes from Boston’s Flour Bakery and Cafe by Joanne Chang – I love this book, you should too.

  • 9 cups of rice cereal (generic Rice Krispies are totally fine)
  • 1 bag of marshmallows (I use Jet-Puffed Mini Marchmallows becasue they melt better)
  • 1 cup unsalted butter
  • 1/2 a vanilla bean (optional but it really does make it better)
  • 1/2 tsp coarse kosher salt
  • Lightly grease a 9×13 pan with butter, just to coat. Measure out the rice krispies into a large bowl.
  • Add the butter and the caviar from the vanilla bean (all those seeds inside when you split it) to a medium pot. Melt the butter over medium heat and keep a close eye on it. The butter will go from browned to burnt in about two seconds. Wanna Be a Country Cleaver has a great How To for browned butter over on her blog if you want some pictures and a step-by-step tutorial.
  • Add the marshmallows to the browned butter and stir to combine and melt. This will be a bit sticky and not all of the butter will blend with the marshmallows, that’s ok.
  • Pour the butter/marshmallow/vanilla bean mix over the cereal and stir quickly. The sugars in the marshmallows cool fairly quickly so being well prepared and stirring fast is key here.
  • Press the rice krispy treat mixture into your greased pan. I frequently use a piece of parchment to smooth out the top of my treats without getting my hands messy.
  • Sprinkle your coarse salt on top of the treats. The salt can be added to the cereal if you prefer but I always find that it falls to the bottom of the mixture when that happens.
  • Enjoy with a drizzle of caramel you made for your big sister, because she asked for it and you just couldn’t say no.