Saus, a love letter to frites and a Giveaway!

Belgian Sized Frite with a Deep Fried Egg

Dear Fries –
You and I go way back.  I’ve loved you since those first homemade fries that my mom made came out of the fry daddy – soft, tender, and tasting of fresh potato; you were delicious.  So I did what any sane person who is terrified of hot oil would do; I started to hunt for THE PERFECT FRY.  I thought that it was a hopeless venture, perpetually leading me to fries that were overcooked or soggy.  I wrote emails to my sister extolling the virtues and failures of fries ranging from mediocre, to unpalatable, to acceptable. Then in January, there was hope.  I saw a tweet from @saus_boston; there was a Belgian frites shop opening three blocks from my office.  I started to dream of the fries I ate in Europe – delicious morsels cooked in good quality lard and covered by at least five different toppings, all of which seemed to involve some sort of curry flavor.  This was what I had been searching for all along.

Saus – From the Top:
Cheddar Duvel, Bleu Cheese (special), The Bost-onion

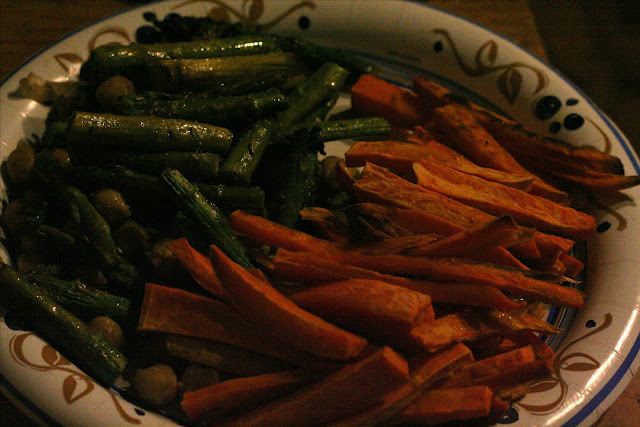
I waited patiently for the storefront to open, scouring local blogs and publications for an opening date and longing for fries that I could eat forever.  I waited and waited until, finally, an opening date was set – a menu was hung on the website (eatfrites.com), and there were rumors of Saus opening in March.  Then it was there.  A tweet said the elusive shop was open and I made plans with BF, Amanda, and her hubs to go for fries.  We started with some soda – root beer and cherry cream soda from Virgil’s, chose an exorbitant number of sauces (I think six) and gorged on a dinner of frites.  These were perfect fries – crispy on the outside and fluffy within.  They were hot without burning my tongue, and with every dip of fry in unique saus, whether it be the Cheddar Duvel or the humble homemade mayo, I was in heaven.  I don’t think we spoke for ten minutes while fries were consumed.  We were in states of pure bliss.  Fries, gourmet sauces, and to top it all off, a crisp root beer.  I wanted to move in.

Belgian Waffle with: Lemon Creme, Berry, Salted Caramel, and Nutella Saus

Then we realized there were Belgian-style waffles. Allow me to reiterate that: BELGIAN-STYLE WAFFLES.  It was June after college graduation, and BF and I were running around Brussels looking for just one late-night waffle shop that would serve us.  And there, in front of Manneken Pis, was one such place, an open window being run by a couple teenage girls just ready to close up shop for the night.  We asked for one waffle with dark chocolate and tipped them one euro for being open and willing to hold off closing for us (and we got extra chocolate).  As I ate my waffle, I fantasized about eating more and was sad that it was our last night in this town of publicly urinating statues.  Now we were home, and finally after three years of longing for good waffles, there were some nearby.  And they fit the criteria – crunchy, fluffy, saus-y and all around swoon-worthy (seriously, you should probably just get the Nutella saus to drink, or bathe in, as one friend suggested).  I left Saus that night in a dreamy state of full, telling BF that we will be going back – sooner rather than later, when the cheese curds were in (they hadn’t gotten their delivery yet) and we could try the poutine.

So, dear humble french fry, I’ve finally found the one of you that is king.  Stick around will you? My belly can hold more than a single batch of fries and I (along with BF) will be back for more, especially with those perfect saus-es (saus-ies? saus-i?).  You should probably make sure you keep around your friend, the waffle, too.  One without the other may be like Peanut Butter without Jelly at this point.
Love, Kathy and BF
Saus on Urbanspoon

Now the fun part!  You have read through my review of Saus and have drooled over my pictures right?  Of course you have.  After my most recent visit to Saus I stopped and asked one of the owners, Renee, if they wanted to team up with me to give one of my readers some frites.  She loved it!  So we hashed out some details.  I’m giving away a $15 gift certificate so that one of my lucky readers can go there and try the frites and waffles themselves! Yum!  You can enter three ways, leave me a comment telling me for each entry:

1) Go to the Saus website and leave me a comment saying which dip you would most like to try, you can also check their twitter feed for a rotating dip, or two. (Mandatory)
2) Go to Facebook and like Kathy Can Cook and Saus and leave a comment (optional)
3) Follow @kathycancook and @saus_boston on twitter and tweet
“I want to try frites and waffles thanks to @saus_boston and @kathycancook! #eatfrites” and leave me a comment that you did (optional)

All entries must be received by Monday June 6 at 12 Noon.  The winner will be announced by 5 pm that day!

Baked Asparagus and Chickpeas

Spring has finally moved in and is rapidly approaching summer here in Boston and I am simultaneously thankful and irritated.  The thankfulness comes of knowledge of fresh and local produce that will soon be gracing my table and kitchen and the irriation comes of horrible spring hayfever.  I know we all have it on heavy pollen days – the runny nose and itchy eyes come with the territory, but just once I would like to smell the lilacs and not sneeze for the rest of my walk home.  But the produce – that I can get behind.  With the city’s seasonal farmer’s markets starting up I’m getting impatient for food that tastes fresh again.

On a recent trip to the Dewey Square Farmer’s Market I was thrilled to see Kimball Farm with bunches of asparagus for $5 each.  They were good and I was excited to be seeing produce that is creeping closer to home as the ground warms and green things start to explore the world.  With the fresh asparagus comes the hope of greater things coming soon – tomatoes that taste like tomatoes (gasp), peppers that I want to eat, and fresh herbs that I’ll add to some greens (which you can get at your market now thanks to cold frames and awesome farmers), add a squirt of lemon juice and call it dinner.  But we’re not quite there yet.  For now I have some root vegetables left over from the winter and this farm fresh asparagus – the first sign of summer actually coming to stay.

I love asparagus, especially the tender green shoots that are no bigger than a pencil and burst with a sweet and green flavor; it’s filling and delicious.  I basically turn BF and I into vegetarians while asparagus is in season, buying it in quantities that make most people look at me strangely, and gently roasting it with chickpeas at least twice a week.  I’m obsessed.  And it’s soooo worth it.  We aren’t vegtarian eaters usually – add a sausage or some chicken to our meals and we’re happy campers but this roasted asparagus dish is fantastic and when I made it the other night as a quick meal, BF asked me to make it again.  I was so surprised you could have knocked me down with a feather, a quick and easy meal that’s cheap and delicious – oh yeah I’ll make it again (and again and again).

The best part of this “meal” if you want to call it that, is that it’s virtually effortless – remove the bottoms of the asparagus, cut it into finger lengths, and toss it with some oil and spices.  It’s a meal!  Veggies!  Protein!  I suppose you could do it as a side, but it’s delicious on it’s own.  I like it with sweet potato fries – which is a great way to use up the tail-end of those wintered-over potatoes that are hiding out anyway.

Baked Asparagus and Chickpeas
1 bunch asparagus, woody ends broken off and cut into 2 -3 inch pieces
1 can chickpeas, drained and rinsed
1 Tbs olive oil
1 Tbs balsamic vinegar
1/2 tsp coarse kosher salt (any coarse salt is fine here, it doesn’t need to be kosher)
1/2 tsp garlic powder, to taste (rosemary is nice here too, or whatever other spices you’re in the mood for)

Preheat the oven to 350 degrees farneheit.  Add the asparagus and chickpeas to a 2 inch deep baking dish (I use a 13×9 glass pan) and drizzle the olive oil and balsamic over them.  Gently toss the asparagus/chickpeas with the oil and balsamic (this can be done in a bowl if you are not confident of your abilities to keep them in the pan).  Add the salt and spices and give everything a final toss to evenly distribute the spices.  Stick the pan in the oven for 20-25 minutes until the asparagus is tender and a little wilty.  The asparagus will be fantasic and the chickpeas crisp up so much that you will  chase them around your plate until they’re gone.  I promise.  This makes a great entree meal for two (with sweet potato fries, of course) or as a side for more.  Deee-licious.

Marx Foods Citrus Juices and a Mocktail to make with them

I love seltzer water, especially when the weather is turning warm and my porch is cleared of the winter’s detritus.  There’s something so refreshing about sipping a lightly sparkling drink that is enhanced by a squeeze of fresh citrus juice and some ginger that I find sinful on Spring days when the sunset is lingering and the trees are bursting into life again.  This is a mocktail that I created for those evenings that linger when the kitchen is warm and you just want to sit on the porch and read.

A friend was recently up for a blogger challenge over on the Marx foods website, so I went to give him my support by clicking a button and then I was caught in a website FULL of fabulous gourmet goods that I hadn’t heard of.  I checked out the Marx blog and wandered over everything until I stumbled across a blogger offer – for juices.  Three of them – Yuzu Juice, Kabosu Juice, and Sudachi Juice.  They were all foreign to me and looked decadent in their squat brown bottles.  I emailed the PR guy (Justin) and asked for a sample – at worst I wouldn’t like them right?

I liked them, all three of the juices offered a variation on lime juice – fairly sour but with subtle undertones.  In my naivete I had assumed these juices would be palatable for sipping – they were not, unless you can sip lime juice or have a miracle berry.  But they were delicious, and offered a depth of flavor that plain lime juice lacks.

The Yuzu had a bright lime flavor with undertones of tangerine (oh yeah, i’m about to get all taster snobby here, it’s kinda fun and silly).  I want this juice in vinaigrettes on fruit salads.  The Kabosu juice seemed to be the sweetest of the three.  I like it for it’s lemony flavor with a fantastic aftertaste of cantaloupe – yeah cantaloupe, it had that honey melon flavor.  Totally Decadent.  There’s a reason this was the juice to grace my mocktail.  And then there was the Sudachi.  This was my least favorite of the three juices, it is very tart and I found it hard to separate any other flavors over the tartness.  Maybe in a simple syrup it would be better?  Maybe?  I felt like I was sucking on a lemon with some grapefruit juice thrown in there to taunt me with another flavor.  It lacked the depth of flavor that I found with the other two juices.

I suppose you could add a bit of your favorite vodka to this drink to make it more of an adult soda – but why would you tamper with a good thing?  And with no alcohol you can feel decadent without going overboard when you drink this on a hot saturday afternoon and read from your newest obsession.

Kathy’s Ginger-Kabosu Soda
Note:  I’ve been adding these juices to a lot of things where I would regularly add lime or lemon juice but this soda is my favorite, and garnished with the fine slices of kumquat and a shave of ginger these were dressed up from refreshing to classy enough to serve at a dinner party.

1 Thumb sized nub of ginger, peeled and thinly sliced into coins
1/3 cup sugar
1/3 cup water
6 oz Club Soda
2 oz Kabosu Juice (If you can’t use that Lime would work too)
Ice
1 Kumquat cut into rounds, for garnish (optional)

In a small saucepan bring the ginger coins, sugar and water to a boil.  Allow them to simmer gently until the sugar dissolves – 2 minutes, maybe.  Remove the pan from the heat.  Let the ginger steep in the sugar water fro at least 5 minutes – more time will make the ginger flavor stronger.  Strain the ginger out of the syrup when the ginger flavor has saturated the syrup enough.  Reserve this ginger for garnish.  Let the syrup cool.  In a pint glass, combine the ginger syrup, Kabosu juice and club soda.  Stir Gently.  Add ice if you like.  Garnish with slices of kumquat and some of the candied ginger from the syrup.  Enjoy while sitting on a deck in the sunshine, reading, or playing a video game.

I was given these juices to try and review for free by Marxfoods.com, but all opinions and comments are my own.

Passover Challenge: Flourless Chocolate Cake with Salted Caramel Sauce

A while ago twitter was all abuzz about a passover potluck and it sounded amazing.  I wanted in and immediately started to plan my Seder challenge meal with the salt of the plate by creating a Flourless Chocolate Cake with Salted Caramel Drizzle.  I immediately emailed Cara saying I was in and what I was bringing; she has a great description of the meaning of the Seder plate over on her blog if you want to learn more (after all, Knowledge is Power!).  I ended up (sadly) missing Cara’s Seder potluck, but I still made the cake because, regardless, we all need a little more chocolate in our lives, right?  Then I searched for my flourless chocolate cake recipe – which is sort of like trying to find a needle in a haystack (my loose recipes are about 6″ of stacked paper and in no semblance of order… someday I’ll work on that).

The recipe I wanted was a symphony to dark chocolate – a pound of chocolate, espresso, eggs, butter, and sugar in a single bowl mixed.  So Simple and So Delicious.  I love rich, dark, chocolate decadence but I can only take it in small portions so I make this cake once or twice a year, if I’m even motivated for that.  I have friends who can’t “do” gluten so I try to accomodate them, and most of the time succeed, which is how I came to hunt for this particular gem in the first place.  I know two people that should avoid the binder that we all know and love and it is with them in mind that I try to go “gluten free” occassionally here on the blog.

Now, this cake; the first time I made it was with a lovely raspberry coulis that was bright and tangy to cut the richness of the cake. This time I made a dark, intense caramel that married with the flavors of the cake in an entirely different way, making each bite more decadent than the last.  It’s quite a lot like eating a well-made candy bar, but without the hassle of having to bite on the chocolate; this cake just melts away, leaving you with an urge for a big glass of milk or some sharp and well-spiced tea.

Kathy’s Flourless Chocolate Cake with Salted Caramel Drizzle
Note: This cake is rich and dense; plan to eat small pieces of it at a time.  Having a sauce to drizzle over it makes it less intensely rich.  I also have a tendency to use the darkest chocolate I can find without it being unsweetened so if you used something less dark, it could be less rich.  Either way, it’s delicious in a celebratory way, and it’s surprisingly quick to mix but takes some time to cook.

Flourless Chocolate Cake
1 lb of semi-sweet chocolate, chopped into coarse hunks (I recommend at least 55% cocoa since this really needs the fat)
1/2 cup sugar
1 cup brown sugar
3/4 cup espresso
16 Tbs (2 sticks) butter, softened and cut into 1 Tbs pieces
2 Tbs cocoa powder
8 eggs
1 Tbs vanilla

Preheat your oven to 350 and grease a 9″ springform pan with butter. Line the bottom of the pan with parchment paper.  In the large bowl of a food processor, pulse your chocolate until it is a coarse crumb texture – this take about a minute.  Add the sugars and pulse until everything is an even, sandy texture.  Turn the food processor on and gently stream in the HOT espresso; this will melt the butter and allow the whole thing to come together.  Allow this to run for a couple of minutes to make sure it’s smooth and the chocolate is fully melted.  Add the cocoa powder, then the butter pieces one at a time to the running food processor.  Process until smooth and fully incorporated – about 30 seconds.  Add the vanilla.  Add the eggs one at a time, pulsing the FP between each egg to incorporate them fully.  Pour the mixture into the lined and greased springform pan.  Place the springform on a cookie sheet (in case of leakage) and bake for 50-60 mins.  The top of the cake will be puffy and a little cracked when it’s done; the center of the cake will still jiggle a bit.  Pull the cake from the oven and set it on a rack to cool for at least an hour – if you don’t allow this resting period and try to pull the springform off early you will have crumbs; they’ll be tasty crumbs, but they’ll just be crumbs. After the cake has set up, remove the outer ring of the springform pan.  You can level the cake now if you would like to, or if you are like me, you can not worry about that and flip it onto a plate and watch the middle make a crater.  If you do level the cake, you should probably flip it over so the pretty side is facing up.  Chill it overnight or for at least 3 hours in the fridge.  Serve chilled and drizzled with copious amounts of salted caramel sauce.

Salted Caramel Sauce
Adapted from Smitten Kitchen
Note: Mine is darker than hers, I liked the “nuttier” flavor of the darker sugar and I added a little corn syrup to keep the caramel from crytallizing.  Since I wouldn’t eat all the caramel for a bit I wanted to be able to reheat and use it at my leisure – a little corn syrup made that easier.  If you are hesitant about corn syrup, David Liebovitz talks about it over on his site and you can see more there, but for all intents and purposes it can be left out here if you feel it should be.

1 cup sugar
1 Tbs light corn syrup
6 Tbs high quality salted butter. I used Kerrygold and it was divine!
1/2 cup plus 2 Tbs of heavy cream at room temp; fresher is better if you can get it.

Add the sugar and corn syrup to a medium sized sauce pan and whisk them while they gently come to a simmer over medium heat. This takes about 5 mins, sometimes less if it’s humid out.  Cook the sugar to a dark copper color (it’s better to have a light bottomed pan here so you can see the sugar change colors).  Whatever you do: DONT LEAVE YOUR SUGAR UNATTENDED, it’s a little twit and will burn if you walk away for even 0.2 seconds.  Remove the melted caramelized sugar from the heat and add the butter all at once, immediately.  This will simultaneously melt the butter and cool down the caramel enough to add the cream without it all siezing on you.  Whisk the sugar/butter mixture until everything is evenly distributed.  Add the cream all at once. The caramel will foam; it’s okay, that’s why you used a largish pan (you did use a largish pan right?). Continue to whisk the sauce until it all comes together.  Serve it immediately over your rich, dark, flourless chocolate cake or take it to the darkest corner of your apartment and eat it with a spoon while calling it “my precious” and… wait sorry, that’s not right.  You should probably try to share.  Everyone will love it after-all.  This stores for 2 weeks or so in the fridge. If you refrigerate it and find the caramel too firm, you can microwave it for about 30 seconds to soften it up again.

Baking for Bloggers Bake for Hope

Do you ever look at the delectable treats I blog and wish you could have them?  Now you can!  Well, you can have my Brown Sugar Sugar Cookies anyway.  With bidding from May 4-6 Boston/Mass based bloggers Cara and Jen have organized Bloggers Bake for Hope

Doesn’t that look like something you would love to have?  There are A LOT of local bloggers baking for this shindig too, so if caramel-ly delicious brown sugar sugar cookies don’t appeal to you maybe Amanda’s Cream Cheese Coffee Cake, Renee’s Cape Cod Cranberry tart, or some Sea Salt Nutella Fudge from Katie will.  I’ve got my eye on some Crusty Rosemary Sea Salt bread.  It’s all going to be fantastic and it’s all for a GREAT cause.  So go, bid and get someone you love something delicious (yourself included, since you love you too, right?).  I’m looking forward to giving away some of these cookies and hope that you’ll come bid on them when the bidding starts!