Summer Panzanella With Pea Tendrils and Prosciutto

Summer has descended upon the fair city of Boston, with steamy streets and humidity that makes you want to hide somewhere air conditioned ALL THE TIME.  With this heat comes the need to NOT COOK.  I want to avoid turning on the oven like nothing else, I haven’t baked in weeks and poor boyfriend has been living on things that are flash fried or grilled.  And while that’s fine, in theory, I’m still learning about grills (mainly how to light mine… who knew that charcoal was such a tricksy creature?).

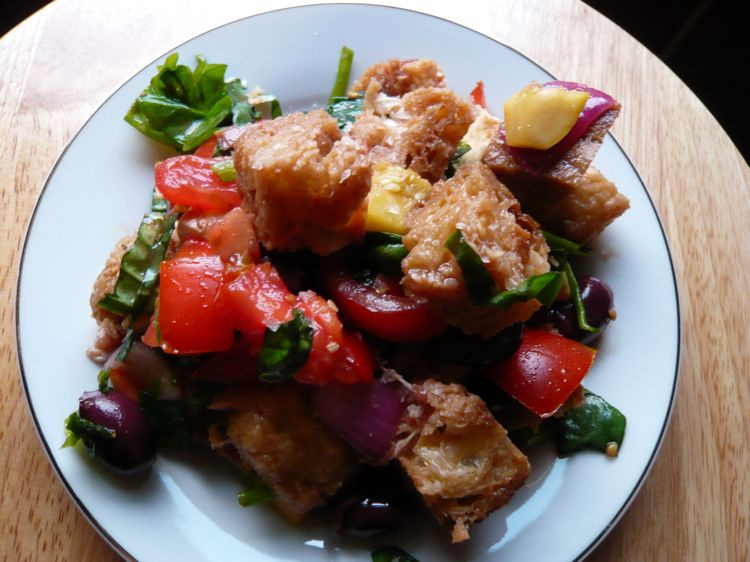
So in my efforts to “beat the heat” and not break the bank I have been focusing on cool easy to make foods in my kitchen, sweet potato hash, ice cream (boyfriend got ma a late birthday gift of an ice cream maker, he must love me), and this Summer Panzanella.  Now panzanella is something I’ve been wanting to try out with simple enough seeming directions and always a mouthwatering looking image at the end.  This first attempt was no exception.  And the best part? I spent maybe 10 minutes standing in front of the stove – total.  Most of this salad was just chopping and tossing.

A bit about my sordid past of lusting after panzanella:  One day while in college and living in dorms equipped with full cable access and the food network I saw the sweater-vest clad Micheal Chiarello prepare this “rustic” bread salad in his perfect studio kitchen with the promise that anyone would love it, well – given that they don’t have a gluten allergy.  I promptly forgot about panzanella until about three years later when boyfriend’s father went to California on a business trip.  The night before as he began to fall asleep on our *awesome* fold-out couch he asked if we wanted anything from Cali – I asked for a cookbook that captured some local cuisine (honestly thinking independent published and intimate a la The Enchanted Broccoli Forest ).  He brought me Micheal Chiarello’s Easy Entertaining*.  And there was a picture of the same panzanella I had seen him make years earlier on the food network *swoon.*  I immediately googled Panzanella recipe and came up with about a million (ok there were probably only 500 results) among the results were Smitten Kitchen, Cheap Healthy Good, and epicurious (though they have everything so that’s not really surprising).  I decided to tuck it away and forgot about it AGAIN for a year.  Which brings us to this my first (perfect) attempt at panzanella.

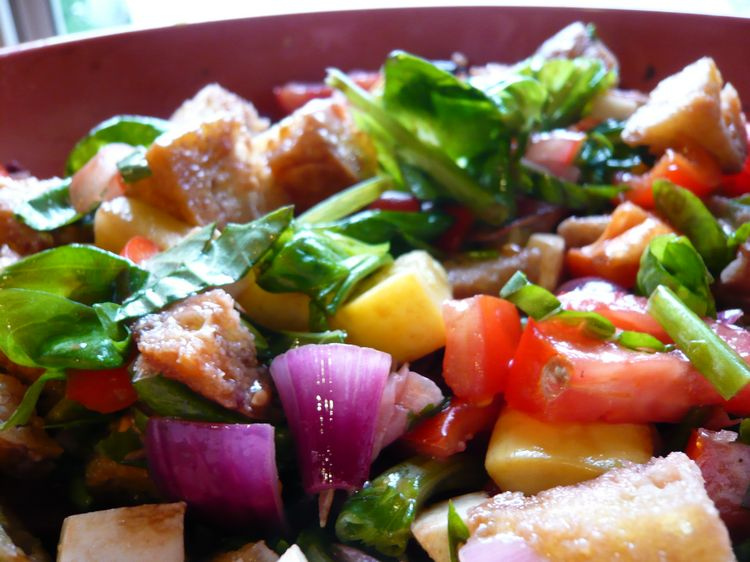
Summer Panzanella with Pea Tendrils and Prosciutto
Inspired my Micheal Chiarello and the frickin’ heat
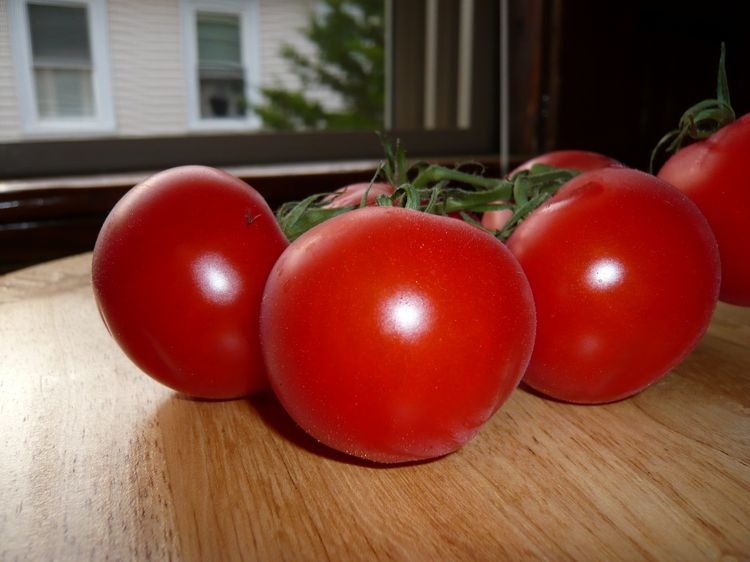
Note: All ingredients can be omitted at your preference except the tomatoes and bread as they are really the foundation of the whole salad.  Unless otherwise specified I chopped everything to a 1 1/2-2 inch cube

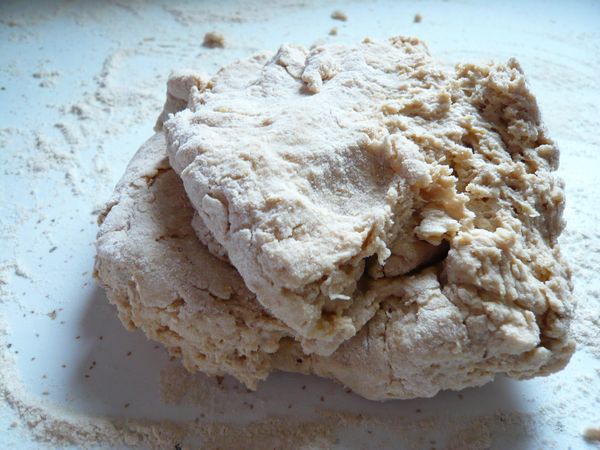
1/2-3/4 loaf of day-old  crusty bread (I used Ciabatta)
3-4 vine ripe tomatoes or 1-1/2pts of grape tomatoes halved
1/2 pound pea tendrils
1/4 pound prosciutto
1 Sweet pepper (Red, Yellow, or orange whatever color you’re feeling)
1 Zucchini
1 Red Onion, a Vidalia or scallions would work as well though not as pretty
3-4 cloves garlic, minced fine
1/3 Pound Kalamata Olives, whole
1/2 Pound Mozzarella, chopped to 1/2 inch cubes
10 large leaves of basil, chopped into fine strips** (you can use more if you really like Basil)
Olive Oil
Balsamic Vinegar (I used blueberry because it’s delicious, but any decent quality balsamic is fine)
Flaky Sea Slat (if you have it it’s prettier but regular is fine)

Toast the bread cubes with a healthy glug of olive oil in a pan until they’re crispy -about 5 minutes then put them in a big bowl and set it aside.
Saute the red onion, zucchini, and garlic in the same pan with a little more oil (if you need it) – another 5 minutes and add those to the toasted bread.
Chop all the other ingredients and pile them in the bowl, see why I had you get a big bowl now?  Add about 2 glugs of olive oil (2-3 Tbs) to the salad and gently toss, drizzle balsamic over the whole thing (1-2 tsp) and gently toss again.
Let it sit for about 20 minutes in the fridge before eating (I like this salad better cold).  Watch something ridiculous like Invader Zim (so GIR can teach you how to make waffles!) or an episode of Micheal Chiarello’s show on Food Network, make fun of the sweater vest, please.
Serve this salad with a light sprinkling of sea salt and a basil sprig on the side (because it’s pretty).

*A note about this book – he asks that you have very specific very expensive ingredients fully stocked in your pantry at all times (something I JUST CAN’T GET BEHIND) so I looked at the pictures and planned to make the recipes in a more wallet friendly fashion.

**I find the easiest way to do this is to roll the basil leaves up in a tight cigar and slice from leaf tip to stem,it’s called chiffonade!

Brown Sugar Sugar Cookies

I like it when friends have birthdays, there are parties and there are excuses to bake.  We’re not talking about simple things like chocolate chip cookies either, but the things that you save for special occasions – ganache filled cupcakes and hand dipped chocolates, cookies that require the maker to first brown then strain the butter before even adding other ingredients. These cookies are like that, complicted, delicious, and for a birthday.

The first time I made these I vowed to NEVER MAKE THEM AGAIN not because they were too much work, but because they didn’t leave the kitchen.  I barely got them out of the oven when my boyfriend grabbed one off the cooling rack yelling, “Hot hot!,” and ate it with a taunting grin.  I know I should be greatful he realized they were hot, mostly I was irritated that I barely got one before they disappeared.  But the one was a magical cookie, deep rich caramel tones that were fluffy and didn’t even threaten to pull out my million-and-one fillings – I’ll take two please (or would have if there had been two to have).

So here I was asking said friend what she wanted for her birthday and she asked for these, of all things.  I tried to dissuade her, “Are you sure you don’t want gingersnaps?” I wheedled.  She was steadfast and I was stuck covertly making delicious, decadent cookies hoping my TF2-playing-boyfriend didn’t notice the kitchen bustle.  He did.  I lost two cookies before I was able to seal them in a Ziploc bag marked “FOR NIKKI DO NOT TOUCH” (admittedly he did get a consolation prize of coconut macaroons, which were fine but nothing to write home (or here) about).

So without further ado, caramelly, rich, crackly infinitly amazing Brown Sugar Sugar cookies.

Brown Sugar Sugar Cookies
Adapted, very slightly, from Cook’s Illustrated

Note: These cookies can be frozen, premade, for later usage and eating (but I would strongly recommend a double batch in that case)

Ingredients
14 Tbs unsalted butter (I use half Salted hlaf unsalted but it doesn’t really matter)
2 Cups packed Dark Brown Sugar
2 Cups plus 2 Tbs All Purpose flour
1/2 tsp Baking soda
1/4 tsp Baking Powder
1/4 tsp Salt (use a little more if you are using all unsalted butter)
1 large egg
1 large egg yolk
1 Tbs Vanilla (it really is neccessary, DON’T SKIMP HERE)
1/4 cup granulated raw sugar (i prefer the raw but don’t go get it especially regular granulated works fine)

Heat 10 Tbs of the butter in a light bottomed sauce pan over medium until melted and nutty brown, it will smell rich and there will be some solids in the bottom, stir the butter nearly constantly and watch it like a hawk or IT WILL BURN (and that is sad).  Transfer the melted butter to a large mixing bowl and add the rest of the butter to melt.  Let the melted butter mixture cool to room temperture, this should take 10-15 mins.

Place oven rack in the middle position and line cookie sheets with parchment paper.  Mix the raw sugar and the brown sugar together in a small bowl (bowl 2) until even and set it aside, you will use this later to dip the rolled cookies in.

Sift the flour, baking soda, baking powder and salt together into another bowl ( I know bowl 3 is a little confusing try to keep up) and set it aside.

Add the remaining 1 3/4 cups of Brown sugar to the melted, delicious, butter and stir it until there are no lumps 30-45 seconds, it will be a very dark and molasses-y looking mixture -that is OK.  Scrape down the sides of the bowl and add the egg, egg yolk, and vanilla mix it all until fluffy-ish and incorporated, another 30-45 seconds.  Side note: recipes alwasy say “mix until fluffy” when they really mean mix it until eveything is incorporated and it looks a little mor opaque than before, because lets face it – you’re not making whipped cream here. Add the flour mixture (from bowl 3) to the liquids (bowl 1) and mix until just combined ~1min.  This mixture will be a little stiff, that is okay – brown sugar and butter will do that.  Give the dough one final stir and scrape the bowl to check for even distribution.

Scoop out the dough in 11/2 to 2 Tbs balls (really don’t try to make these smaller they’re better as a chewy cookie) and roll in in the sugar mixture to coat evenly.  Stick the doughballs on cookie sheets 2-3 inches apart and cook them fro 12-14 minutes.  The cookies will begin to crack on the tops and look a little raw, they’re not.  Also if your cookie is getting dark on the edges its been in there too long and you should maybe eat that one as a tester… you know for the sake of the cookies.

Cool the cookies for 5-10 mins on a rack and hide them a… wait that wasn’t what I meant. 

ENJOY!

Tzatziki, because there’s nothing cooler

It’s been hot here in Boston for the past week, like July hot with humidity you can see in the air and pavement full of mirages. I don’t even want to turn on my oven or stovetop and in general have been avoiding heated foods like the plague that they become in the summer time. I want something refreshing, something that that makes me swoon with the freshness of it. A while a go one of the many food blogs I read posted about Tzatziki – which I had never really had and had certainly never made, but it sat there niggling the back of my mind until last week.

Last week, if I wasn’t clear, was hot. The heat was making me want to cry with the lack of cooking, so I drove to Russo’s – I realize that this doesn’t make much sense, but consider it as a haven of fresh vegetables to be rinsed and eaten as they are at prices a girl paying back scads of money in education loans can afford. At Russo’s I found tomatoes for a steal, european cucumbers in need of chopping, and fresh dill.

A side note about dill – I am in LOVE with dill, it always makes things taste better for me while at the same time reminding me of childhood and weeding in my mother’s garden in the sunshine. Dill just tastes like summer, with the idea of canning jars covering the kitchen table full of garlic cloves and dill blooms. It’s rich and decadent and proliferates itself wherever you plant it, I love that about it.

When I got home from Russo’s with the good intention of writing my yearly assessment for my job in my mind I went to the kitchen and chopped tomatoes, cucumbers, dill, and green onions until my head swam and I was starving. The heat in my kitchen was getting to me and THAT DILL SMELL was something that I couldn’t get enough of so I did what any sensible person would do – I made Tzatziki..

Tzatziki is what everyone is talking about right now, I’ve been wanting to make it for blog it forever with the intention of letting it get out for the summer heat and keeping us all cool.  It is now June.  I haven’t posted up here in far too long and this tzatziki is still delicious and well worth the chopping, cross-my-heart-and-kiss-my-elbow.

Tzatziki

A Note: if you find yourself not wanting this much tzatziki adjust the recipe accordingly it can be made for anyone – singles or large groups, it’s really one of my favorite parts about it, also the tomatoes don’t really NEED to be seeded it’ll just be watery if you don’t seed them.  Also this recipe is flexible – don’t like raw tomatoes? add more cucumber.  Just want it as a sauce? skip the tomato and cucumber all together.

1/4 cup Green onions, scallions, or chives (or some combination) chopped into 1/2 inch pieces
1 vine ripe tomato chopped into half inch sections with seeds removed (1/2 -3/4 cup)
1/2 English cucumber chopped into half inch sections (1/2 – 3/4 cup)
2-3 Tbs of finely chopped dill, add more or less depending on your fondness for dill
1/4-1/2 cup of Greek Yogurt
1/2 tsp Garlic powder or use garlic chives and just skip this step (more if you want it garlicky)
Salt to taste

Chop the onion, tomato, and cuke so it is about the same size and put it in a big bowl with the dill.  Sprinkle your garlic powder on top and fold in the greek yogurt.  Serve it in little rice bowls with a sprig of dill across the top and a dash of salt.  SERVE IT IMMEDIATELY.  I know that there are a lot of food blogs that tell you otherwise, you can drain it in cheesecloth overnight or let it sit for a bit.  I like it better freshly made because I don’t drain mine.

I love Tzatziki and now you will too, I promise.  

Chicago Style Deep-Dish Pizza

So let me preface this by saying I only make this pizza on weekday evenings, I realize that sounds insane to most people – what she is cooking a yeast risen dough on her evenings does she have no life? And of course the answer to that my dear friends is why would I bother to have a life when I have FOOD. I understand that to all of you this is a trifle non-sensical. We subsist on food but why revel in it? Why go to beach if you don’t like the sand in your toes, I reply.

This pizza is A-MAZING. For real. It makes me swoon – every time. It is perfect dough covered in cheese and rich delicious tomato sauce and then more cheese. The crust is flaky and fresh from the oven this pizza is a delight (it isn’t too bad cold either… you know because you get two whole pie pans of the pizza following this recipe).

Boyfriend and I will almost always consume one of the two pizzas this recipe makes for the dinner it has been intended for then use the rest as lunch and dinner for the next day. The cheese firms up and the sauce becomes closer to ketchup then anything else without actually becoming ketchup – its a sauce that only has a slight variation to my 3 Ingredient Tomato Sauce. I’m in love with it. Pair the whole thing with a salad and well, basically it is LOVE. And the scents as they permeate the air as the dough rises, the sauce thickens, and the pizza bakes… well let’s just say you’ll want to devour the pizza the INSTANT it comes out of the oven (PS not something I recommend, unless you are NOT overly fond of your tastebuds – in which case HAVE AT IT).

This pizza is awesome as a low-work (I know you’re thinking yeast can’t be low work you crazy person) no fuss recipe on those gross rainy spring evening that tend to sneak up these days. Have fun. And try it, be surprised. It’s delicious.

Chicago Style Deep-Dish Pizza
Adapted just barely from Cook’s Illustrated
Note: This is a pretty forgiving yeast dough – most pizza dough is if made correctly, and DO NOT get intimidated by the length sometimes its just easier to be wordy. Also if you can’t figure it out leave me a comment!
Make 3 Ingredient Tomato Sauce with grated or finely chopped onions instead of just half onions and let it simmer until it has reached a thick almost pudding like consistency (an extra 20-30 mins).
3 1/4 cups All Purpose Flour
1/2 cup cornmeal (either yellow, white or blue)
1 1/2 tsp Table Salt
2 tsp sugar
2 1/4 tsp Active Dry Yeast (1 package if you use those)
1 1/4 cup tepid water (a little warmer than room temp but not more than 115 degrees)
3 Tbsp Melted butter plus 4 tbs softened and set Aside
1 tsp plus 4 Tbs Olive oil set aside
Mix the dry ingredients (flour, sugar, salt, yeast and cornmeal) in the bowl of a stand mixer until even, this takes 1-2 mins with a dough hook, by hand with a wooden spoon it would probably only take a minute. Add the water and melted butter and mix to fully combine on low speed another 1-2 mins scraping the bowl occasionally to check for pockets! Increase your mixer speed to medium and knead the dough until it is smooth and glossy, I can never get the glossy quite *that* glossy, until it looks even and not lumpy really 3-5 mins (by hand I think it would be much the same kneading time). Coat a large bowl with the 1 tsp of olive oil and stick the dough in there and let is rise somewhere warm until doubled, 45-60 mins.
Make your sauce now!
Preheat your oven to 425 degrees.
After your dough has risen to the appropriate size turn it out onto a dry (NOT FLOURED) work surface and roll it out into a 15×12 inch rectangle. Spread the 4Tbs of softened butter (remember that butter I had you set aside, hell-o let’s use it ALL) over the dough, using your hands is easiest, leaving a border of about 1/2 inch overall. Roll the dough up into a tight cylinder (but not tight enough to squeeze out the butter, that would be bad). Flatten the cylinder out and halve it with something sharp. Tuck the ends of both halves into the bottom of the dough so you get a ball, add both balls to the greased bowl and toss that in the fridge while you go watch an episode of Buffy (about 40 mins). This is called lamination, fancy right?
Ok, you watched Buffy – was it the Hush episode?, that’s one of my favorites. Right laminated dough. Your dough is laminated (which means we let the gluten calm down) so roll out one of the balls so it will fit into a pie plate of a 8 inch round cake pan and press that dough into the cake pan. Sprinkle 1/2 pound of grated of finely cubed Mozzarella cheese on the dough and cover it with half of the sauce you made earlier. Grate a little bit of Parmesan on top and stick it in your now blisteringly hot oven (so watch your fingers) for 45 mins to an hour, until the Parmesan is lightly browned and the crust is golden.
Let it rest for ten minutes and ENJOY. The leftovers of this ROCK!
Sprinkle

On Breakfast and Scones and Coffee

I love a homemade lazy breakfast. There really isnt anything that satisfies my Saturday morning quite as much as a good cup of coffee and standing in front of the oven, stove top or toaster to create something warm and bready that can be slathered in butter. There is something very satisfying about knowing you created the breakfast you are enjoying with your own motivation and not just out of a need to eat. These scones are no exception to that rule. I originally found the recipe on one of the many cooking blogs that clutter my GoogleReader feed and it piqued my interest, so I starred it thinking maybe I’ll go back to it. I will mention that I rarely eat a satisfying scone – mostly I find them bland and dry, the exception to this rule being those ones I ate in the catacombs at St. Martin’s in the Fields (oh the clotted cream how it sings to me).

So I approached these scones with low expectations, boring was what I was expecting but not what I got. These scones are flaky and delicious – also not too sweet and totally malleable which I love about them. They also went spectacularly well with my perfect coffee (Thanks Polcari’s)! Since the initial find of the recipe I have made these scones twice – both times to enthusiastic applause (well mouth full nods) and plates where the crumbs have been licked off.

The boyfriend is not the biggest fan of ginger so I wasn’t expecting the response he gave me which was, quite simply, “Make more right now, please-and-thankyou.” I was shocked to say the least, someone who is decided not the biggest – read here could eliminate it entirely – fan of ginger asking for seconds with a ginger based baked good, well if you insist boyfriend.

With the tang of yogurt and the spice of ginger I desperately want to serve these for an afternoon tea. Now if only I can find a good place to purchase some clotted cream…

Whole Wheat Lemon-Ginger Scones

Note: I made these scones with jelly as the sugar (my mom makes a plum ginger kind) but real sugar would probably work just fine.  Also, I made my scones with greek yogurt which is a thick yogurt, if the yogurt you are using isn’t thick skip the milk.
1/2 c greek yogurt
1 t vanilla
1/4 cup milk
1 egg
2 c whole wheat flour
2 t baking powder
½ t salt
1/4 c cold butter, cubed
2 T sugar
1/4 c candied ginger, diced
lemon zest from 1 small lemon

Preheat oven to 425 degrees Fahrenheit. In a small bowl, whisk the yogurt, vanilla, milk and egg together until frothy. Set aside.

In a large bowl, mix together the flour, baking powder, and salt. Work in the butter with your hands until the mixture resembles small peas. Add in the sugar, zest, and ginger and stir in the yogurt mixture, reserving about a teaspoon for later. Mix gently with a fork until the dough comes together.

Sprinkle a clean work surface with a bit of flour and turn out the dough, kneading for no more than 12 times. Pat dough into a round shape, flattening it with your palms to 1/2 inch thick and cut into 8 wedges. This fits perfectly in a pie plate, or whatever it doesn’t really change shape as it cooks. Bake for 10-15 minutes or until golden. Cool on a wire rack and eat warm or cold.