A Perfect Spring Menu (With PIE)

(

One of the hardest things for me is choosing a menu. I know that seems like a simple task, but how do you choose when there are recipes for Summer Panzanella and cookbooks hanging out in our kitchen full of recipes you’ve just been drooling over, like Roasted Corn and Black Bean Salsa and a refrigerator full of fresh Spring vegetables? Recently the Boyfriend and I hosted one of our old (I’ve known her since college – he’s known her since they were in preschool) friends for dinner. I’d been reading blog posts full of gorgeous spring produce and light meals of steamed asparagus with poached eggs, and the rhubarb – everyone has been gushing about rhubarb, those tart green and blush pink stalks bursting with flavor that just make the mouth water.

So the day before dinner I checked the Cooks Illustrated website (for inspiration not to avoid doing work) and there teasing my taste buds and solidifying my evening menu was a recipe for spring risotto that involved the asparagus I had been using in everything, fresh spring onions, and peas. Simple, classic and delicious – I was there.

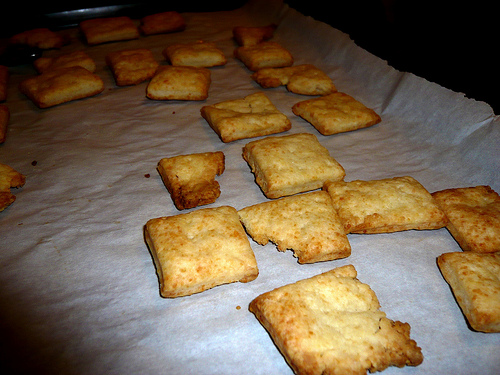
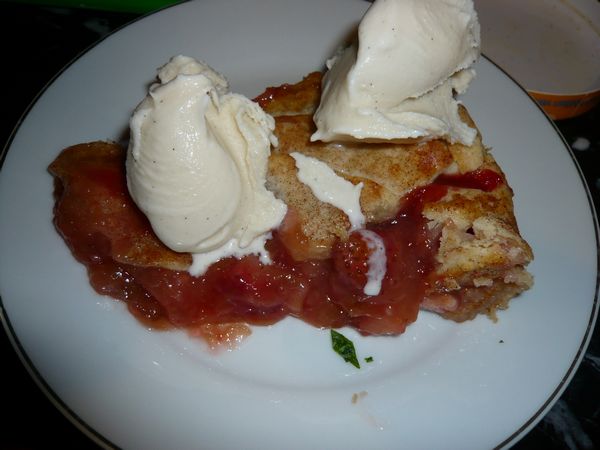
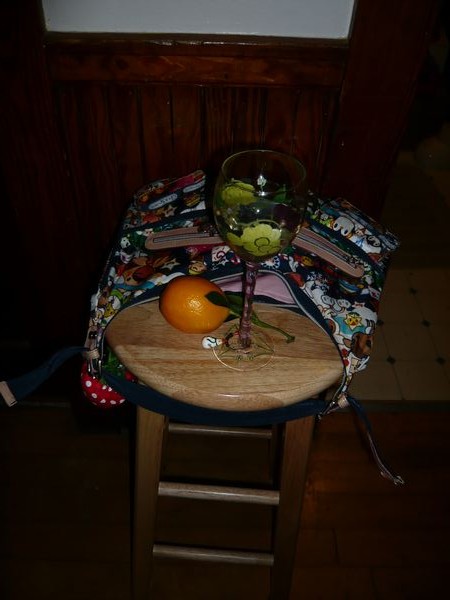
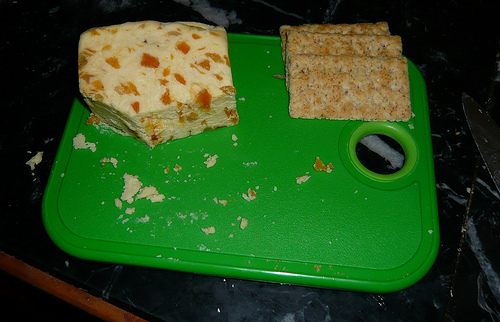
Now about dessert, what was I going to pair with Asparagus and risotto? I had no idea but I figured Russo’s (the local and AMAZING produce market) would let me know once I got there for the other vegetables. As I stepped into the hubbub that calls itself Russo’s I saw it – sitting on a shelf directly in front of the doors were strawberries and rhubarb, the light bulb above my head lit up and a plan was formed, strawberry-rhubarb tart! I immediately called my mom, an expert on all things comfort food and amazing, for a recipe. In her awesome way my mother managed to give me the recipe for strawberry-rhubarb tart and thoughts about an appetizer, a simple apricot stilton served with crackers.

And there it is a perfect Spring Meal, ok there were some kinks but it was delightful and goin with what was in season was the way to go. Everything had great texture and flavor, complements of its “in season-ness!”

Strawberry-Rhubarb Tart
Adapted from The New Settlement Cookbook… kind of. I think.

Crust
2/3 cup COLD butter
2 cups flour
1/4-1/3 cup ice water, or milk for a richer dough
dash salt
1/2 tsp Cinnamon

Add the flour and cinnamon to a medium sized bowl of the bowl of a food processor. Using two butter knives, a pastry blender, or a food processor (if you are lazy like me) cut the butter into the flour and cinnamon until it is the size of small peas. If you are using a food processor be careful and watch it like a hawk or else your butter chunks will be small and your crust will lack proper flake. Add your ice water slowly to the flour/butter mixture 1-2 Tablespoons at a time until it has turned into a loose ball (it should have come together but not be a sticky clump surrounded by flour). Cut this ball of dough in half. Wrap one dough ball in plastic wrap and refrigerate. Roll out the second ball of dough so it will fit in either a 9 inch pie pan or a 9 inch tart pan and line the pan.

Filling
1 1/2 cup Rhubarb, depending on the size of the chunks you may want more
1 cup sugar
2 Tbsp Cornstarch, plus 1/4 cup water
1 Tbsp butter
1 tsp Cinnamon
Dash Nutmeg
1 egg
2 Cup strawberries, chopped to slightly larger than the rhubarb

In a medium saucepan bring the rhubarb and sugar to a boil over med-low heat. Once the Rhubarb-sugar mixture has come to a consistent low boil put the cornstarch and water in a jar and shake to mix. Pour the cornstarch into the sugar-rhubarb mix and let simmer about 5 minutes (the mixture should clear up a bit and start to thicken). Remove the rhubarb sauce from the heat and stir in the strawberries. Allow the sauce to cool for about five minutes and slowly stir in the egg, be careful here – adding egg to the sauce while it is too hot will cause fried egg, if you are worried about this let the sauce cool completely before adding the egg. Pour the filling into the crust lined pan and add butter in dabs around the top of the pie and a sprinkle of cinnamon and nutmeg (these can also be mixed in with the sauce as well). Top with the second crust you reserved, I cut my top crust out with a pretty little leaf cookie cutter (it wasn’t quite a big enough piece of dough). Brush the top of the pie with a milk or egg wash and sprinkle it with cinnamon sugar.

Bake for 20 mins at 400 degrees then reduce heat to 350 and bake for another fifteen minutes. If you are using a tart pan bake 15 mins at 400 and 15 at 350.

Serve this pie warm with a little bit of vanilla ice cream. The sauce is also delicious as a topping for ice cream or eating with a spoon, just hold off on the egg!

Asiago Cream Crackers


So I realize that I have been sitting on this recipe forever (like I made them on New Year’s Eve kind of forever) and also that I still haven’t tweaked it completely. That being said these little puffs of crispy crackers were just right with a dollop of Hot Pepper Jelly (Christmas gift courtesy of sister and her girlfriend) as a toast to the new year (or would have been had the boyfriend and I stayed awake). There’s something indulgent in having a cracker made with butter, asiago, and cream as the main ingredients, topping the whole thing with smoked sea-salt well that borders on the obscene.

So with crackers made and veggies in sticks arranged on a plate we ate a meal of appetizers, followed up by perfect miniature cannoli from Modern Pastry in the North End. Turned on The Spirit and promptly fell asleep. As an adventure in seeing the ball drop it was a fail, but as an evening spent together indulging in homemade and milk-based delights in was heaven.

Asiago Cream Crackers
Adapted (eversoslightly) from SmittenKitchen

Note: I made these with just asiago but a little bit of finely chopped rosemary (or whatever you like with your asiago) would be wonderful in them, I’m sure of it. I’m thinking that next time they will have sun-dried tomatoes reconstituted in a little olive oil and chopped into fine slivers, I’m on the end of thinking that would be “practically perfect in every way.”

1 cup All purpose flour, more for flouring and rolling as needed
½ tsp salt
½ cup finely grated hard Italian cheese (I used asiago, SK used parmesan and thinks romano would work well too)
2 Tbs of herbs/sun-dried tomatoes (optional)
4 Tbs butter, cold (salted or un- it doesn’t really matter, if your butter is salted cut your salt in half)
¼ cup cream or half and half
Smoked sea-salt, fresh pepper, sesame seeds, rosemary – whatever you want for sprinkling

Heat the oven to 400 degrees and line a baking sheet with parchment paper. Add flour, salt, cheese, butter, and herbs/sun-dried tomatoes (if you are using them) to the bowl of your food processed. Pulse the food processor until the flour and butter are combined (about the size of peas). Add your cream or half and half and let the machine run until a dough forms (this should be quick so don’t wander away to catch the game or read a book). If you are not getting a dough add liquid one tsp at a time until it does, you want the dough to be one mass but not sticky.

Roll out the dough to ¼ inch thick or thinner on a lightly floured surface. You can either cut the crackers now, like I did or just leave score marks down where you would like them to break apart, either way these crackers should be crispy and light when they come out of the oven. I made mine as little squares this time I think I’ll try to make straws when I make them again. Regardless poke them all over with a fork (so they look like crackers), brush them with milk/cream/half and half and sprinkle whatever toppings you have chosen on top.

Bake until they are moderately golden brown in the middle of the oven, about 12 minutes. Cool on a rack and serve warm or cold with hot pepper jelly or any spread (they were pretty delicious plain as well).

I don’t know how long these crackers will last but boyfriend and I ate a whole batch of them in one sitting over a game of Monopoly…


Red Velvet Cupcakes with Luscious Cream Cheese Frosting

So I was on my way to dinner at a friend’s house and bringing dessert one Thursday, now this sounds easy but when you have the shelf of cookbooks that I have you start to panic, sweat dripping hands shaking panic, what to choose to make a wow impression. So many choices, do I go with classic never-fail-chocolate chip cookies or do I instead try the ultrachic never tried hazelnut chocolate tart (which I don’t even have a pan for)? Obviously, I went for some middle ground cake which was a familiar and easy to adapt thing but something I had never tried yet to make, the Red-Velvet variety.

This cake was finicky and at times over-complex, but its complexity has made it increasingly more delightful to my remembrances. This was a cake recipe that SassyRadish tried to very happy campers (mainly an adorable 4-year-old she had photographed eating the cupcake with a HUGE smile). I showed up to my friend’s apartment with 12 of these cupcakes in a records box (I work a full time records management job) and she was enchanted. They were a little richer that I would like, maybe a little lighter on the zest next time and the frosting was decadent and delicious, the boyfriend and I were eating it by the spoonful instead of getting it on the cupcakes, which to be fair was just as reasonable as using it to frost anything, because let’s face it give me cream cheese in anything and I’ll eat it. Yup. I’m a sucker for that deliciousness. But just for fun, here’s the cake!


Red-Velvet Cake with Orange Zest and Cream Cheese Frosting!
Tweaked slightly from SassyRadish
Note: This makes 18 cupcakes, which I got in the form of 12 “Perfect-Prom-Queen Cupcakes” and 6 “Deformed-Cupcake-Cousins”

The Cake!
2 ½ cups sifted All Purpose Flour, plus some to grease and flour the pans
2 tsp salt
2 tsp Baking Powder
¼ tsp Baking Soda
¼ cup Cocoa Powder
2 Tbsp Liquid Red Food Coloring (or ¾ Tbsp or gel coloring and 1 ¼ Tbs Water)
1 ½ Tbsp Water
1 Cup unsalted butter, softened to room temp (70 degrees)
2 Cups Sugar
3 Large Eggs
1 ½ tsp Natural Vanilla Extract
1 ½ tsp Orange Zest (I used a Blood Orange and it was quite strong, the zest can also be entirely left out if you are not of the fruity baked goods type)
1 Cup Buttermilk

The Frosting!

¾ Cup (1 ½ sticks) unsalted butter
½ Tsp Natural Vanilla Extract
1 Pound Cream Cheese (2 Packages) Softened
2 Cups Confectioner’s Sugar (use more if you like sweeter frosting)
2 Tbsp Milk, if it is too thick

1. Preheat the oven to 350 degrees and butter/flour/line a cupcake tin.

2. Sift together the dry ingredients (flour, salt, Baking Powder, Baking Soda). Twice.

3. In a small (dark) bowl mix together the cocoa powder, red food coloring and water until it becomes a smooth paste. This will dye anything you are wearing/making it in/stirring with/your fingers, so be careful and aware of this!

4. In a large mixing bowl beat the butter until smooth (30 seconds or so depending on butter softness) then gradually add the sugar ¼ cup at a time scraping down the bowl between additions. After the final addition of sugar beat this mixture until it is light and fluffy (2-3 minutes). Add the eggs one by one following the same process as before, add/mix/scrape/add. After the eggs add the vanilla and then orange zest beating until mixed evenly with both (15 seconds or so). Add the red cocoa paste and mix it in until everything is an even color (it should look quite red at this point).

5. Add the flour mixture to the butter/sugar/eggs in thirds alternating it with the buttermilk and scraping the bowl each time. This is easier to do by hand with a rubber scraper. Make sure to not over mix your batter, over mixed batter leads to flour where gluten tightens and cake becomes too firm (i. e. gross). Once the buttermilk/dry ingredients have been added to the batter give the whole mixture 3-5 good stirs to ensure even incorporation.

6. Distribute the batter into the cupcake pan until the liners are 2/3 to 3/4 of the way full. Bake the cupcakes until a cake tester (toothpick) inserted come out clean, 18-20 minutes.

7. After pulling the cupcakes from the oven let them cool in the pan for 10 minutes (until you can handle them) then transfer them to a cooling rack.

The Frosting!

1. In a large bowl beat the butter, vanilla, and cream cheese until light and fluffy (1-2 minutes). Add the confectioner’s sugar ½ cup at a time until your frosting has reached the desired sweetness (I recommend no more than 3 cups of sugar). If you think the frosting is too stiff to manipulate add the milk to loosen it up.

Frost all the cooled cupcakes and serve on platter, with napkins!

These cupcakes should store for one day at room temperature and a couple of days in the fridge (they were gone before they became old enough to set up an accurate timeline!).

3 Ingredient Tomato Sauce


All of the cooking blogs that I read have been raving about this tomato sauce, it is the simplest sauce and even a non-cook can cook it (case in point my boyfriend did). From SmittenKitchen to The Amateur Gourmet to Sassy Radish I found this recipe everywhere and it is insanely pleasant because of its simplicity, there’s no chopping to be done and no babysitting needed. Three ingredients, 45 minutes and you have dinner for two, instant gratification.

When I found this recipe back in January I bookmarked it and thought I would look at it later when I was feeling lazy, it turned out that later meant in two days. As I worked late and thought about dinner and the things in my cabinet this was the only thing that came up as an option, simple fast and effortless. I liked it. I pulled out my butter, canned strewed tomatoes, and the last onion in the kitchen when I got home, thinking I was going to end up with something bland and boring. I was wrong. The sauce was rich and creamy, velvety almost with a smoothness I will forever associate with tomatoes.


We liked this sauce so much that I have made it twice since the initial find and the boyfriend has made it once, it is just that good. It hasn’t been adapted much from any of the guidelines I found online so Here it is, more or less as I found it/have remembered it over the past couple of months.

3 Ingredient Tomato Sauce

Adapted from SmittenKitchen via The Amateur Gourmet
Serves 2-3 people

Note: Crushed tomatoes work fine in this recipe but the cooking time should be decreased or else they burn a bit. Also this is one of the few sauces where I would recommend staying away from the parmesan or asiago cheese, it’s got enough flavor already and the cheese actually detracts from it.

1 28oz Can Whole Stewed Tomatoes

4Tbs unsalted butter
1 Onion cut in half

Add the tomatoes, onion and butter to a medium sized saucepan and bring to a simmer over medium heat. Once the tomatoes are soft enough (10-15 mins) using a wide potato masher break the tomatoes up so that the sauce is evenly smooth. Simmer for another 20 to 30 minutes or until you can smell the onion throughout your apartment (or in the next room). Take out the onion halves (make sure you hold them over the pan to drain a couple of seconds) and remove the sauce form the heat.

Pour liberally over pasta and enjoy!

Chai Spiced Apple Oatmeal Muffins

sm_P1040978

Spring has sprung here in our fair city which means I have been faced with the dilemma almost daily of spending the time I have after work reveling in the lovely warm weather that spring has produced or blogging. I’ve been reveling.  

Admittedly with Spring having “sprung” there is also a LOT of rain, I don’t thing I ever realized that it could rain so much, If it’s not perfect out is rainy, can’t it just be a day I want to stay in and get real work done? Alas it can’t. Regardless I have been coping with these alternating perfect and pouring days by baking, a lot. I’m thinking that this baking is the reason I’ve decided to not go crazy on the rain and curl up on the sofa and feign a deathly illness. One such rainy terrible morning I made these muffins- Chai Spiced Apple-Oatmeal Muffins, even the name sounds decadent. They were light and fluffy and remarkably healthy and were nothing at all like Oatmeal, a flavor I love but a texture I just can’t support.

sm_P1040943

So over the past couple of weeks I have been raving about these muffins, not only because they were delicious but also insanely nutritious, with only half a cup of oil and no processed sugar they tasted decadent without being decadent, especially with that lovely toasted coconut crumble on top. 

sm_P1040971

These muffins paired perfectly with a cup of hot coffee, though I wouldn’t have said no to a cup of black or earl grey tea either. They had just the right crisp out of the oven and kept their moisture for a couple of days afterward (because they have so much apple) and were still delicious when chilled.

Chai-Spiced Apple Oatmeal Muffins 
Adapted from Everybody Likes Sandwiches through Cheap Healthy Good
Makes 12 Muffins or one loaf

Note: I made these with milk but I’m pretty sure you could substitute in almond or soy milk and they would come out fine. Also, If you are really averse to one or any of the spices leave it out, or leave them all out and substitute 1 tsp cinnamon for them (then you’ll have Apple-Cinnamon Oatmeal Muffins, and I’m pretty sure those would be delicious as well)

1 Cup Old Fashioned Oats
1 Cup Flour (I used unbleached white but if you use whole wheat let me know how they turn out)
1tsp Baking Soda
¼ tsp Ginger
¼ tsp Ground Coriander Seed
1/8 tsp Ground Cloves
1/8 tsp Ground Nutmeg
1/3 Cup Canola Oil
1/3 cup Milk
1/3 Cup Honey
1 Egg
4 Small or 2 Large baking apples (Cortlands work perfectly), Peeled, Cored and diced into ½ inch cubes
Unsweetened Toasted Coconut (This is entirely optional, I had some leftover from making caramels so I used it)

Preheat the oven to 350 degrees and oil and line a muffin pan (this recipe will also work as a loaf but I like muffins). In a medium mixing bowl mix together the oats, flour, baking soda, ginger, coriander, cloves, and nutmeg. 

In a separate larger bowl combine the oil, milk, honey and egg. Add the dry ingredients and stir until just combined (12-15 strokes should do it). Fold in the diced apples to coat. This batter is mostly apples, so it should look like a bowl full of apples – that’s ok.

Pour the batter into the prepped muffin pan until it’s all gone, the muffin cups should be mostly full, and sprinkle with the toasted coconut. Bake the muffins for 20-25 minutes, 40-50 for a loaf pan. The top will be a nice medium brown and a toothpick inserted in the center should come out clean. Let them cool for about ten minutes and enjoy.